We’re Having a Heat Wave!

By Paul James
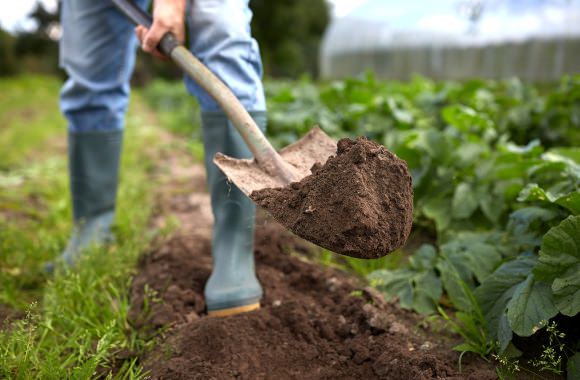
Recent rains were a nice respite, but now it looks as though we’re heading into an extended period of hot weather, with heat indices climbing well into the 100s and few chances for additional rain. That’s hardly surprising, given that it’s officially summer. And with that in mind, here are the two most important words to keep in mind – mulch and water.
Mulch – A thick layer of mulch is great for maintaining even soil moisture and soil temperature, two things plants love. Mulch also prevents annoying summer weeds from popping up all over. And on top of all that, it looks great. Choose from among chipped or shredded wood products, or try pine needles. A two- to four-inch layer is ideal, but keep mulch a few inches away from the base of plants to avoid rot and damage by mice, who love to chew on bark in search of moisture.
Water – Of course you have to water, but how much and how often? That’s one of the toughest questions to answer, because there are so many variables to consider. But in general, annuals, perennials, and turf grasses need at least one inch of water every week, and the way to measure that amount is about as low tech as it gets. Place a straight-sided can (I use a tuna can) in the garden bed or lawn, turn on the sprinkler, and determine how much time it takes to fill the can with water up to an inch. That’s how long you need to water every week. As temperatures climb in to the mid 90s and beyond, you might want to water twice a week.
Trees and shrubs up to six-feet tall need roughly three gallons of water a week, whereas larger ones need up to 10 gallons. Time how long it takes to fill a one-gallon watering can at a slow trickle from the hose, and multiply by three or 10 to determine how long you’ll need to leave the water running. And while it’s running, move the hose in a circular pattern several feet away from the base of the plant for even distribution.
If you rely on an automatic sprinkler system, use the tuna can test to determine how long you’ll need to run the system, but be prepared to water trees and shrubs by hand regardless.
And finally, plan on watering patio pots and hanging baskets at least once a day, maybe twice a day if they’re in direct sun.
Beyond taking care of your plants, be sure to take care of yourself. Stay hydrated, take frequent breaks, wear sunscreen and mosquito repellent, and try to avoid working in the garden during the hottest part of the day.
Summer Vegetable Tips
By Paul James
This is a time of transition in the vegetable garden, and I face it with mixed emotions. I’m forced to rip out lettuce, spinach, and other greens (no more fresh salads!) that have bolted due to the heat, but I look forward to harvesting tomatoes, peppers, cucumbers and the like. And here’s what I’m doing now to make sure all goes according to plan.
Beans – Harvest often, perhaps even daily, but don’t worry about fertilizing. Beans are legumes, which means they fix nitrogen from the air and store it in root nodules. Bean beetles, which look sort of like ladybeetles but with yellowish green to light orange bodies, can be a nuisance; control them with a product containing Spinosad (I like Captain Jack’s Dead Bug Brew).
Corn – The real trick to getting a good crop of corn in a small veggie garden is to shake the stalks regularly so that the pollen at the top of the plants drops down to the silks on the cobs. Corn is pollinated by wind, not insects, and in a small plot it often needs our help. Once the silks have begun to brown, add a few drops of Bt, an all natural insecticide, to the tips of the cobs to control earworms, ugly caterpillars that always seem to find their way into corn and leave behind a gross mess.
Cucumbers – Cukes need lots of moisture and sunlight, and they should be fertilized as fruits begin to grow. Espoma Plant-Tone provides all the nutrients they need. Watch out for cucumber beetles, which also look like ladybeetles but have bright yellow bodies with black spots or stripes; treat plants with Spinosad.
Eggplant – To maximize production, fertilize when flowers appear and harvest often. Smaller fruits tend to have far fewer seeds and are less bitter. Be on the lookout for shotgun-like holes in the leaves caused by flea beetles. Treat with Spinosad.
Garlic – Assuming you planted garlic last fall, it should be close to harvest time. If scapes have formed (curly stems with a flower bud at the end), remove them to force more energy into bulb development (and either grill them or use them to make pesto!). Once a half dozen or so of the lower leaves have turned brown, carefully lift the plants out of the ground and store them in a shady spot that gets good air circulation. In about ten days, cut the top growth and store the now cured bulbs in a cool, dry place.
Okra – Just keep it watered. That’s about all there is to it. Harvest when the pods are roughly three-inches long, and plan on harvesting darn near every day.
Peppers – Provided they get lots and lots of sun, peppers generally aren’t bothered by pests and diseases. Try not to overwater them, however, especially if growing hot varieties. Periods of drought tend to make them hotter.
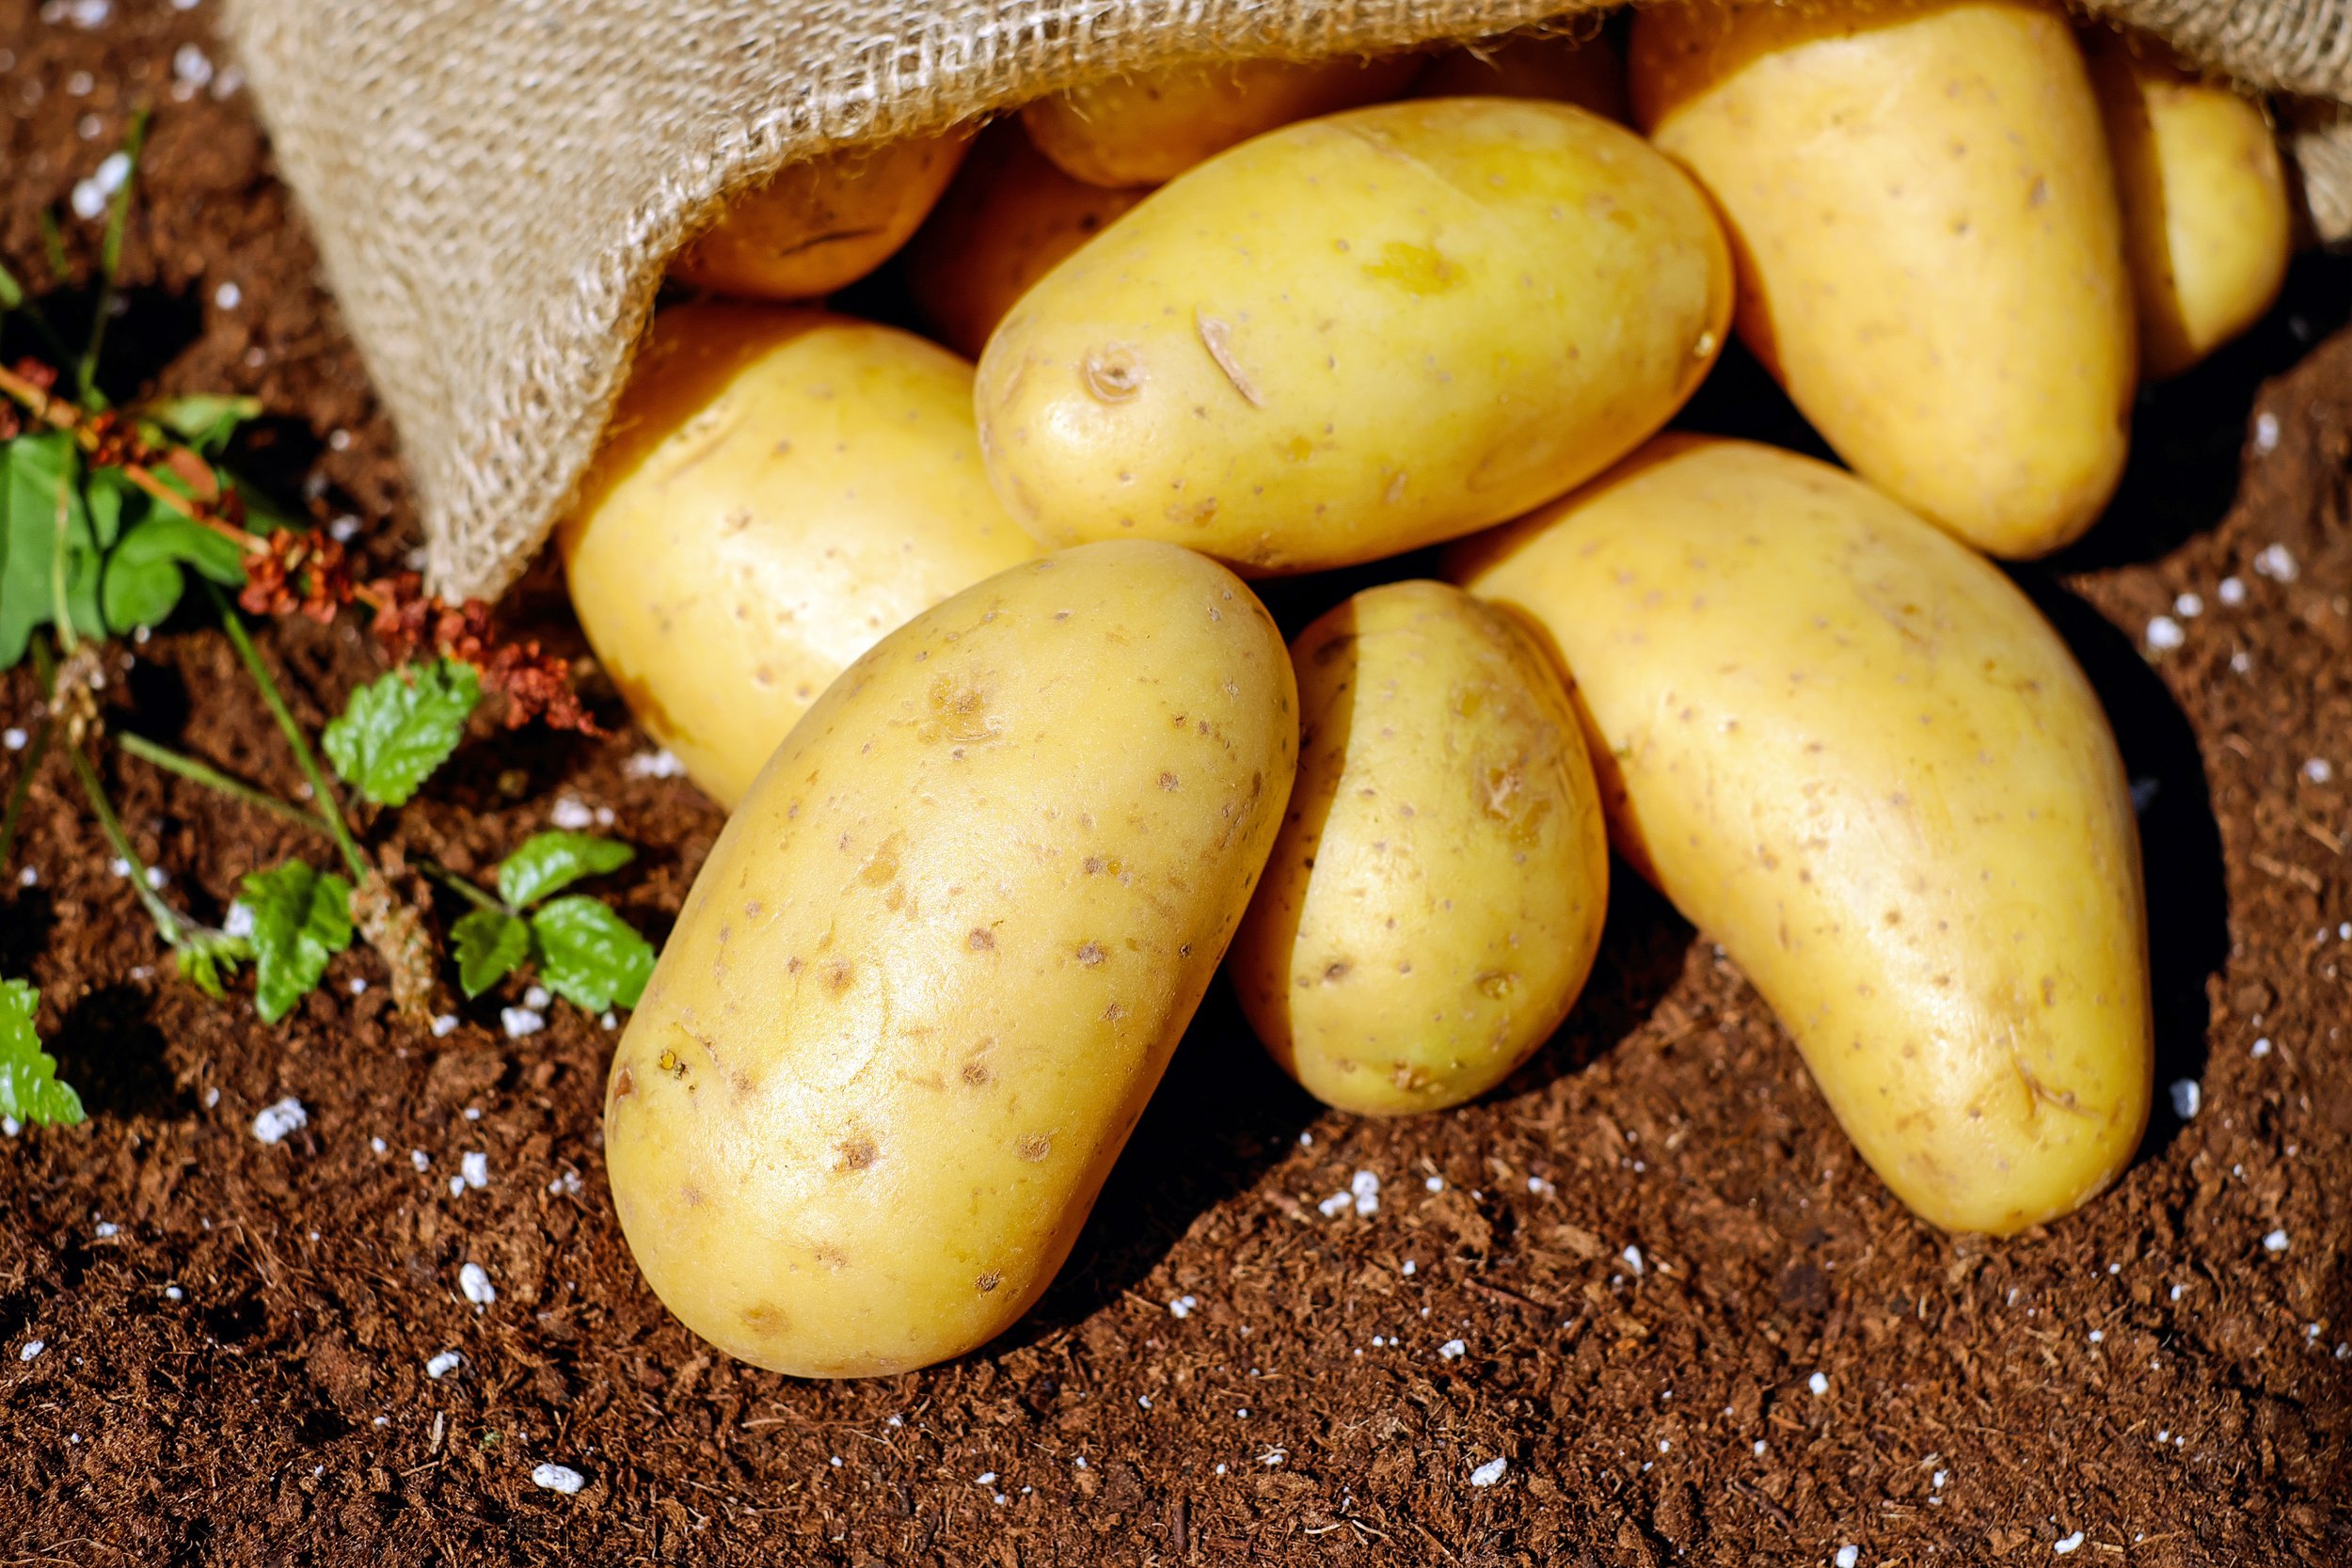
Potatoes – Although a cool-season crop, potatoes are usually harvested in early summer. Once flowers appear, you can begin harvesting new potatoes. If you let the vines turn brown before harvesting, the tubers will last longer in storage.
Squash – Squash is so often ravaged by squash beetles and squash vine borers that for me anyway it’s the toughest veggie to grow. Still, I plant a few hills every year and hope for the best. Squash bugs can be controlled with pesticides if you catch them in their nymph stage, but adults are a different story. Look for reddish-brown egg masses on the underside of leaves and “squash” them to reduce the population. Female squash vine borers look like red and black wasps. They lay their eggs in the vine or stem of the plant, and the emerging caterpillars feed from the inside, making them hard to detect, often until it’s too late. If you see “frass” (caterpillar poop) on the main stems, that’s a sure sign that your squash is in trouble. Make a small slit in the stem and pour some Bt into it, then cover with soil and cross your fingers.
Melons – Melons can be tricky to grow as well, because they’re susceptible to various insects and fungal diseases. But they’re still easier than squash! Make sure you’ve got Spinosad on hand for the bugs and a great, all natural fungicide called Serenade for the diseases. Harvest watermelon and cantaloupe when the underside turns from white to pale yellow and the melon feels heavier than you would expect.
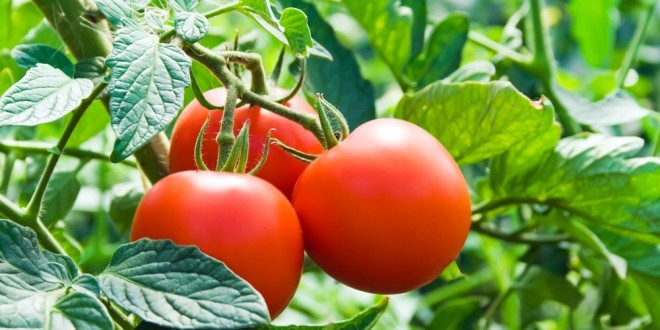
Tomatoes – Despite their enormous popularity, tomatoes can be challenging to grow thanks to bugs, viral and bacterial diseases, birds and squirrels, and excessive heat, which can shut down fruit production. Still, I doubt there’s anything I could say to discourage you from trying, right? Perhaps the most important thing to do is water frequently. Erratic swings in the moisture level can cause blossom-end rot and cracking.
And don’t forget the next transition – from summer to fall – when planting starts all over again!
Creating a Pollinator Garden
By Paul James
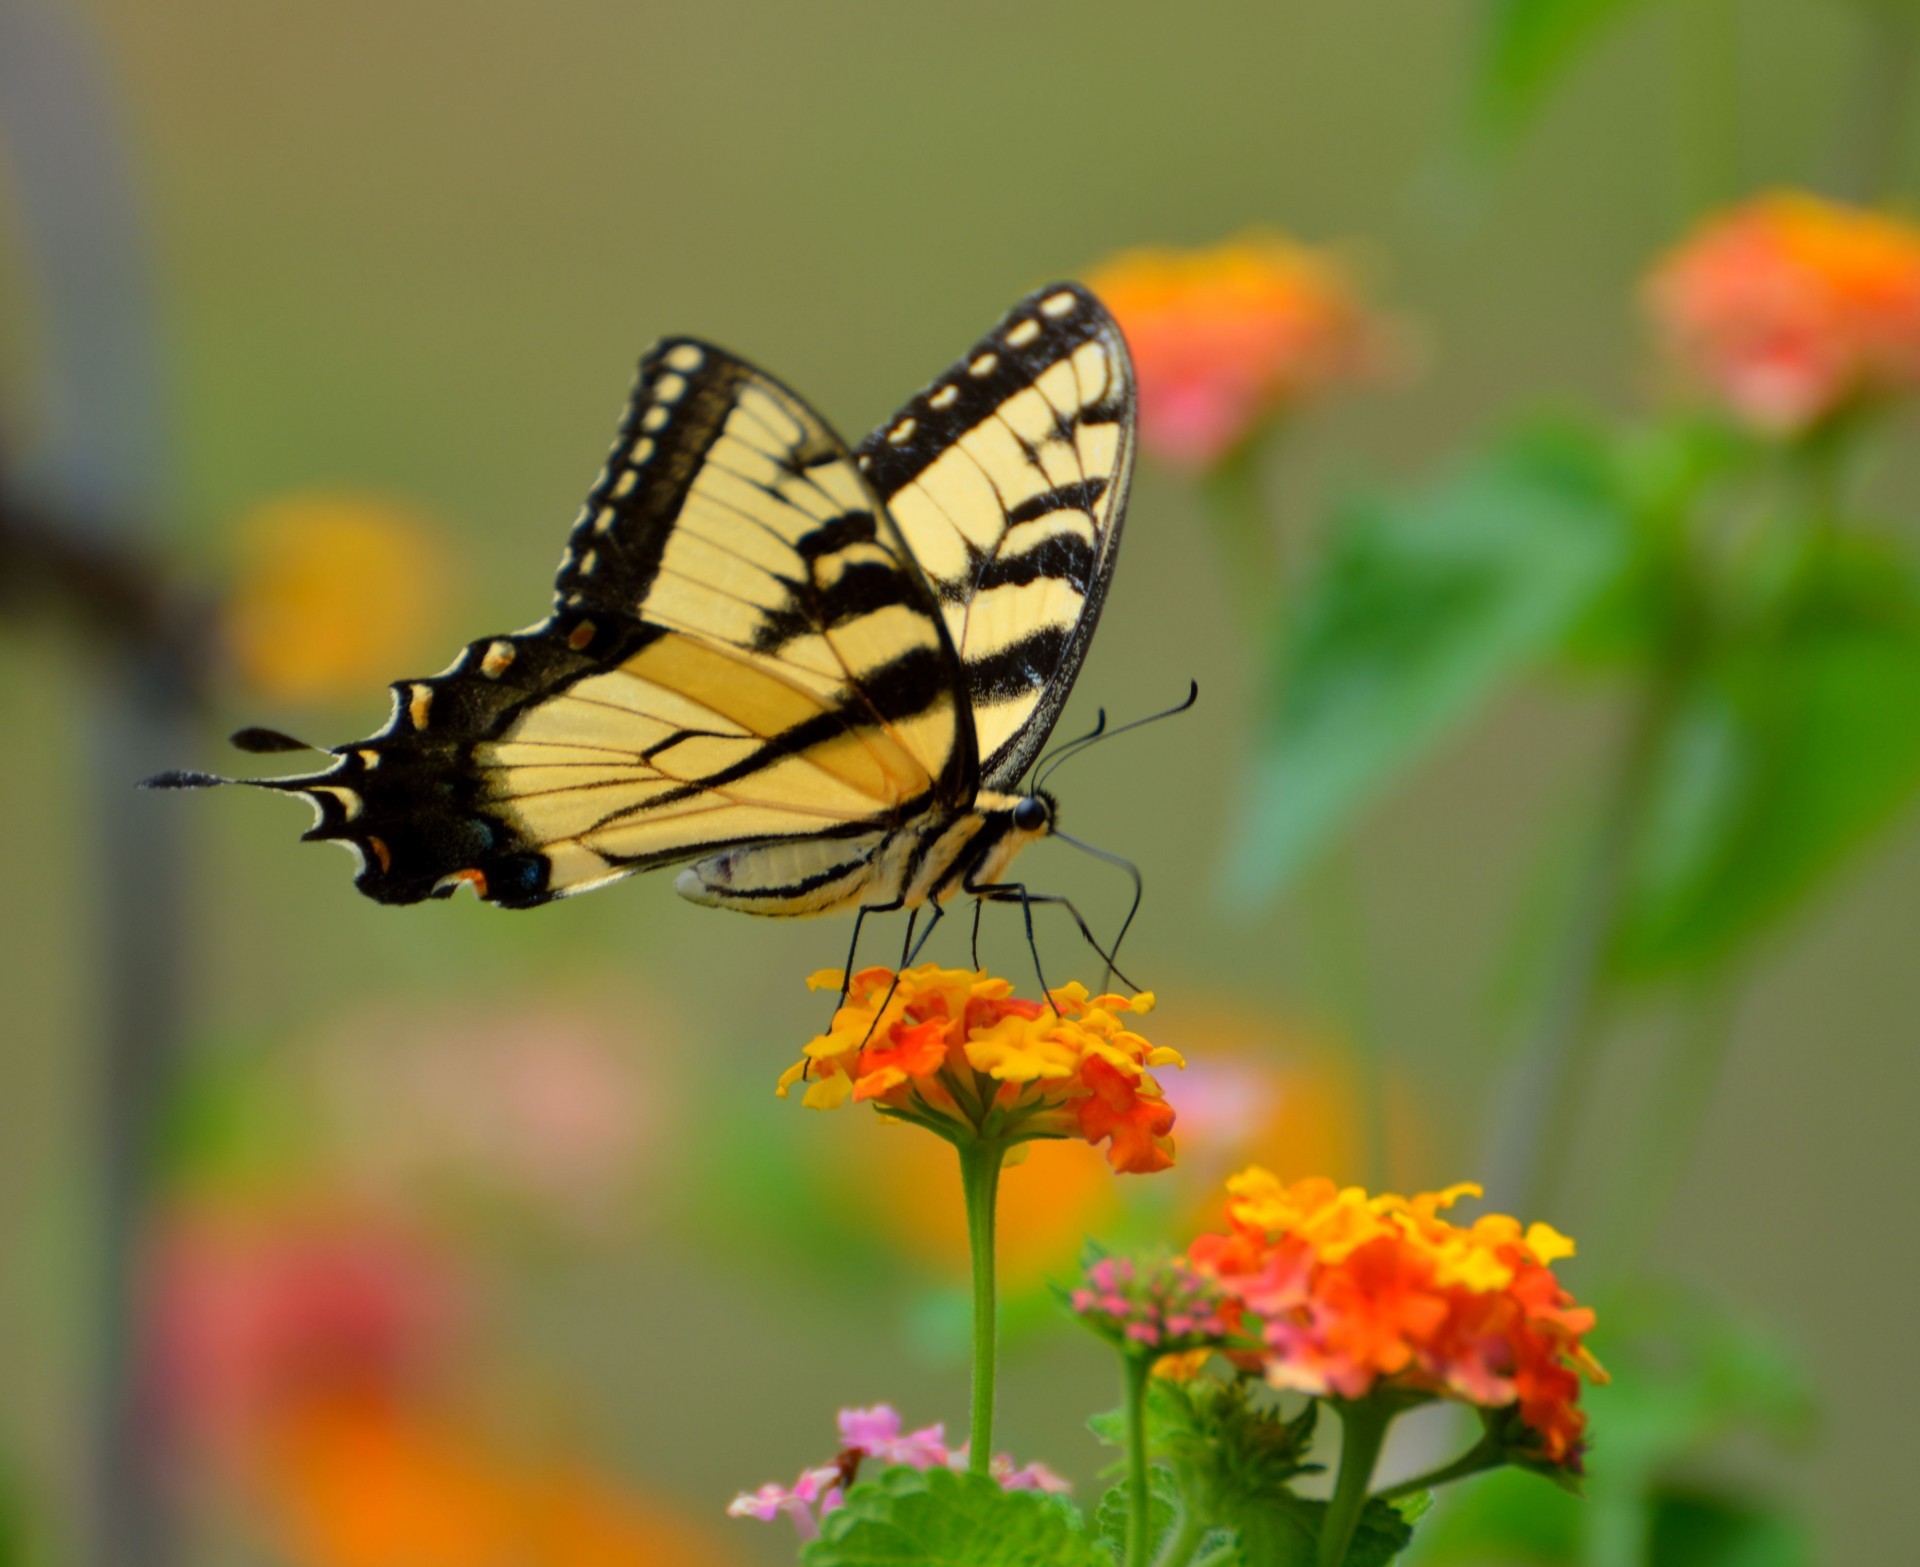
Pollinator gardens are all the rage these days, thanks largely to the concern over the future of honeybees and Monarch butterflies, whose populations have been in decline in recent years. That’s made them the poster children for the pollinator movement, and that’s a good thing. But there are lots of other critters that pollinate our gardens, and they deserve attention too.
Among them are several other species of native bees, including bumblebees, mason bees, solitary bees, and sweat bees (honeybees aren’t native – they’re from Europe). And while there are about 750 species of butterflies in North America, there are over 11,000 moth species! Due to their numbers, a lot of winged insects we think are butterflies are actually moths, and they pollinate a considerable number of plants, both during the day and at night.
Other effective pollinators includes various flies, wasps, beetles, dragonflies, ants, male mosquitoes (they don’t need blood like the females do – they need nectar), and of course hummingbirds.
So how do you attract pollinators to your garden? Well the short answer is to include lots of flowers of various colors and shapes, but there’s more to it than that. You also need to eliminate the use of broad-spectrum insecticides, opting instead to use products that target only the pest you’re trying to control. And you need to provide a source of water such as a bowl or birdbath filled with stones to provide perches, especially for butterflies and moths.
As for plants, choose a wide variety, especially natives, and plant them in clumps rather than as single plants to provide large landing zones for pollinators. Try to overlap flowering times between seasons, from early spring into fall. And mix up the colors and flower forms. Butterflies are attracted to red, orange, and yellow and usually prefer flat, open flowers. Hummingbirds also love the color red as well as fuchsia and purple, and they prefer tubular flowers.
Here are a couple of partial lists of great perennial pollinator plants to help you get started. Keep in mind the fact that there are many more, including numerous annuals, trees, shrubs, and fruits.
To Attract Bees & Butterflies
- Achillea (Yarrow)
- Agastache (Hyssop)
- Asclepias (Milkweed)
- Aster
- Caryopteris
- Coreopsis (Tickseed)
- Echinacea (Coneflower)
- Gaillardia (Blanket Flower)
- Gaura
- Soldago (Goldenrod)
- Lavender
- Monarda (Bee Balm)
- Penstemon (Beardtongue)
- Perovskia (Russian Sage)
- Phlox
- Rudbeckia (Black-Eyed Susan)
- Salvia (Sage)
And don’t forget to consider a Vitex (Chaste Tree). It’s a shrub, but it’s quite possibly the greatest pollinator magnet of all.
To Attract Hummingbirds
- Agastache (Hyssop)
- Ajuga
- Gaillardia (Blanket Flower)
- Heuchera (Coral Bells)
- Lantana
- Monarda (Bee Balm)
- Penstemon (Beardtongue)
- Phlox
- Salvia (Sage)
- Verbena
Living with Latin
By Paul James
When my daughter was 12 or 13, she commented on how pretty a particular tree was as we strolled through the garden. “What’s it called?” she asked. “It’s Acer japonicum aconitifolium,” I said. She then repeated those three words three times, and now nearly 15 years later she can still pronounce the Latin name of the Full Moon Japanese maple perfectly. But why didn’t I just call it that in the first place?
Gardening geeks like me are sometimes accused of being pretentious when we use the Latin names of plants. But the truth is, all gardeners use Latin names routinely whether they realize it or not. For example, Begonia, Clematis, Crocus, Forsythia, Gardenia, Ginkgo, Hibiscus, Hosta, Hydrangea, and Iris, and Viburnum are all Latin names.
So here’s the deal: using the Latin name of a plant is the only way to positively identify the plant. Common names can be confusing because they may refer to more than one plant and often vary from one part of the country to another. As a result, if you were to ask for a ‘Snowball Bush’ at a nursery, the salesperson can’t be sure whether you’re asking for a particular type of Viburnum or a Hydrangea.
The method we use to name plants – known as binomial nomenclature — was developed in 1753 by Carolus Linnaeus, a Swedish naturalist who described and named thousands of plants and animals. In its simplest form, it consists of a genus name and a species name, although it may also include other descriptors.
Thus, in the case of the Full Moon Japanese maple, Acer is the genus for all maples, japonicum means it comes from Japan, and aconitifolium refers to the shape of its leaves (resembling those of another plant called monkshood, which is in the genus Aconitum).
Actually, learning a little Latin can be helpful, because the species names in particular can tell you something about a plant – its color, where it comes from, how it grows, etc. Here are a few are the more common species names used to describe plants.
alba — white
aurea – golden or yellow
canadensis – from Canada
chinensis – from China
densiflora – dense flowered
grandiflora – large flowered
macrophylla – large leaves
pendula – hanging
rotundifolia – round leaves
viridis – green
vulgaris — common
My favorite plant name has always been Ilex vomitoria, the Latin name for Yaupon Holly. Ilex is the genus for hollies, and vomitoria refers to the fact that a tea brewed from its leaves can make you quite sick. Who says botanists don’t have a sense of humor?
Is Laurel Hardy?

By Paul James
I sometimes chuckle when someone asks me if a plant is hardy, because often what they’re actually asking me is if a plant is tough enough to survive Oklahoma summers. And that’s not what hardiness is all about. Hardiness has to do with a plant’s ability to survive the winter in a given area, and Hardiness Zones are established by the USDA based on historical weather data. So, do you know which Zone you’re in?
Before answering that question, I should explain that Plant Hardiness Zones are first numerically divided into 10-degree increments, and there are 13 of them (Zone 1 is bone-chilling cold, whereas Zone 13 is tropical). They’re then further divided into 5-degree “a” and “b” increments. The numbers and letters represent the average annual extreme minimum temperature for a given area. The key word here is average, because the zone designations do not reflect the coldest temperature ever recorded at a specific location.
(FYI – the coldest temperature ever recorded in Tulsa was 16-below zero, set in 1930. In 2011, we hit minus 12.)
Most of Oklahoma consists of three Zones that run somewhat parallel from east to west. Zone 6b (-5 to 0 degrees) is in the northernmost area of the state, roughly from just south of Bartlesville to the Kansas border. Zone 7a (0 to 5 degrees) includes Tulsa and extends south just beyond Okmulgee. And Zone 7b (5 to 10 degrees) covers an area from just north of McAlester to the Texas border.
Other than annuals – which by definition aren’t hardy – and tropicals, which I wish were hardy, it’s safe to assume that fully 99% of the plants sold by nurseries in your area, including here at Southwood, are hardy. Otherwise, they (and we) would have to deal with a lot of angry customers returning plants that didn’t make it through the winter.
But circling back to my first sentence, just because a plant is hardy in the winter here doesn’t necessarily mean it’ll survive the summer. Take hemlock, for example, one of my favorite conifers. It’s perfectly hardy (down to minus 30!), but it can’t take the heat in our neck of the woods. Ditto firs, many rhododendrons, and a host of other plants.
The American Horticultural Society years ago developed a Heat Zone Map that shows whether a plant is likely to survive the summer, but it never really caught on, perhaps because people just zoned out due to the confusion created by having to understand not one but two zone maps. Still, it’s a useful tool that you can find online at http://ahsgardening.org/gardening-resources/gardening-maps/heat-zone-map. (And by the way, we’re in Zone 8 in terms of heat).
Fortunately for us, we live in an area where we can grow a staggering number of plants that are dependably hardy. And yes, that includes laurels.
Kids and Gardening

By Paul James
Getting kids interested in gardening is really quite simple — just think like a kid! That means forgetting about everything being neat and tidy and orderly and exact. In fact, it often means doing quite the opposite. My first suggestion? Let them get filthy dirty like my grandson pictured here. Does he look happy or what?!
Years ago I did an episode of “Gardening by the Yard” that was all about kids and gardening. I recruited 20 or so of my own kids’ friends – most were between 4 and 8 years of age – and we spent the better part of a day playing in the yard and completing a variety of projects.
The first was making mud pies. I gave each kid an aluminum pie pan and had them fill it with mud that I’d prepared in advance. Then I told them to wander about the yard and decorate their pies with seeds, berries, flowers, leaves, and stones – pretty much anything that caught their eyes while also reminding them not to put anything in their mouths. The results, for the most part anyway, were beautiful.
Over the course of several hours, we planted beans from seed by throwing the seeds into a prepared bed in the most haphazard way imaginable, and planting them where they fell. We turned the compost pile in search of earthworms and other critters, and discovered a nest of garter snakes. We made transfers of tree bark on paper, released lady beetles and tied praying mantis egg cases to the branches of various shrubs, harvested strawberries and doused them (and each other) with canned whipped cream, and picked lettuce and spinach straight from the garden for lunch (I had PB&Js standing by).
But one of my favorite projects was planting broccoli. I gave each of the kids a transplant (for instant gratification) and showed them the bed where I wanted them planted. Then I showed them how to carefully remove the transplants from the pot and tease the roots before planting. When they were finished, I asked them if they liked broccoli, and most said only if it was covered with cheese sauce. So I went inside, grabbed a package of shredded cheddar cheese, and had the kids sprinkle each transplant with cheese.
All the kids, quite unknowingly, connected to the natural world around them. And to this day many of them – now in their 20s and 30s and avid gardeners – tell me how much fun they had that day. I had fun too, especially when I sent all the kids home to their parents filthy dirty and soaking wet.
The Sun/Shade Dilemma
By Paul James
When shopping for plants, one of the first and most important questions you’ll likely be asked is, Will they be growing in sun or shade? And often it’s one or the other. But that’s not always the case. Truth is, the whole sun and shade discussion can get rather confusing, but it’s a critical consideration when it comes to picking the right plants.
First, realize that telling the salesperson that your house faces east or west (or any other direction) isn’t specific enough. For example, most people would assume that a south- or west-facing property gets lots of afternoon sun. But if the property is loaded with mature trees, it may actually get very little sun, so make sure you convey that information.
Figuring out how best to describe your particular situation means you’ll carefully have to observe when and where the sun is shining throughout the day. And why is it so important to make such a determination? Simple. Plants that require full sun won’t grow well in the shade. They may survive, but they won’t thrive, and they’ll forever lack the vigor that they would otherwise have. However, they may do just fine in dappled light, or a spot that gets some sun throughout the day. Plants that require full shade will croak in the sun. Period.
Here are the most common sun/shade situations and suggestions on how to select the right plants for each.
Morning Sun/Afternoon Shade
Lucky you, because this situation gives you lots of choices, depending on exactly how much morning sun the area gets. If it’s just two or three hours worth, then you should consider Azaleas, Hydrangeas, Yews, Japanese Maples, and Dogwoods, plus all annuals and perennials that are considered shade tolerant. If it gets sun until midday or later, you should opt for plants that prefer full sun.
Morning Shade/Afternoon Sun
In this situation, your best bet is to go with plants that require full sun, because the shade-tolerant plants mentioned above cannot handle afternoon sun. Still, the list of plants that will adapt to such a situation is a long one, and includes nearly all flowering annuals and perennials as well as trees and shrubs.
Partial Sun/Partial Shade
This situation is also called “dappled light,” and here things get a little tricky. But generally speaking, if there’s more sun than shade, go with plants that require full sun, and if there’s more shade than sun, choose plants that prefer shade. If there are roughly equal amounts of sun and shade throughout the day, you can plant pretty much anything you want.
Following these guidelines, you may not be successful 100% of the time, but then no gardener has that kind of success, including me.
Debunking Garden Myths

By Paul James
When I speak at gardening events across the country, the format I prefer is a simple Q&A. It engages the audience, it helps me understand exactly what gardeners are interested in, and it allows me to perform my shtick. It also gives me the opportunity to debunk common and persistent garden myths, including many that never seem to go away.
Newly Planted Trees Must be Staked
There are only two times to stake a tree. One is if it’s been planted as a bare-root tree and therefore lacks sufficient root mass to keep it upright. And the other is if you live on a hilltop where strong winds blow. Otherwise, there’s no real benefit to staking a tree. Ideally, trees should be left to sway in the wind because that helps them develop stronger trunks. If you do stake a tree, remember to remove the stake after the first year.
Stressed Plants Should be Fertilized
When a plant looks sickly, your first instinct may be to fertilize it. But that’s often the last thing you should do. A plant in poor health absorbs fewer nutrients than a healthy plant, so adding fertilizer can actually backfire by leading to an accumulation of excess nutrients and salts in the soil that can burn tender roots and cause leaf discoloration.
Instead, you should first try to zero on what the real problem is, including pH imbalance, pest or disease problems, drainage issues, poor watering practices, and so on, all of which can inhibit the absorption of nutrients, making the addition of fertilizer a complete waste of money.
Add Gravel to Bottom of Pots
This one’s been around for years, unfortunately. The idea behind it is that gravel at the bottom of the pot improves drainage and reduces the likelihood of root rot. But in fact, it actually increases the chance of root rot, because water doesn’t move easily through the potting mix to the gravel. As a result, water builds up in the potting mix and is only released into the gravel when it’s saturated, like a sponge that can’t hold any more water. So when planting things in a pot, use only potting mix.
(The technique, by the way, is known as crocking, and soil scientists have known for over a hundred years that it doesn’t work. Said another way, crocking is a crock.)
Pruning Paints
The idea behind the use of pruning paints is simple enough: the cut surface of a stem or branch is like an open wound, and by sealing the wound the threat of rot or disease is eliminated. But in fact, pruning paints actually increase the threat by interfering with the natural healing processes.
When a stem or branch is cut, trees form scar tissue to keep pathogens out. Not only do pruning paints prevent the formation of scar tissue, they can also seal in water along with various pathogens that can lead to decay.
Amend Clay Soil with Sand
If you mix clay with sand and add water, you get something akin to a brick, and that’s not a good thing, unless of course you’re building a home. In the garden, the only way to improve clay soil is by adding organic matter – compost, shredded leaves, grass clippings, barnyard manures, and so on. It may take several seasons and repeated applications to truly transform a clay soil into something akin to loam, but you’ll get there.
Organic Pesticides aren’t Chemicals
It’s common these days for people to refer to natural pesticides as “organic” and synthetic pesticides as “chemicals.” But that’s ridiculous, because all pesticides are chemicals. Period. Organic products are derived from natural sources (such as plants, animal byproducts, and bacteria), whereas synthetic products are manmade. But they’re all chemicals, and there’s no getting around that fact.
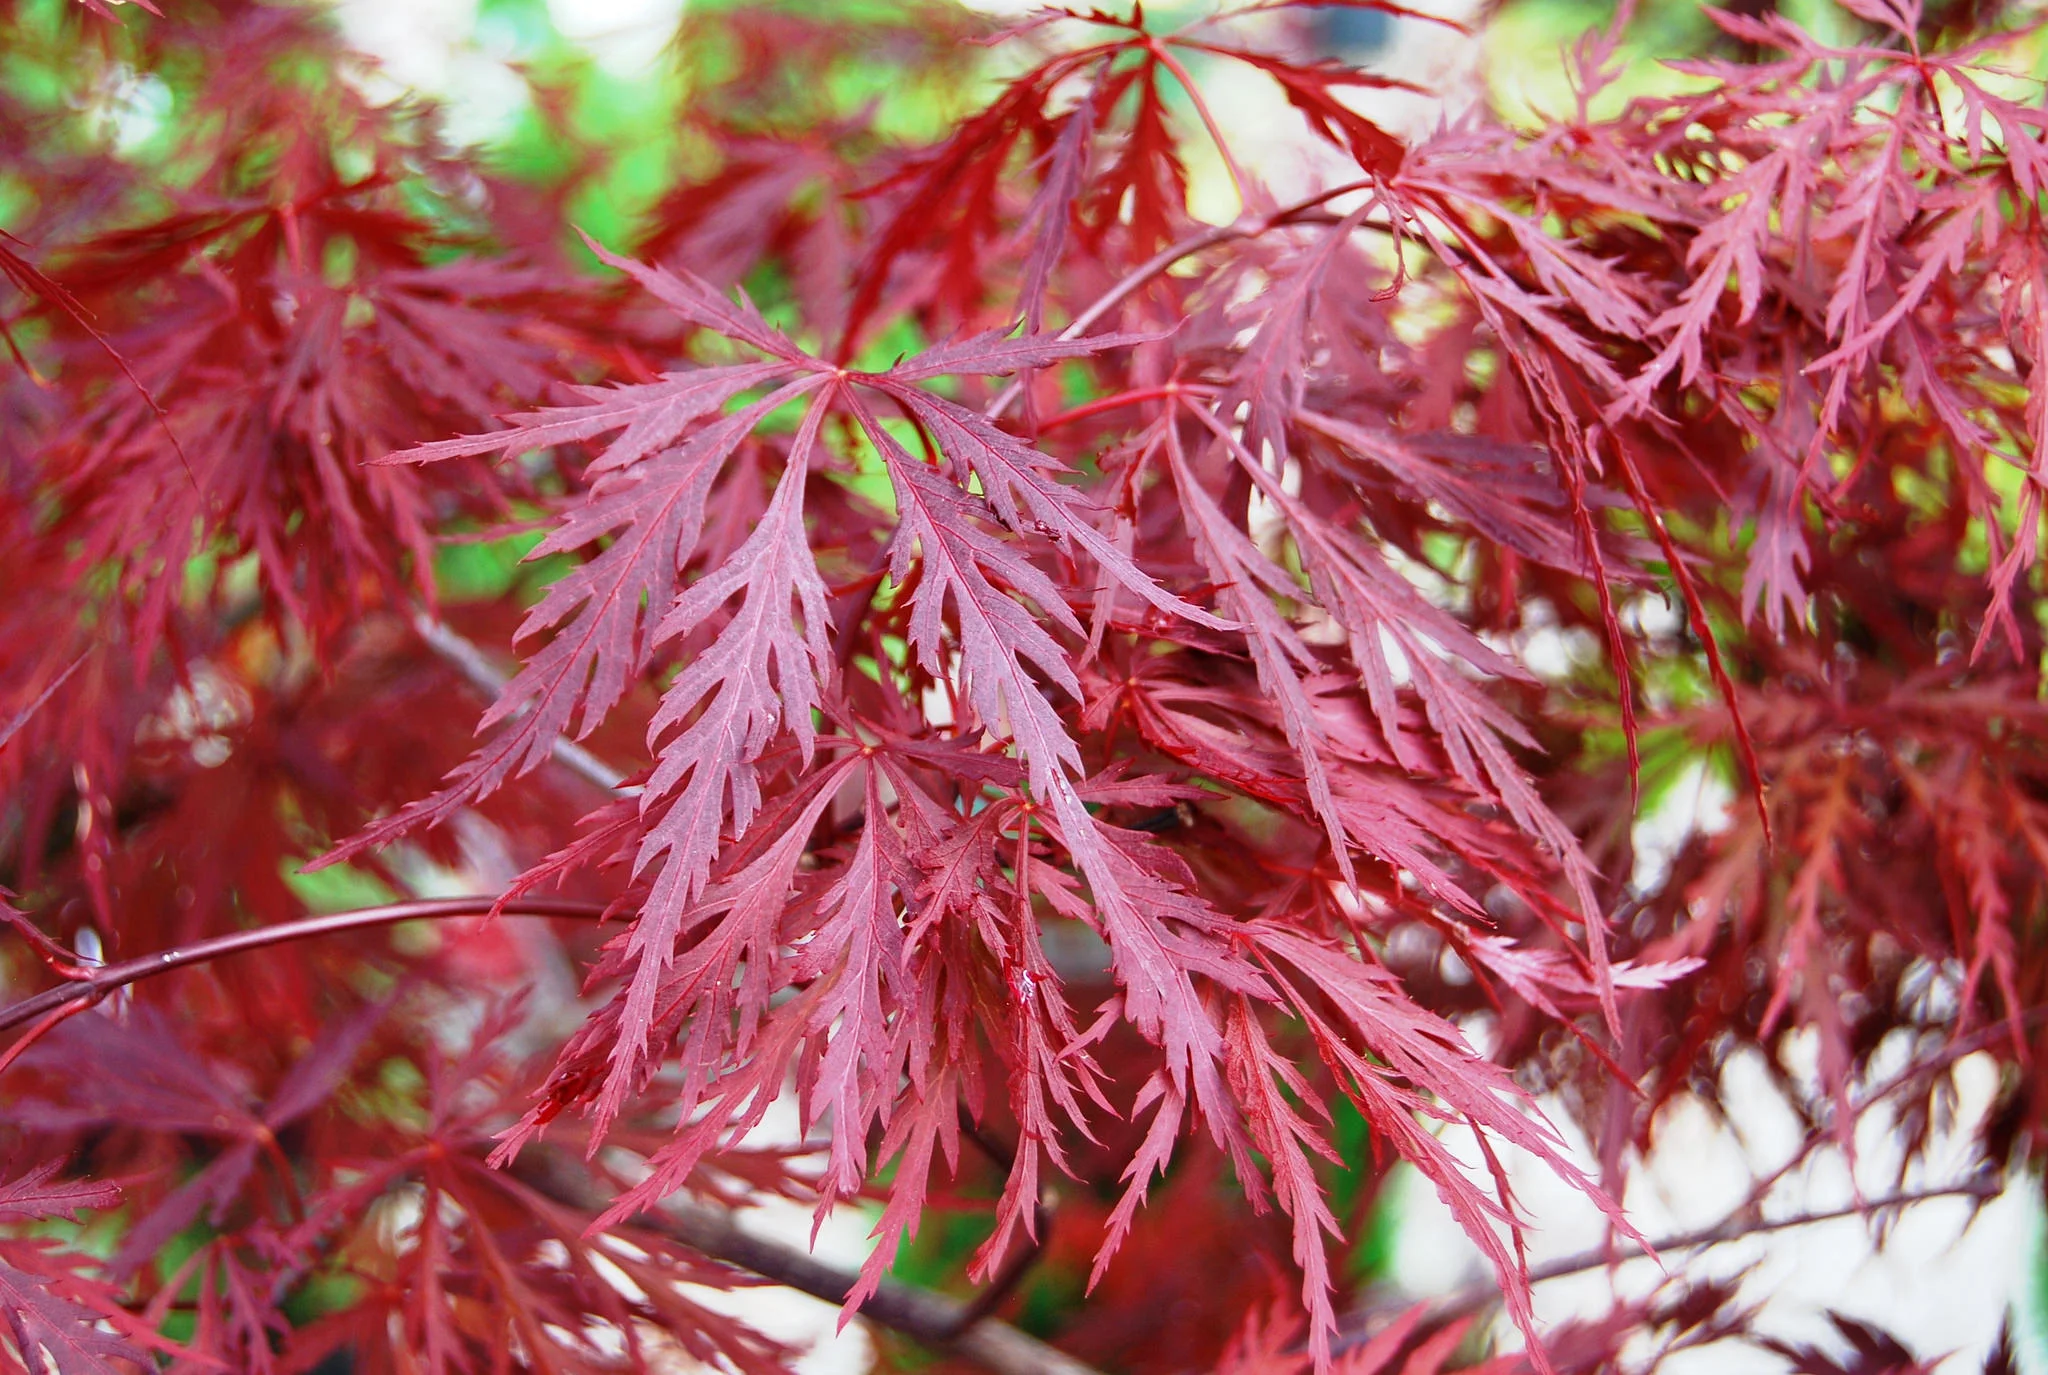
Best. Trees. Ever.
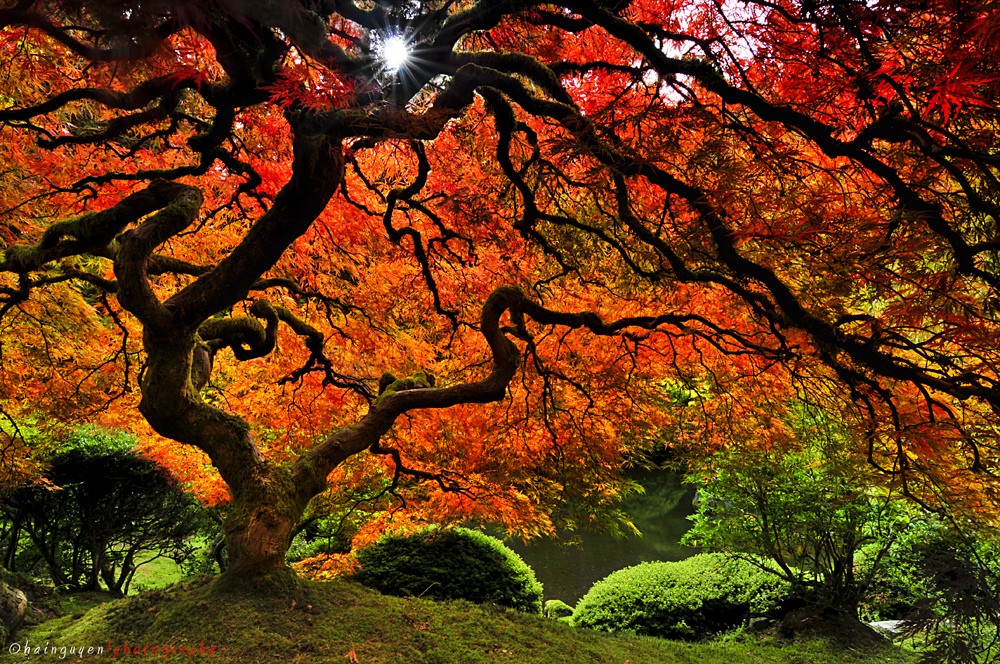 By Paul James
I don’t just love Japanese maples. I adore them. Have for decades. To me, they’re the most beautiful of all trees. Interestingly, although they appear delicate, they’re actually tough as nails, and rarely suffer from pest or disease problems. I don’t think I’m going out on a limb when I say every landscape should have at least one of them.
Japanese maples grow extremely well in this area, assuming they’re planted in the right location. That generally means a spot that gets just a few hours of morning sun followed by shade the rest of the day, or dappled light throughout the day. That can be a challenge for many homeowners, so your decision as to which one to buy may come down to this: red-leaf varieties will color up best when they get morning sun, whereas green-leaf varieties will do fine in all-day shade. If all you’ve got is all-day sun, plant something else. Sorry.
Ideally, the soil should hold moisture but drain well, but I’ve grown Japanese maples successfully in fairly heavy soils as well by planting them such that at least a third of the rootball is above grade. They thrive in acidic soils, witnessed by the fact that they’re often combined with azaleas, but they’re happy in soils with a near neutral pH.
Try to plant them in an area that’s protected from hot summer winds to avoid leaf scorch. And during the first two years after planting, keep them well watered. Once established, Japanese maples are fairly drought tolerant, but it’s best to give them a deep soaking once a week, especially during the summer months.
Japanese maples make stunning specimens in the landscape, and the choices available – in terms of size, shape, and leaf color — are staggering. There are upright and weeping forms. There are varieties that can reach 25-feet tall or more and others that top out at only three or four feet. In addition to red and green leaves, there are those with yellow to orange leaves (which may turn green in summer). And the fall color of nearly all Japanese maples borders on the spectacular.
One more thing to keep in mind: You can also grow Japanese maples in containers. And because they actually prefer to be somewhat pot bound, you don’t need an especially large pot. I’ve been growing three different varieties in 18-inch pots for over eight years now, and they look great.
And finally, just in case I haven’t convinced you in words to plant a Japanese maple at your place, perhaps these pictures will change your mind.
By Paul James
I don’t just love Japanese maples. I adore them. Have for decades. To me, they’re the most beautiful of all trees. Interestingly, although they appear delicate, they’re actually tough as nails, and rarely suffer from pest or disease problems. I don’t think I’m going out on a limb when I say every landscape should have at least one of them.
Japanese maples grow extremely well in this area, assuming they’re planted in the right location. That generally means a spot that gets just a few hours of morning sun followed by shade the rest of the day, or dappled light throughout the day. That can be a challenge for many homeowners, so your decision as to which one to buy may come down to this: red-leaf varieties will color up best when they get morning sun, whereas green-leaf varieties will do fine in all-day shade. If all you’ve got is all-day sun, plant something else. Sorry.
Ideally, the soil should hold moisture but drain well, but I’ve grown Japanese maples successfully in fairly heavy soils as well by planting them such that at least a third of the rootball is above grade. They thrive in acidic soils, witnessed by the fact that they’re often combined with azaleas, but they’re happy in soils with a near neutral pH.
Try to plant them in an area that’s protected from hot summer winds to avoid leaf scorch. And during the first two years after planting, keep them well watered. Once established, Japanese maples are fairly drought tolerant, but it’s best to give them a deep soaking once a week, especially during the summer months.
Japanese maples make stunning specimens in the landscape, and the choices available – in terms of size, shape, and leaf color — are staggering. There are upright and weeping forms. There are varieties that can reach 25-feet tall or more and others that top out at only three or four feet. In addition to red and green leaves, there are those with yellow to orange leaves (which may turn green in summer). And the fall color of nearly all Japanese maples borders on the spectacular.
One more thing to keep in mind: You can also grow Japanese maples in containers. And because they actually prefer to be somewhat pot bound, you don’t need an especially large pot. I’ve been growing three different varieties in 18-inch pots for over eight years now, and they look great.
And finally, just in case I haven’t convinced you in words to plant a Japanese maple at your place, perhaps these pictures will change your mind.
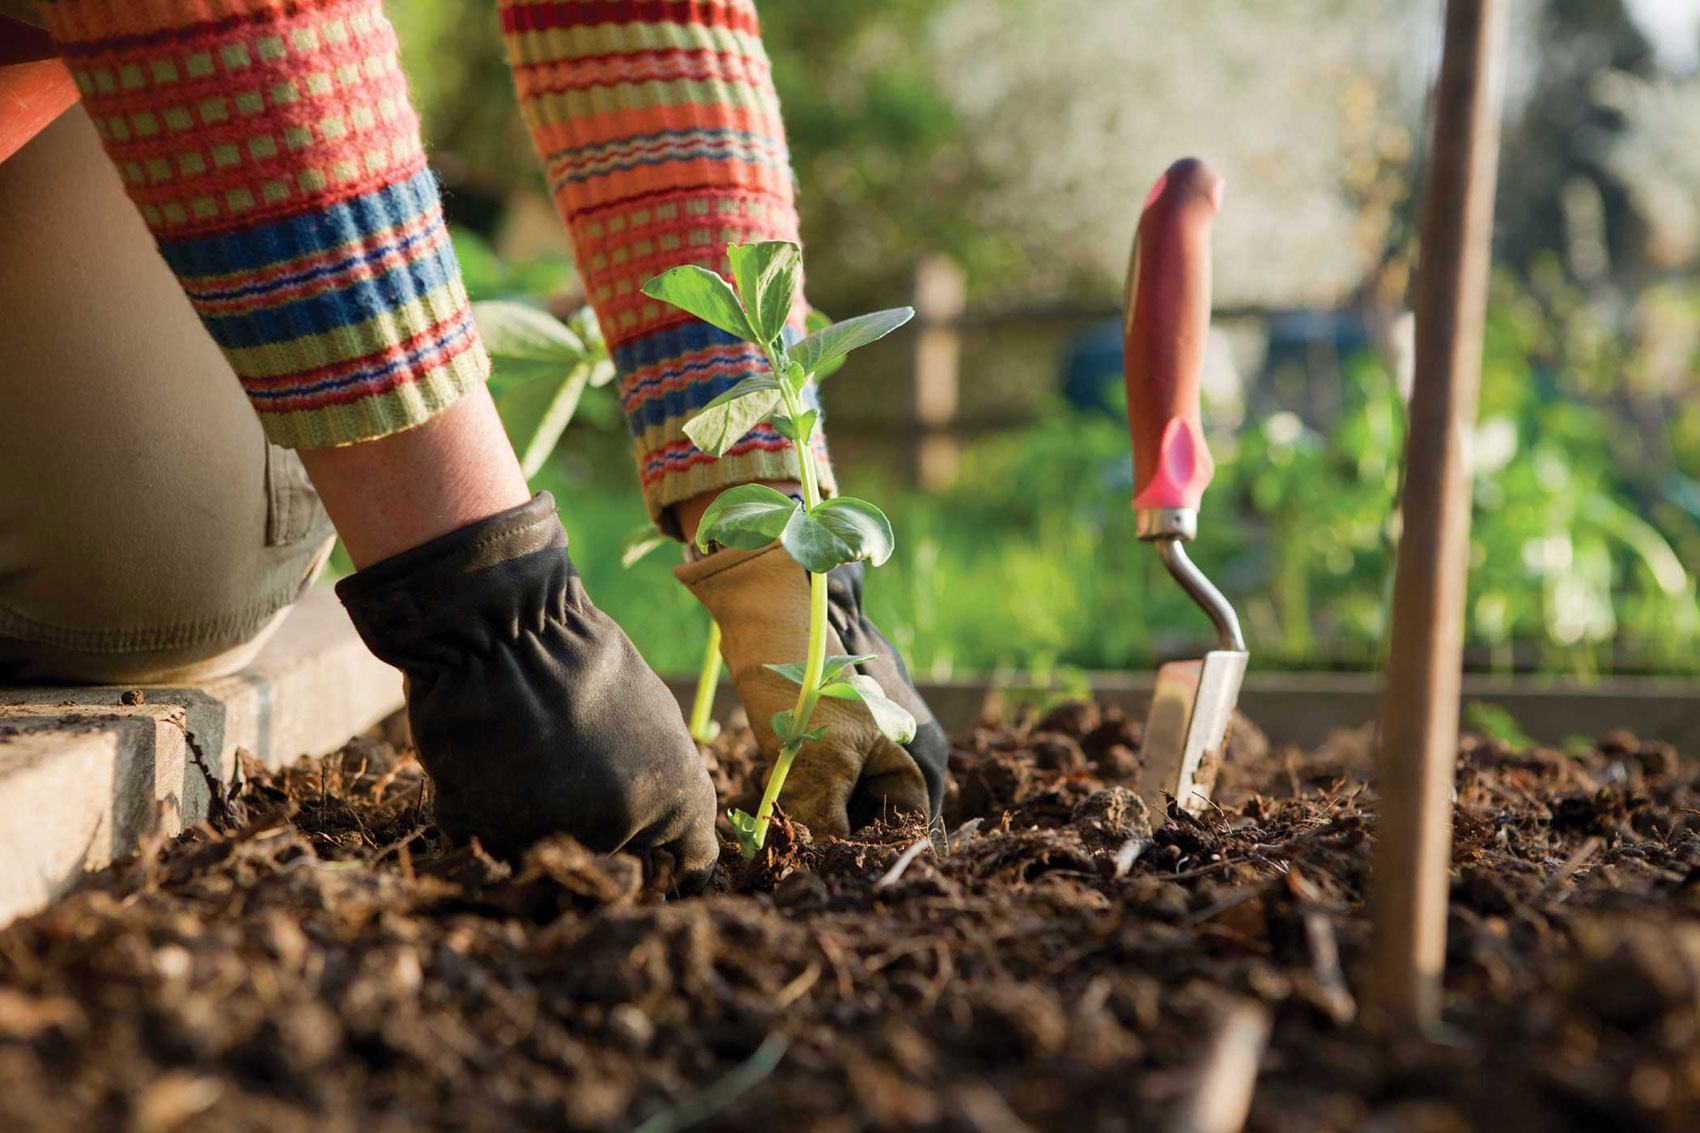
Let’s Plant!
By Paul James
I think I speak for most gardeners– okay, maybe all – when I say, “What the heck. Let’s plant!” After all, it finally looks as though the cold temps are behind us, soil temps are steadily climbing, and I know we’re all dying to dig in the dirt. Plus, the forecast for next week looks downright perfect. In fact, the only thing I’d wait another week to plant would be caladium bulbs. So what the heck. Let’s plant! And that concludes my shortest post ever.
Controlling Pests & Diseases
By Paul James
There’s no getting around it, folks…sooner or later some of our favorite plants get attacked by pests or diseases or both. Sometimes the invaders are relatively easy to control, although that’s not always the case, which is why there are dozens of products on the market aimed at targeting and destroying them. But what if I told you there are several things you can do to discourage pests and diseases from showing up in the first place?
The most important thing you can do is maintain healthy soil, because plants grown in healthy soil will be healthy too, which means they’ll be better equipped to resist invasions by pests and diseases. It’s much the same with humans; when our immune system is compromised we’re more likely to get sick. And creating healthy soil is simple – get in the habit of routinely adding compost (whether store-bought or homemade) to your soil. Just top off your beds with a two-inch layer of the stuff or place it around the perimeter of individual plants at least once or twice a year and your plants will thank you.
Now repeat the mantra – Right Place, Right Plant – over and over again, because it’s vitally important. When you plant something in the proper place you greatly increase its chances of remaining healthy. But if a plant requires well drained soil and you plant it in clay, or if it requires shade and you plant it in sun, you have only yourself to blame if it doesn’t do well and succumbs to pests and diseases.
Providing good air circulation can go a long way toward preventing problems, especially fungal diseases, so don’t crowd plants too close together or plant them directly against the house or fence. That’s especially important in the case of roses and Photinia.
Mulch can actually help keep fungal diseases at bay as well, because it smothers fungal spores in the ground and prevents them from splashing onto leaf surfaces when it rains or when you water.
And speaking of water, avoid watering late in the day so leaf surfaces have a chance to dry out completely. If they remain wet overnight, they’re prone to attack by fungal diseases. And regardless of when you water, soak the base of the plant rather than the leaves for the same reason.
Finally, try to keep your garden relatively tidy. Pests love to hide in garden debris, especially in piles of leaves and under boards or stones.
By doing all these things you’ll likely be pleasantly surprised by how much healthier your plants are. Of course, that doesn’t mean they’ll be immune to attack by pests and diseases, but it does mean they’ll be better equipped to withstand them.
Plant for Spring Color Now
By Paul James
Funny thing about people’s plant buying habits – they tend to buy things when they’re in full bloom. That’s perfectly understandable. But if you want to enjoy the blooms over a longer period of time, you really should consider planting much earlier. And for some of the most colorful harbingers of spring, that means now.
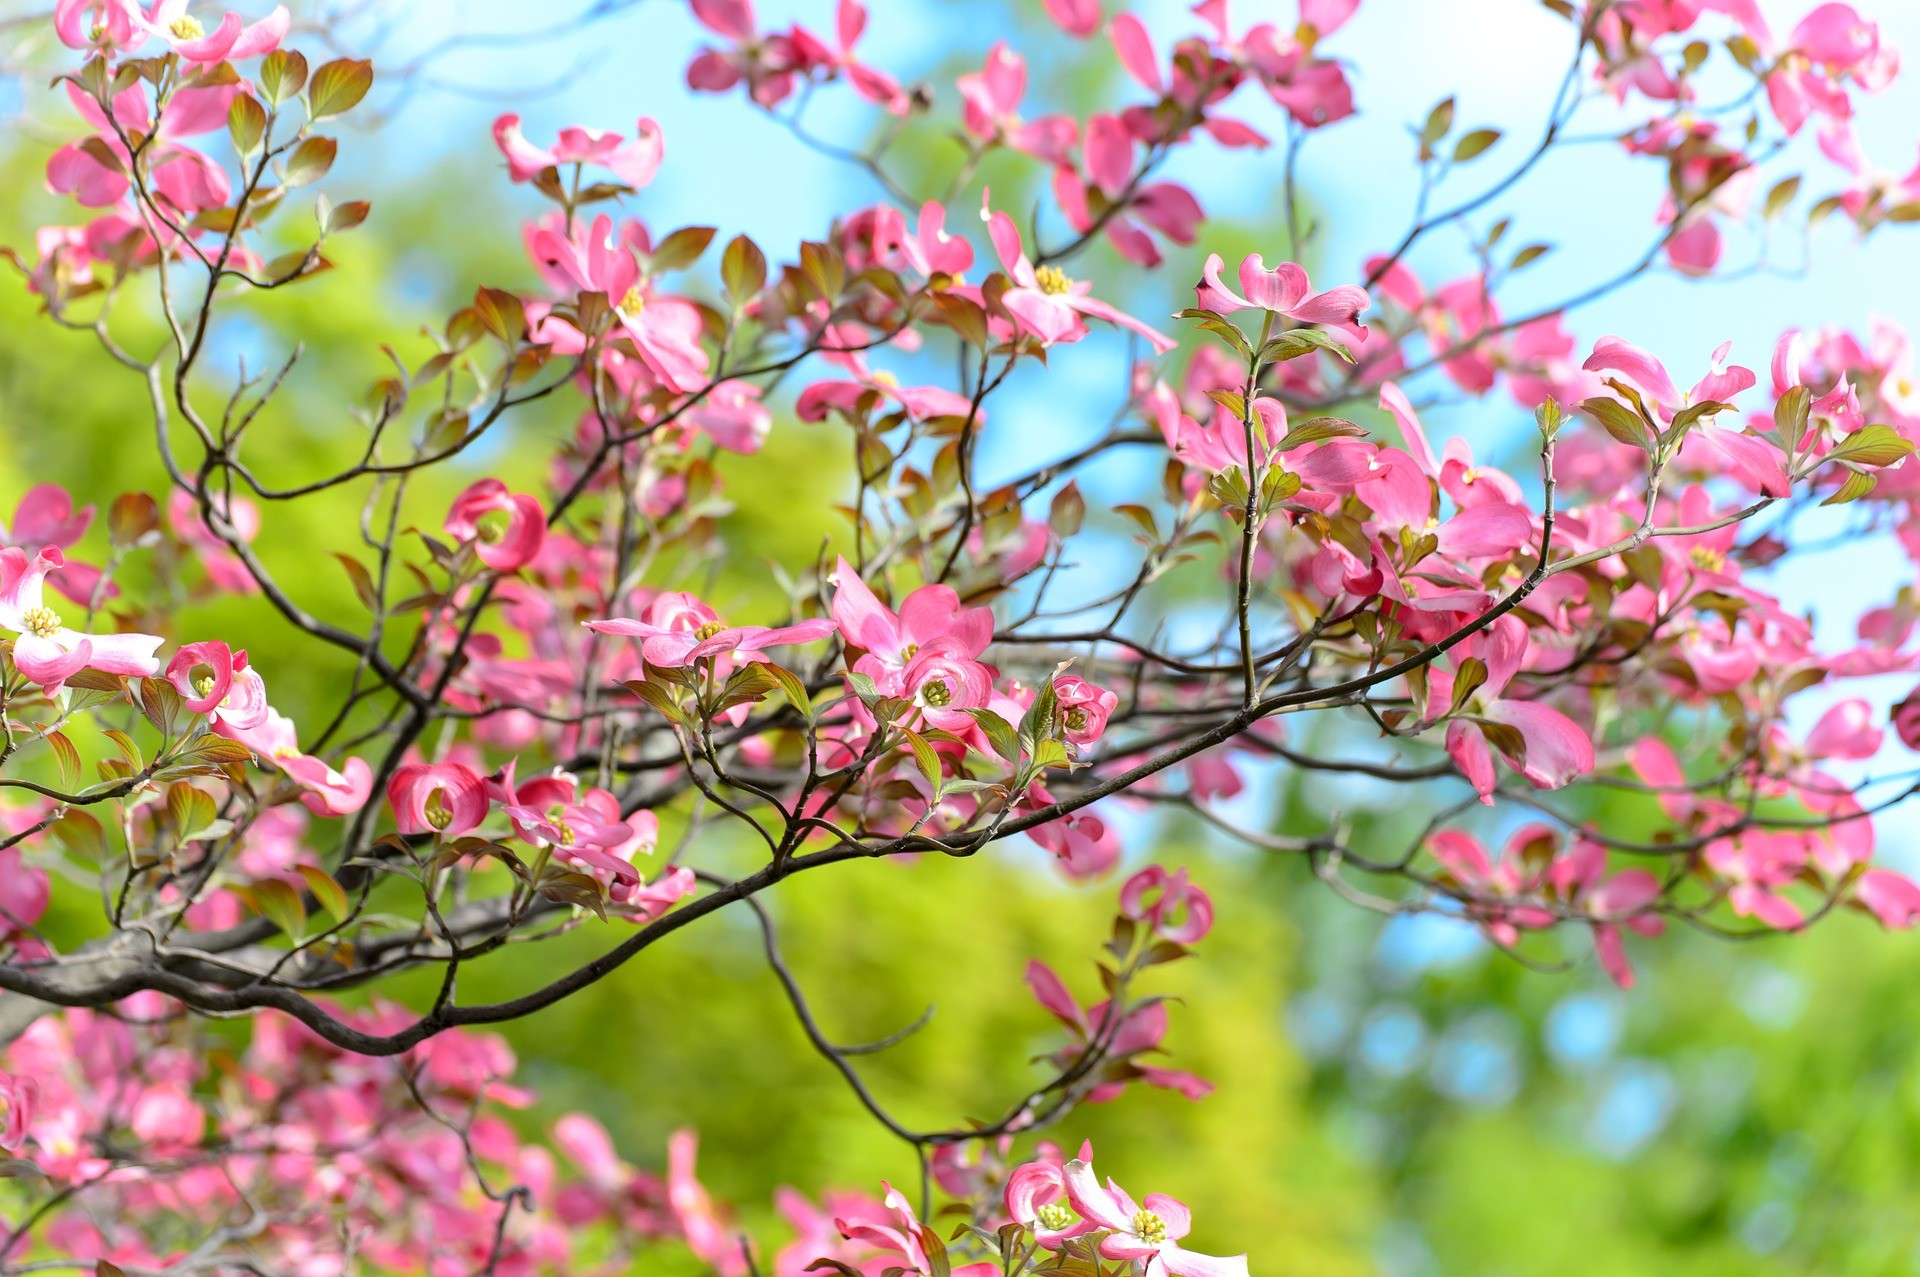
For example, let’s say you’ve been thinking of buying a dogwood. Well then chances are you know what a dogwood in flower looks like, right? But have you ever seen how those flowers develop, first as tight buds on branch tips that open slowly, often changing colors slightly along the way, until they finally open fully to reveal the familiar flower that made you want a dogwood in the first place? The process is, to my mind, every bit as interesting as the final result. And you miss that when you buy a dogwood that’s already in full bloom. What’s more, you cut short the time you get to appreciate the tree in bloom.
The same goes for other stars of spring such as azaleas, cherries, crabapples, redbuds, and serviceberries, just to name a few, all of which will be blooming soon, perhaps even as early as next week in the case of crabapples.
Don’t get me wrong: I’m not suggesting you shouldn’t plant something that’s already in bloom. But if you’re buying something primarily for the beauty of its flowers, why not enjoy them from beginning to end? Said another way, why not plant now? After all, the weekend forecast looks awesome.
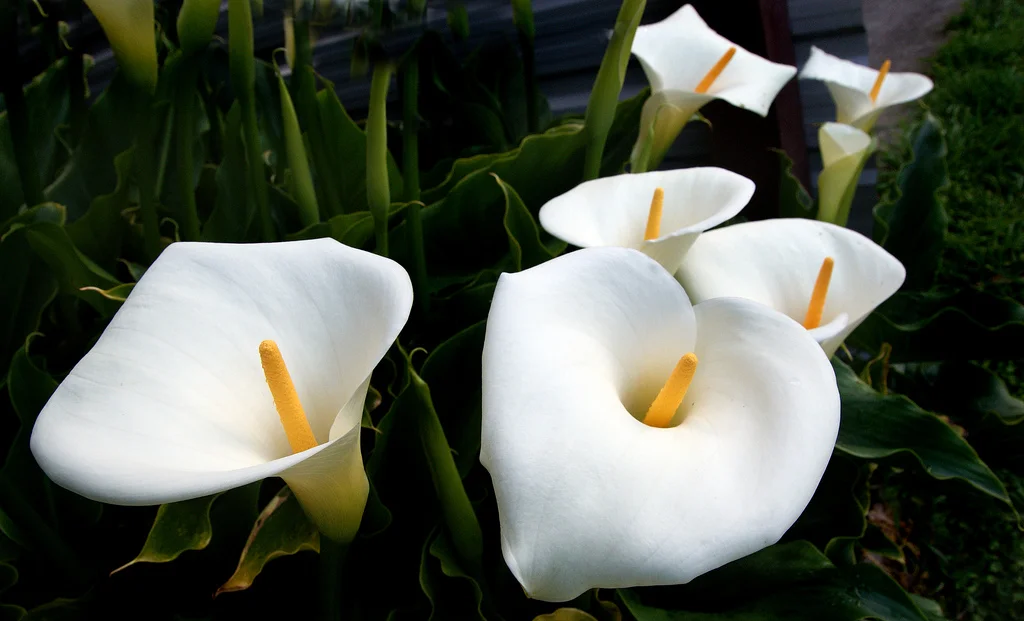
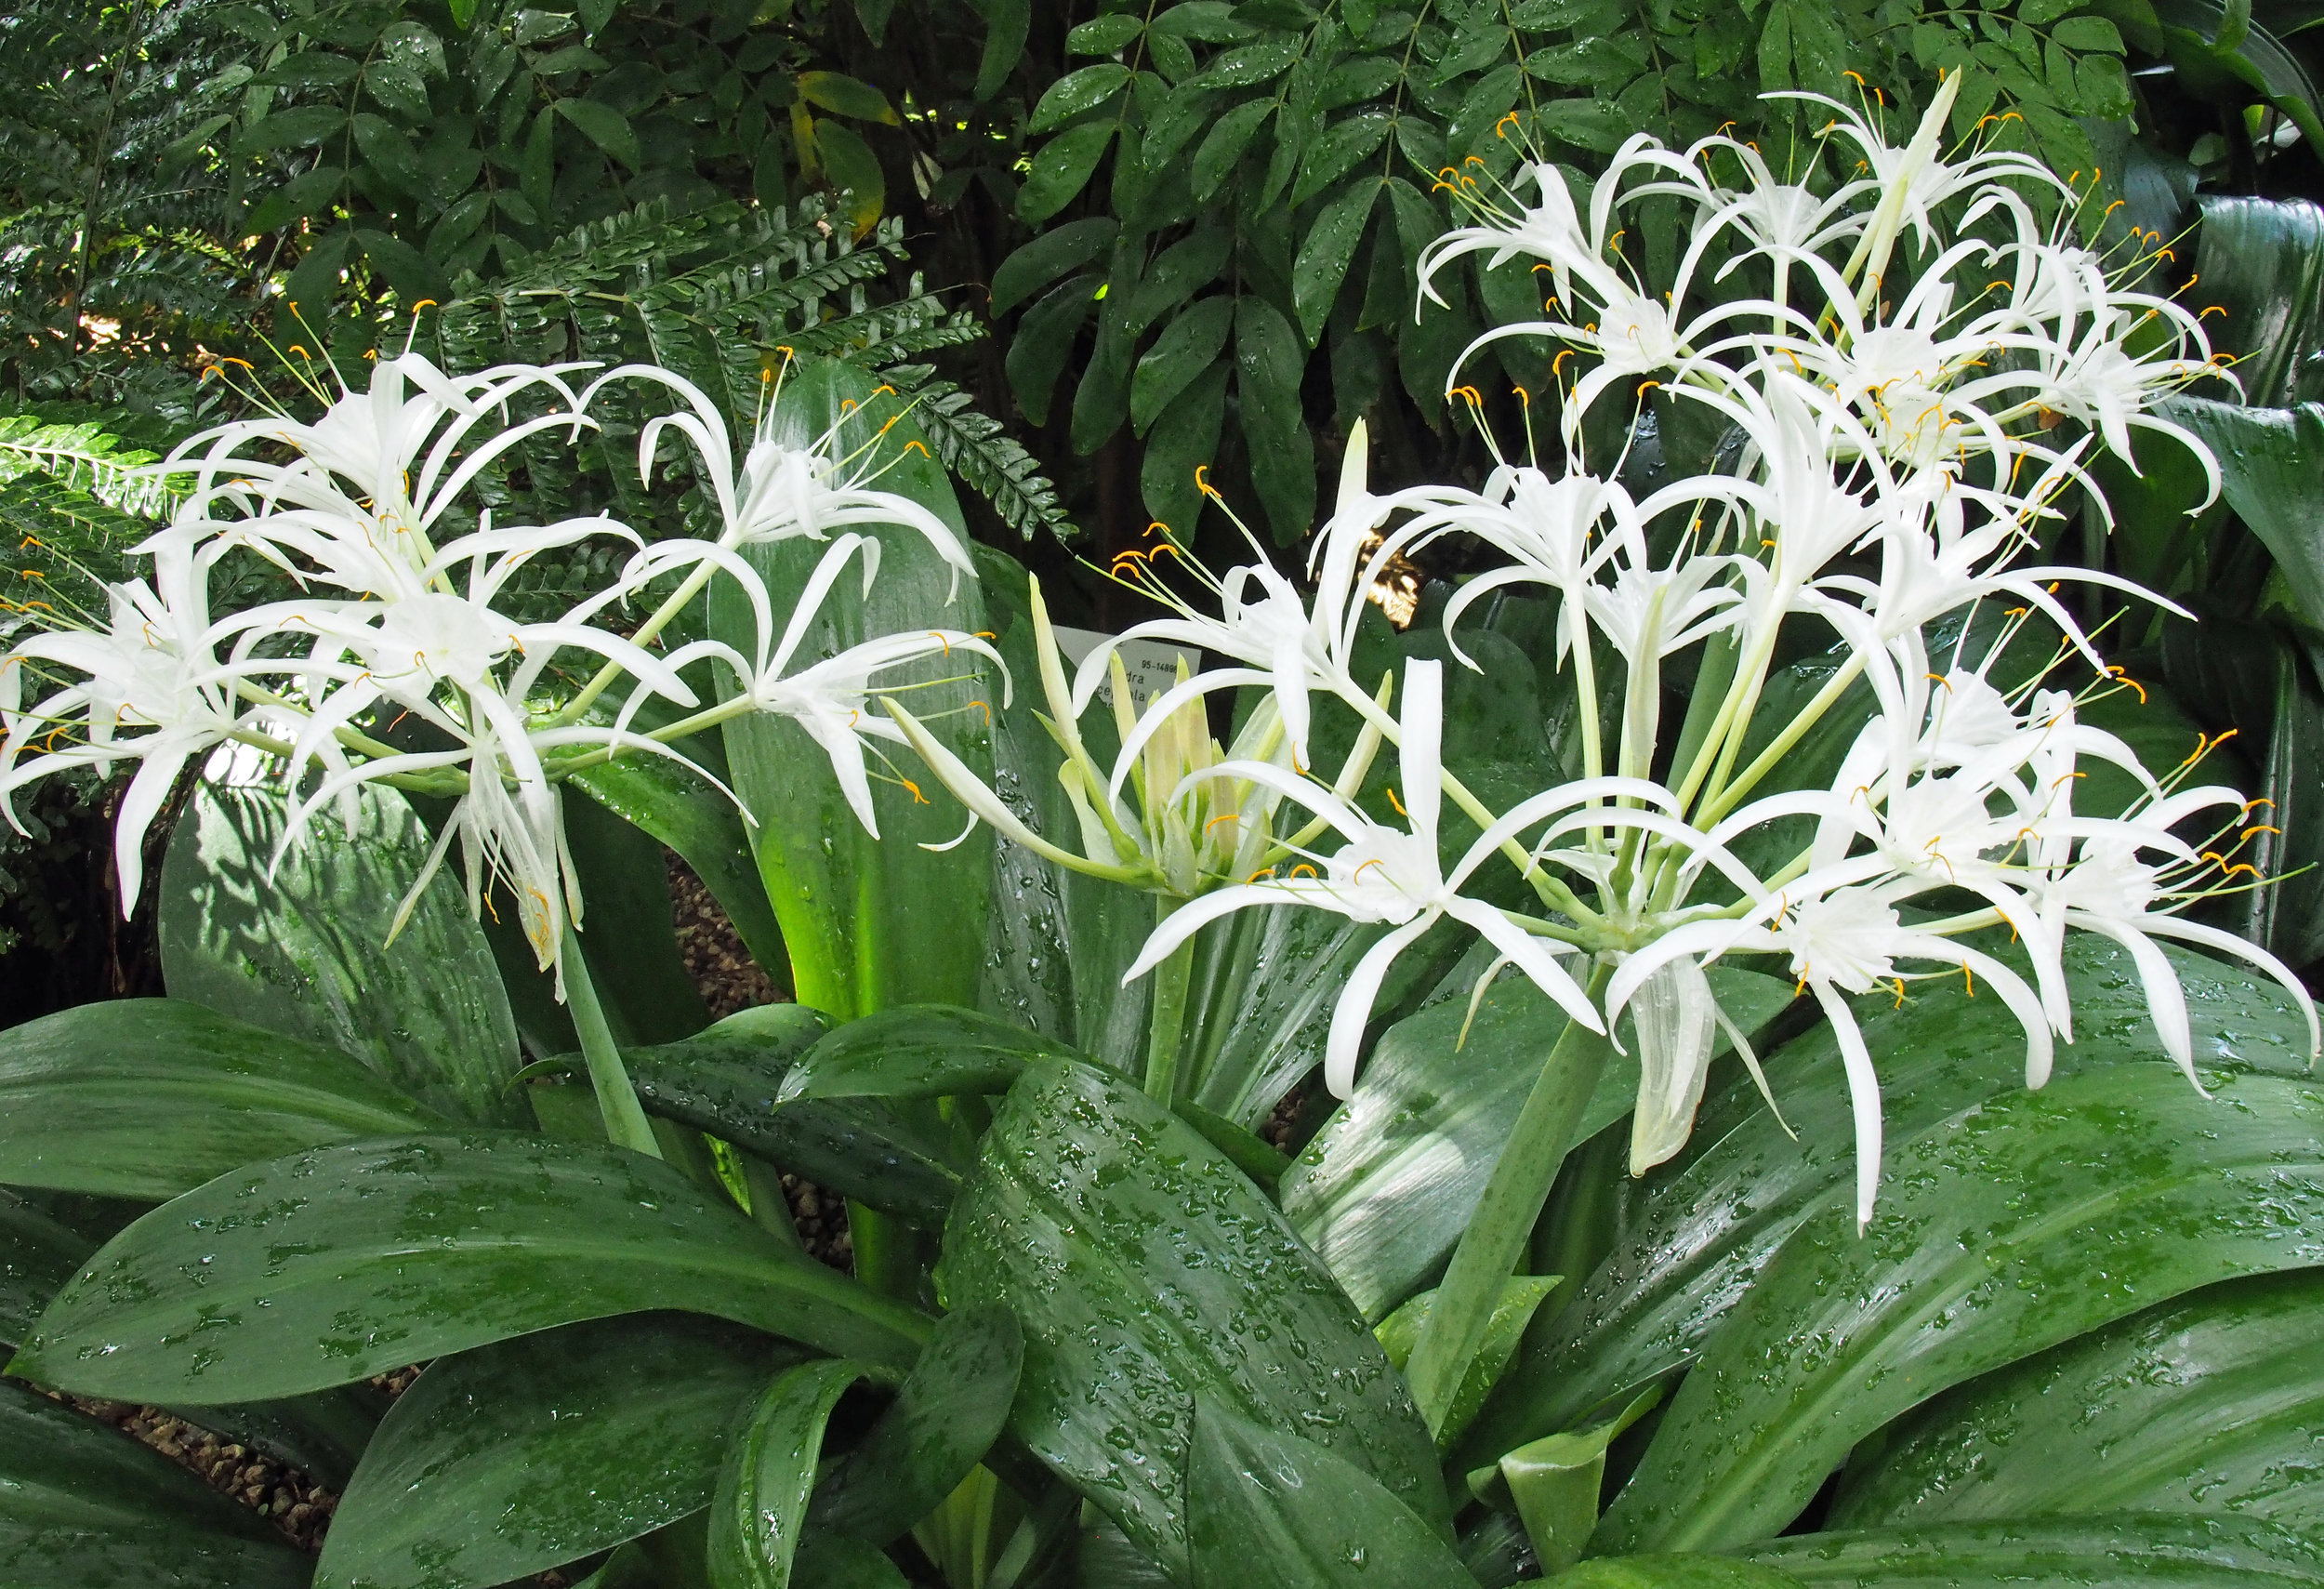
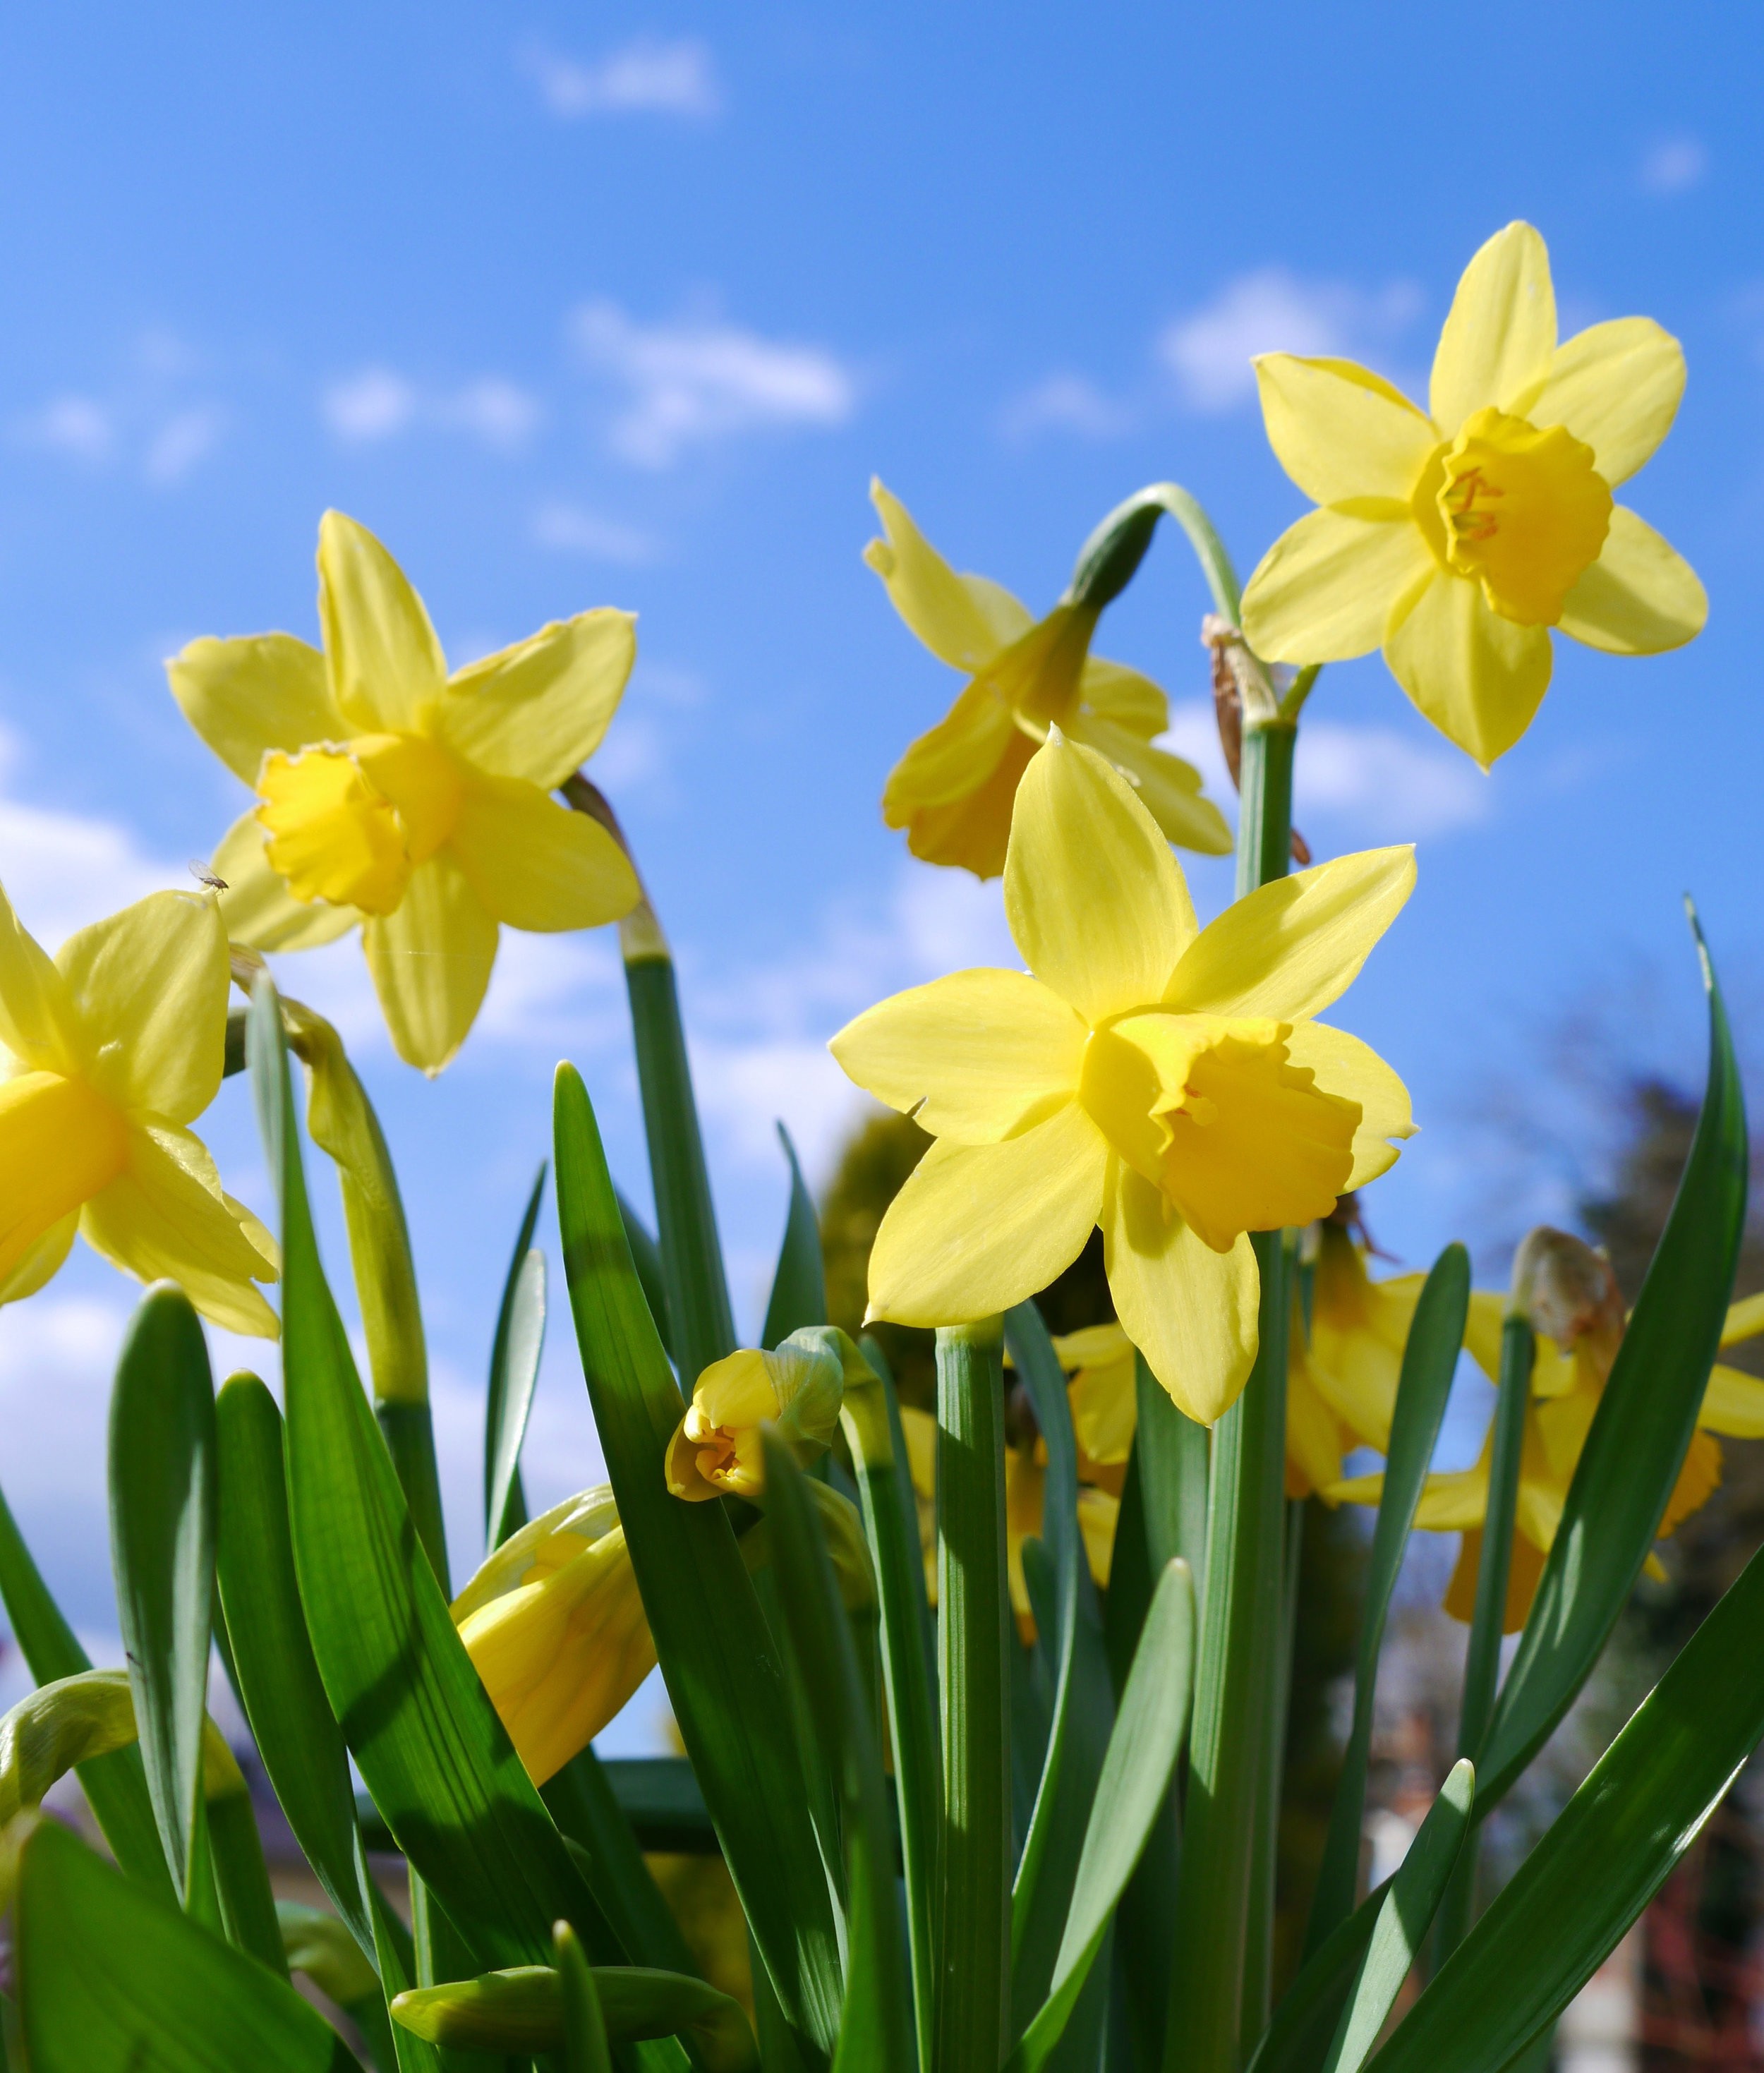
The Other Beautiful Bulbs
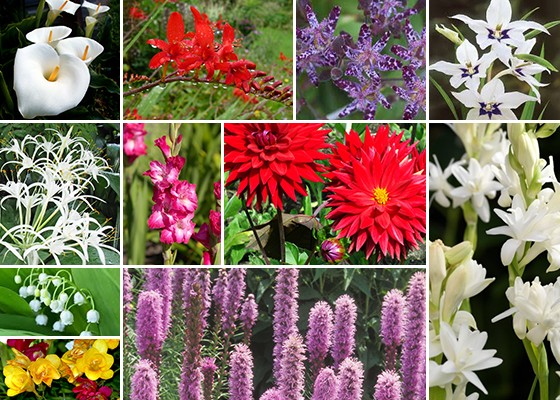
By Paul James
When you hear the word bulb, you more than likely think of those that bloom in late winter to early spring – daffodils, tulips, and hyacinths, for example. But there’s another group of bulbs that you actually plant in spring for a summer show, and they’re among the most beautiful bulbs of all.
In fact, in many cases, you must plant them from bulbs (or corms or tubers or rhizomes), because they aren’t available as transplants. So, consider the following choices, knowing that you can’t go wrong with any of them, whether planted in the ground or in containers.


The Time to Plant is Now!
By Paul James
Two significant events occur this month: daylight saving time begins on the 11th; and spring begins on the 20th. That means there’ll be more daylight in the evenings and the days will be getting longer, so we’ll all have more time to garden. Yippee! But what, exactly, should we be planting this month?
Well the easy answer to that question is darn near everything (I‘ll get to the exceptions in a moment).
For starters, think trees and shrubs, both deciduous and evergreen. The sooner you get them in the ground the better so they’ll have time to focus on root development before top growth emerges, or in the case of conifers and evergreens, before they begin rapid growth.
Likewise, this is the perfect month to plant fruit trees, cane fruits (raspberries, blackberries, etc.), blueberries, and strawberries.
Perennials can go in the ground this month, and they too will benefit from putting on roots before their top growth takes off. Start early in the month with the woody types like Russian sage and Salvia greggii such as ‘Furman’s Red,’ as well as tough stuff such as hostas and daylilies. By the middle of the month go ahead and plant pretty much everything else.
It’s time to plant cool-season vegetables and most culinary herbs (basil is an exception – wait until the end of the month unless you plant in a container that can be moved indoors if temps drop below 45 degrees of so). Here’s a list of veggies to plant now.
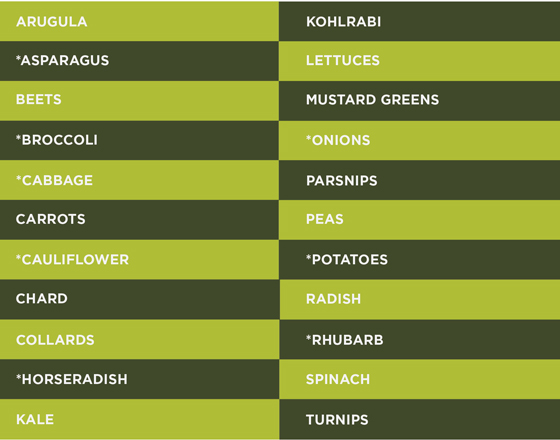
*Plant as roots, sets, transplants, or tubers. Plant everything else from seed.
And don’t forget fescue and rye. Both are cool-season turf grasses, so go ahead and seed new lawns or overseed existing lawns.
It’s still a tad early to plant most annuals, but before the end of the month, assuming the weather cooperates, they should be good to go in the ground or in containers.
And speaking of weather, I’d be remiss if I didn’t throw in this quick caveat. Yes, it’s possible, and perhaps even likely, that we’ll see a freeze this month, and perhaps even next month. So be prepared to cover sensitive plants. But realize too that the vast majority of landscape plants – trees, shrubs, perennials, as well as fescue and rye — won’t be affected by freezing temps. And nearly all veggies and herbs can tolerate temps in the mid to upper 20s.
So get out there and garden, because the time to plant is now.
Gardening as Exercise
By Paul James
Last Sunday I spent six hours in the garden, planting 60 hills of potatoes, 80 leeks, and 120 onions, among other things. Monday morning I had a tough time getting out of bed. But I must say the discomfort I felt was strangely gratifying, because not only did I get a lot of gardening done, I also burned a lot of calories. Just how many calories, you ask?
Probably a lot more than you might have guessed. Consider this: Ten minutes of shoveling burns as many calories as ten minutes on the treadmill at high speed. While shoveling – or raking or weeding – you experience a range of motion unlike any traditional exercise routine. And all that bending and stooping and twisting is good for muscles and joints, assuming you’re in decent shape to begin with and don’t overdo it.
So here’s a look at how many calories you can burn per hour while performing a variety of gardening tasks.

Now, someone who weighs 125 pounds won’t burn as many calories as someone who weighs 185, but any way you slice it, you’re burning calories and building muscle strength.
I calculated that last Sunday I probably burned about 1,000 calories, or roughly the number of calories in an incredibly large slice of cheesecake, which I ate later that evening, followed by two Aleve PM.
Soil Temps & Taters
By Paul James
The other night my son asked me if it was time to plant potatoes. I paused momentarily to soak in the pride I felt knowing that he, along with his younger brother, have made gardening a part of their lives. (I’m sure their sister will do likewise once she moves out of her tiny apartment in Queens, NY.) Then I turned to him and said, “Check the four-inch soil temperature.”
“What’s that going to tell me?” he asked. “It’s going to tell you when you can plant potatoes,” I said.
Savvy veggie gardeners know that deciding when to plant is tricky. On the one hand, an early start means an early harvest, and cool-season vegetable crops do best when grown under cool conditions. On the other hand, getting started too early can lead to crop failure if temperatures nose dive.
However, because potatoes are planted below ground, deciding when to plant is based not on air temperatures but rather on soil temperatures, and when the soil temp hits 40 degrees (technically, when the four-inch bare-soil temp hits 40), you can plant away. The same is true of asparagus, rhubarb, and horseradish because they too are planted below ground, where they’re safely insulated from the cold.
Truth is, you can use soil temperatures to decide when to plant any and all veggies from seed. At 45 degrees, it’s safe to sow cool-season crops such as beets, carrots, lettuce, radishes, and spinach. But for warm-season crops it’s best to wait until soil temps are at or near 70 degrees (think beans, cucumbers, peppers, tomatoes, melons, and such).
And just how do you know what the four-inch soil temperature is? That’s easy. Go online to Oklahoma Mesonet www.mesonet.org or install the app on your phone. The Oklahoma Mesonet is a world-class network of 110 environmental monitoring stations scattered across the state, and it’s run by scientists from OU and OSU. The site displays real-time weather information of all kinds, and detailed maps of soil temperatures.
Of course, there’s always the possibility that air temperatures may plummet once everything is up and growing, and depending on how low they go your crops could take a hit. But that’s the chance we all take. Or, said another way, that’s gardening.
Do Freezing Temps Kill Bugs?
By Paul James
In the past few weeks, I’ve repeatedly heard the claim that the recent snap of cold weather means the bugs won’t be bad this year. The idea of course is that bugs can’t survive prolonged cold temperatures and therefore their populations will be greatly reduced if not eliminated entirely. But does that claim have any basis in fact?
Sorry, no. While it’s true that a number of bugs can’t survive freezing temperatures, they’ve developed truly remarkable ways of protecting themselves and furthering their progeny.
The simplest way to beat the cold is to migrate to a warmer spot, just as Monarch butterflies do. Moving into your house is another common means of survival for numerous insects including crickets, ants, ladybugs, stink bugs, moths, and even wasps.
Insects that can’t survive cold temperatures at least know how to sustain their populations by laying eggs underground, in leaf litter or garden refuse, and in buildings.
And what about fleas and ticks and mosquitoes? Again, sorry.
Fleas are clever enough to find ways to stay warm, whether on wild or domesticated animals or in garages, under decks, and around foundations.
Ticks begin a process of acclimation long before winter arrives by moving water out of their cells before it freezes and crystallizes, thereby allowing them to survive freezing temperatures. They also escape the cold beneath leaf litter and other warm spots.
Mosquitoes actually hibernate both inside and out. They also lay eggs in the fall that can survive the cold – even in frozen water — and remain dormant until spring.
And there are some insects – the Emerald Ash Borer for example, as well as some mosquitoes – that produce a sort of antifreeze in their blood called glycerol, which enables them to survive freezing temperatures in a state of suspended animation. It’s insect cryogenics, basically.
Let’s face it. Insects have been around for millions of years, and rarely do we hear of them becoming extinct. They’ve survived predators, pesticides, an asteroid that killed off the dinosaurs, and yes, even nuclear explosions. Among living things, they are the ultimate survivors.
And you think something like a little cold weather is going to affect them?
Gardening From the Inside Out
By Paul James
I know. It’s been colder than a well-digger’s foot lately, and for that reason I haven’t spent much time in the garden since the holidays. But I have been thinking a lot about my garden and trying to imagine what changes I want to make once the weather warms up. And thankfully, finally, it looks as though it’s about to do just that.
What I’ve been thinking about most is how to improve the look of my garden from the inside looking out, so that as I stare out the windows while sipping my morning coffee or evening cocktail, or even just stroll past a window, I’m pleased by what I see. Too often people focus exclusively on what their landscape looks like from the point of view of the street, looking back toward their house. That’s certainly important, but it’s only half the picture. Besides, we spend far more time looking out onto our gardens from our house than actually looking at our house!
For example, there’s a large bay window in my living room that looks out onto my back yard. The view is okay, but it’s missing something, and I’ve decided that what it’s missing is a small- to medium-sized tree with great fall color and a branching pattern that isn’t too dense so I can still see through it and beyond. So I’m going to plant a new – and very cool — Japanese maple called ‘Jack Frost.’ Problem solved.
I’ve got three large windows in my office that also provide a view of the backyard, but when I’m sitting at my desk and looking out all I see is sky. So I’m going to plant one Hinoki Cypress tree at the base of each window so that when I look out I’ll see green year ‘round with the sky as a backdrop. Another problem solved.
Then there’s the sliding glass door that leads out to my covered patio. I pass by the door dozens of time a day, and while the view out into the yard is nice, I’ve always felt it needed something. And the other day it hit me. It needs foreground in the form of two large, strongly vertical pots flanking the door in which I routinely or at least seasonally rotate shade tolerant plants – large ferns, various upright tropicals, maybe even yews if I decide on a more permanent solution. Once again, problem solved.
Given the forecast, it looks like I may be able to get back in the garden this weekend. But given that it’s still winter, I’m sure I’ll have plenty more time to solve my gardening problems from the inside looking out. I encourage you to do likewise. Enjoy your coffee…or cocktail.
You Gotta Water in Winter!
By Paul James
Although it may seem somewhat counterintuitive, it’s crucial that you water landscape plants during the winter months. The combination of dry soil and cold air temperatures can be especially tough on even the hardiest plants, both deciduous and evergreen. So keep these basic watering tips in mind.
First, realize that I’m not suggesting you water all that often during the winter months. Typically once a month will do the trick, although if it’s bone dry in December and January you may need to water twice a month. Pick a day when the temperature is above freezing and the overnight low is forecasted to be above freezing as well. Those conditions happen more often than you might imagine, and on those days you should seize the opportunity.
Deep soak each time you water, but avoid watering the base of trees and shrubs, because if water freezes around the trunk it can damage the bark. Instead water halfway between the plant and just beyond the outer stretch of branches (also known as the “drip Line”).
Evergreens and conifers need more water than their deciduous counterparts because they continue to grow, albeit ever so slowly, during the winter. And many of them, including azaleas, arborvitaes, pines, spruces, junipers, Euonymus, and Oregon grape have shallow roots and are therefore more susceptible to drying out. But even deciduous plants need water in the winter to prevent their roots from becoming desiccated.
The same is true of cool-season turf grasses such as fescue and rye, both of which continue to grow in winter.
Dormant perennials should be watered as well to keep their roots hydrated. And spring-flowering bulbs, which store lots of water in advance of blooming, absolutely must be watered during dry winters.
Of course, if we get plenty of rain this winter you can skip watering altogether, but the extended forecast looks pretty dry. And November was one of the driest on record. This weekend, however, looks beautiful. And you can bet I’m going to water.
The Beauty of Bark
By Paul James
When choosing a tree for your landscape, what attributes appeal to you most? Overall size and shape, growth rate, or maybe fall color? Those are all important considerations for sure, but what is often the most overlooked attribute happens to be my favorite – bark.
Bark is basically dead tissue. It protects a tree’s vascular system, which lies just below the bark layer. And it comes in many textures – smooth or rough, shallow or deep fissured, and exfoliating, just to name a few. On a clear winter day, bark is basically all you see, so why not plant a tree with interesting bark? And with that in mind, here are several trees whose bark I find especially attractive.
Shantung Maple – I like this tree a lot. It’s not as well known as other maples, but it’s gaining in popularity. Like most maples, it produces gorgeous fall color. But unlike most maples, its bark isn’t smooth. Instead, it has a texture that’s best described as cantaloupe skin. Very cool.
Coral Bark Maple – The contrast of its light green leaves against its coral-red bark is striking during the growing season, but the bark makes a statement of its own in winter, especially when planted in front of evergreens or a light-colored wall.
Sycamore – Yes, this tree can be a tad messy, but the bark is so beautiful that it makes it worth growing, especially on a large property. Its brown bark peels away to reveal a white inner bark, which against a clear blue sky is an awesome sight.
Lacebark Elm – This is a great tree that adapts to just about any soil type, and its mottled, multicolored exfoliating bark makes it standout in any yard. The bark of mature trees puts on a beautiful display of red, brown, green, and gray.
River Birch – Another exfoliating bark beauty, river birch grows well in moist soils yet is very drought tolerant once established. Its cinnamon-colored bark peels away in spectacular fashion.
Crape Myrtle –Some crape myrtles are more interesting than others when it comes to their bark, but the old ‘Natchez’ variety is still the best of the lot. Its gray bark peels to reveal an eye-catching cinnamon layer.
Kousa Dogwood – The bark of this Asian dogwood (which by the way tends to flower about a month later than the native species) produces a stunning patchwork of gray, tan, brown, and orange.
Tupelo – This is one of the best trees for fall color, but even after its leaves have fallen, you’re left with a distinctive bark that’s often described as alligator skin.
Dawn Redwood – The deep fissured bark of this deciduous conifer peels away in dark, orange-brown strips that are a sight to behold.
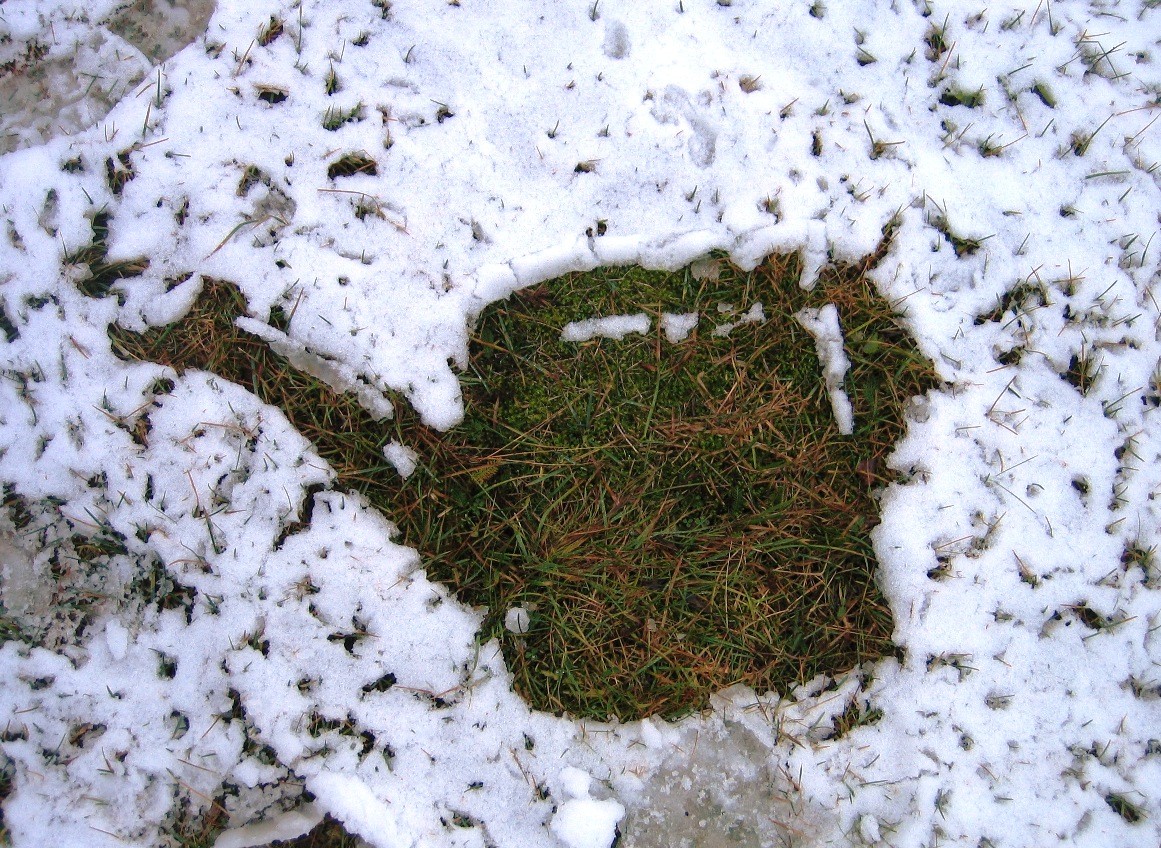
Frost and Freeze Alert
By Paul James
It looks as though the overnight lows both Saturday and Sunday could hover at or dip below freezing throughout the area. But given that it’s late October, that shouldn’t come as a surprise to anyone. The real question is what effect, if any, will the cold temperatures have on plants?
And the answer is, not much. Landscape plants – deciduous and evergreen trees and shrubs and perennials — won’t be fazed at all, so there’s no need to cover anything.
Mums and pansies – whether in the ground or in containers – will also be fine.
Fall vegetables and most herbs will be okay too, although if you’ve still got summer crops such as tomatoes and peppers, they aren’t likely to survive even with protection. The same is true of basil and cilantro. But lettuce, spinach, and other greens, as well as broccoli, Brussel sprouts, cabbage, cauliflower, carrots, kale, and onions will actually benefit from a cold snap because it concentrates their sugars (and makes them taste even better!).
Of course you will need to bring in any tropicals that you’ve had growing in containers outside, assuming you haven’t done so already. You can move them in temporarily, that is until overnight temperatures warm up a bit, but at this time of year you really should consider moving them in for the winter anyway.
So just kick back and relax, knowing all your plants will be just fine. Or said another way, about the only thing you need to do in response to the frost and freeze alert is chill.
Fall Color at its Best

By Paul James
Looking for trees and shrubs that’ll produce jaw-dropping, car-stopping fall color? Well after careful consideration and discussions with several fellow plant geeks whose opinions I respect, I came up with a list of three trees and three shrubs that’ll do just that. And here they are.


Sure, there are many, many more trees and shrubs that I could add to the list, but assuming you’re interested in giving your place a pop of color this fall, I wanted to simplify the decision-making process. And the simple truth is, you can’t go wrong with any of those on the list.
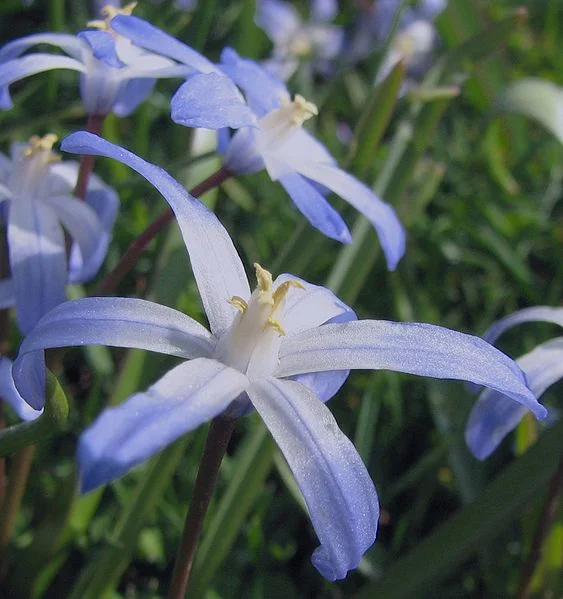
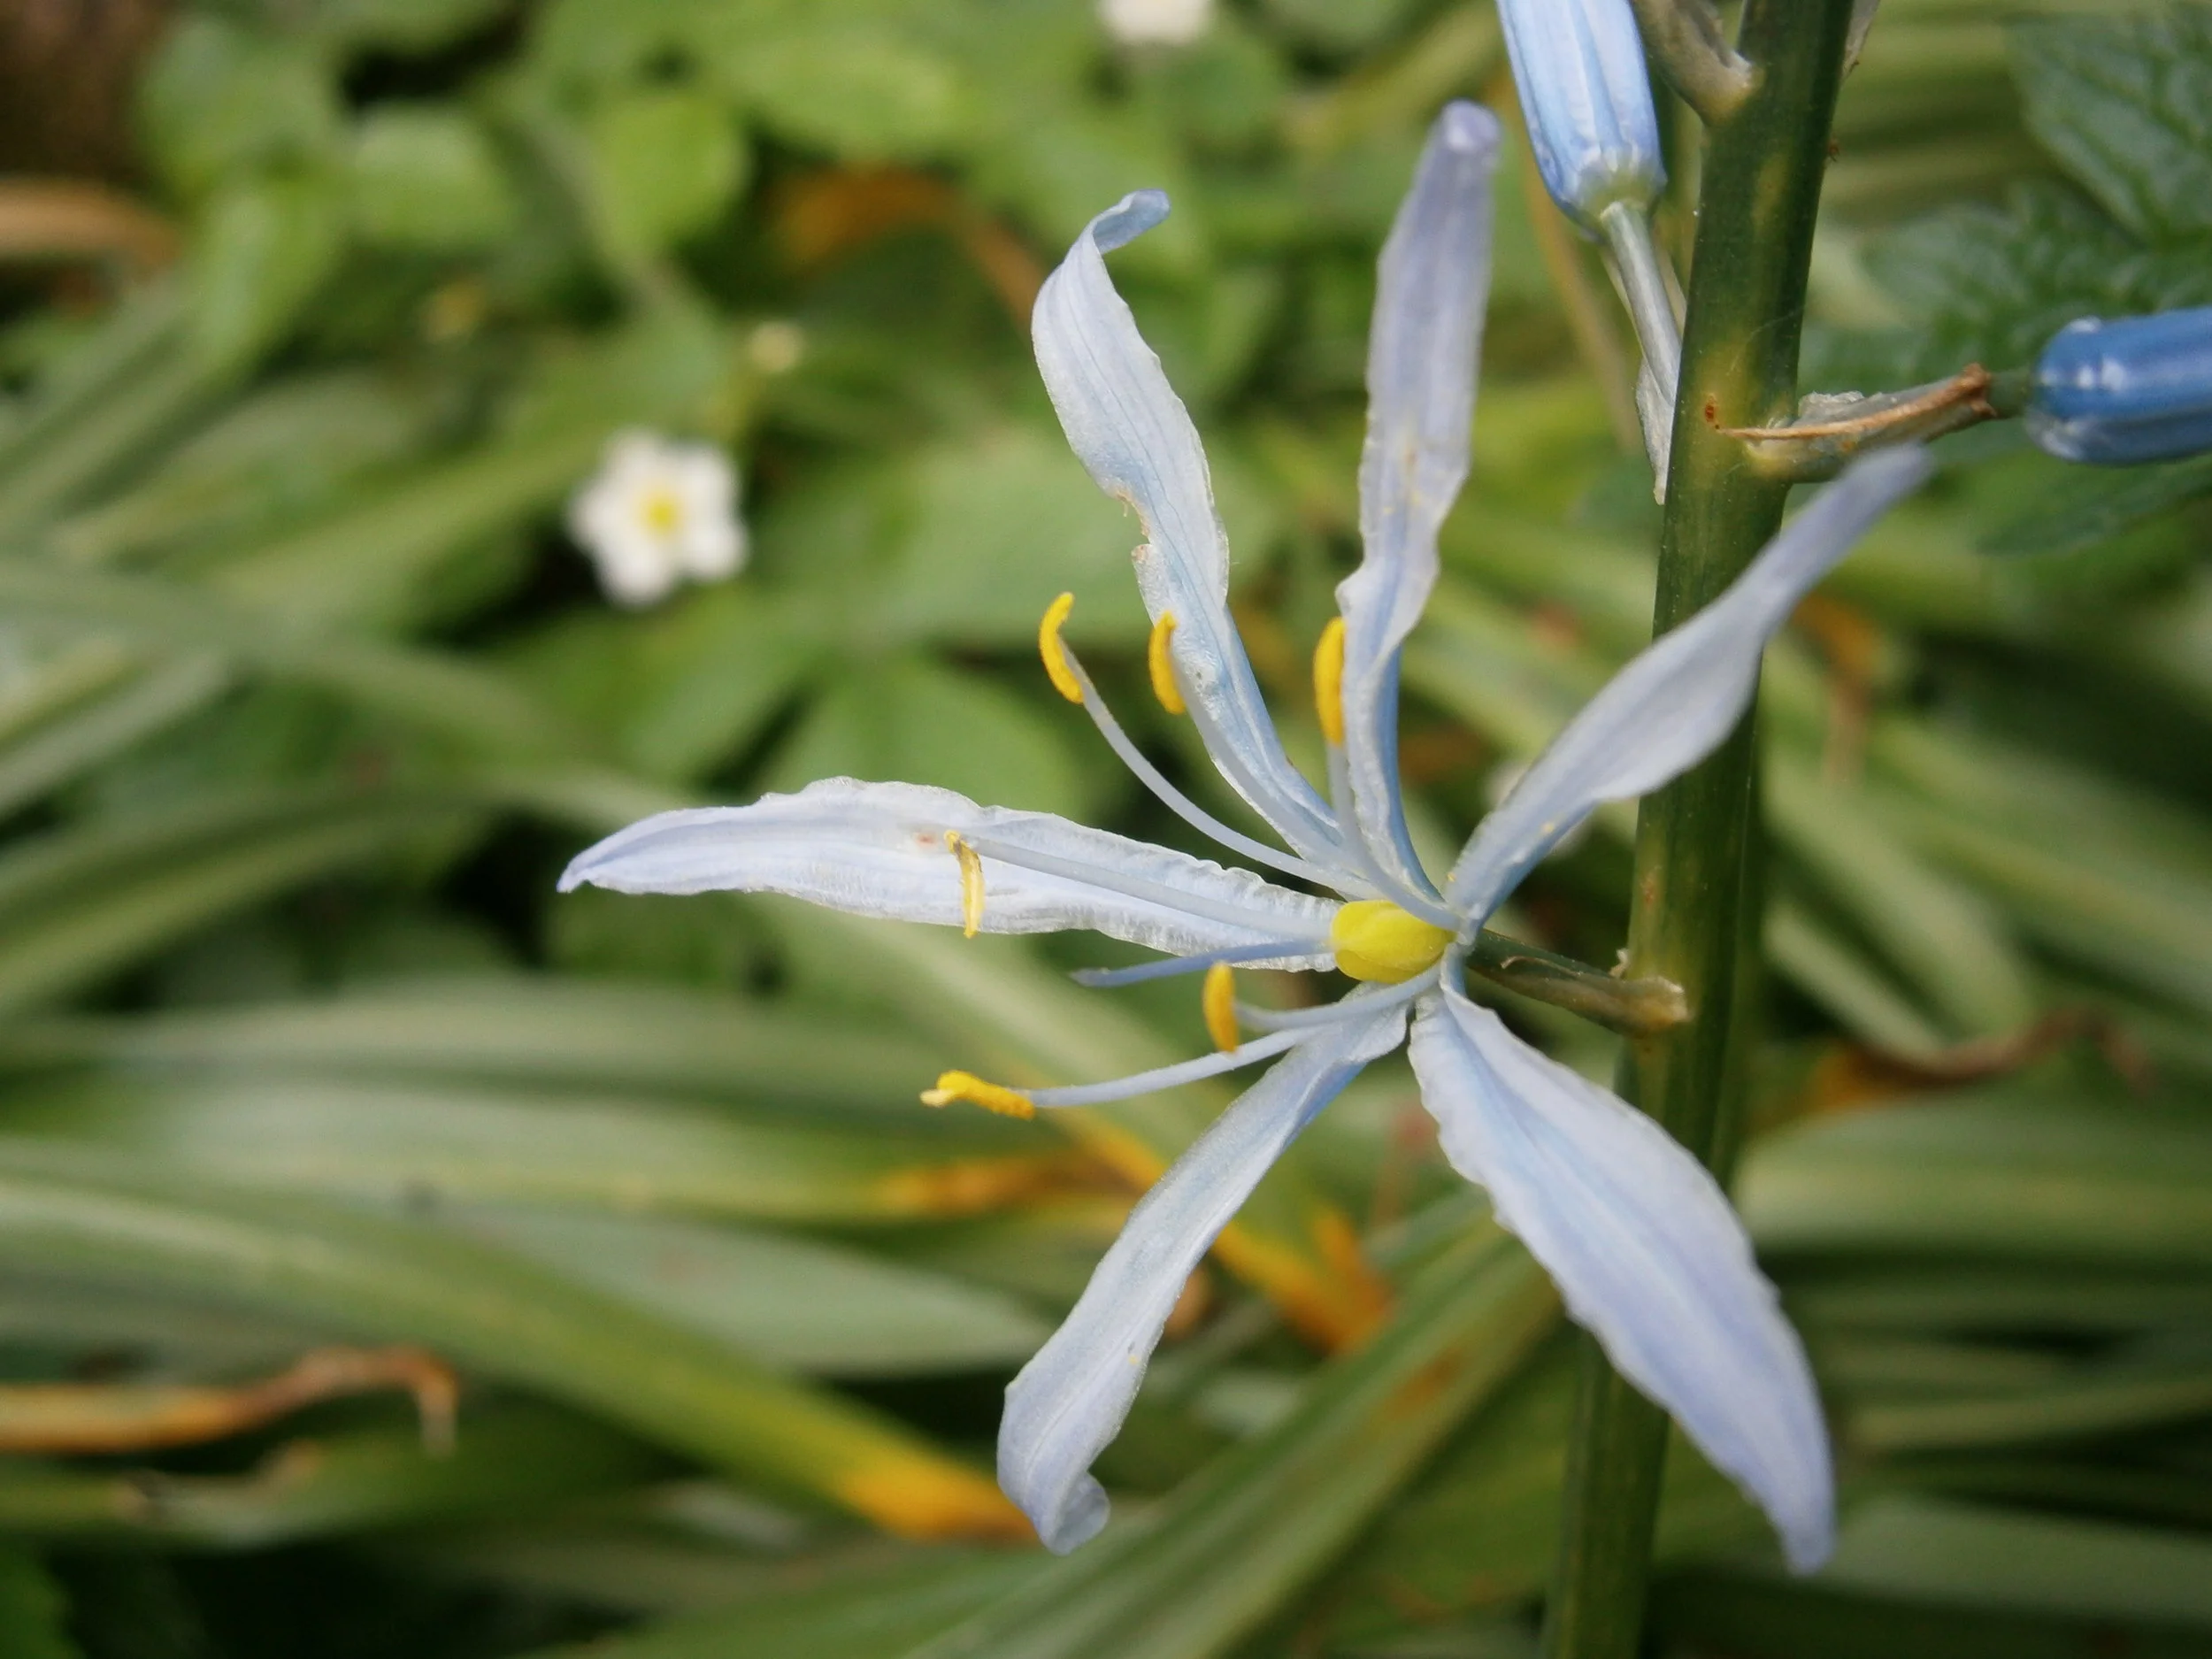
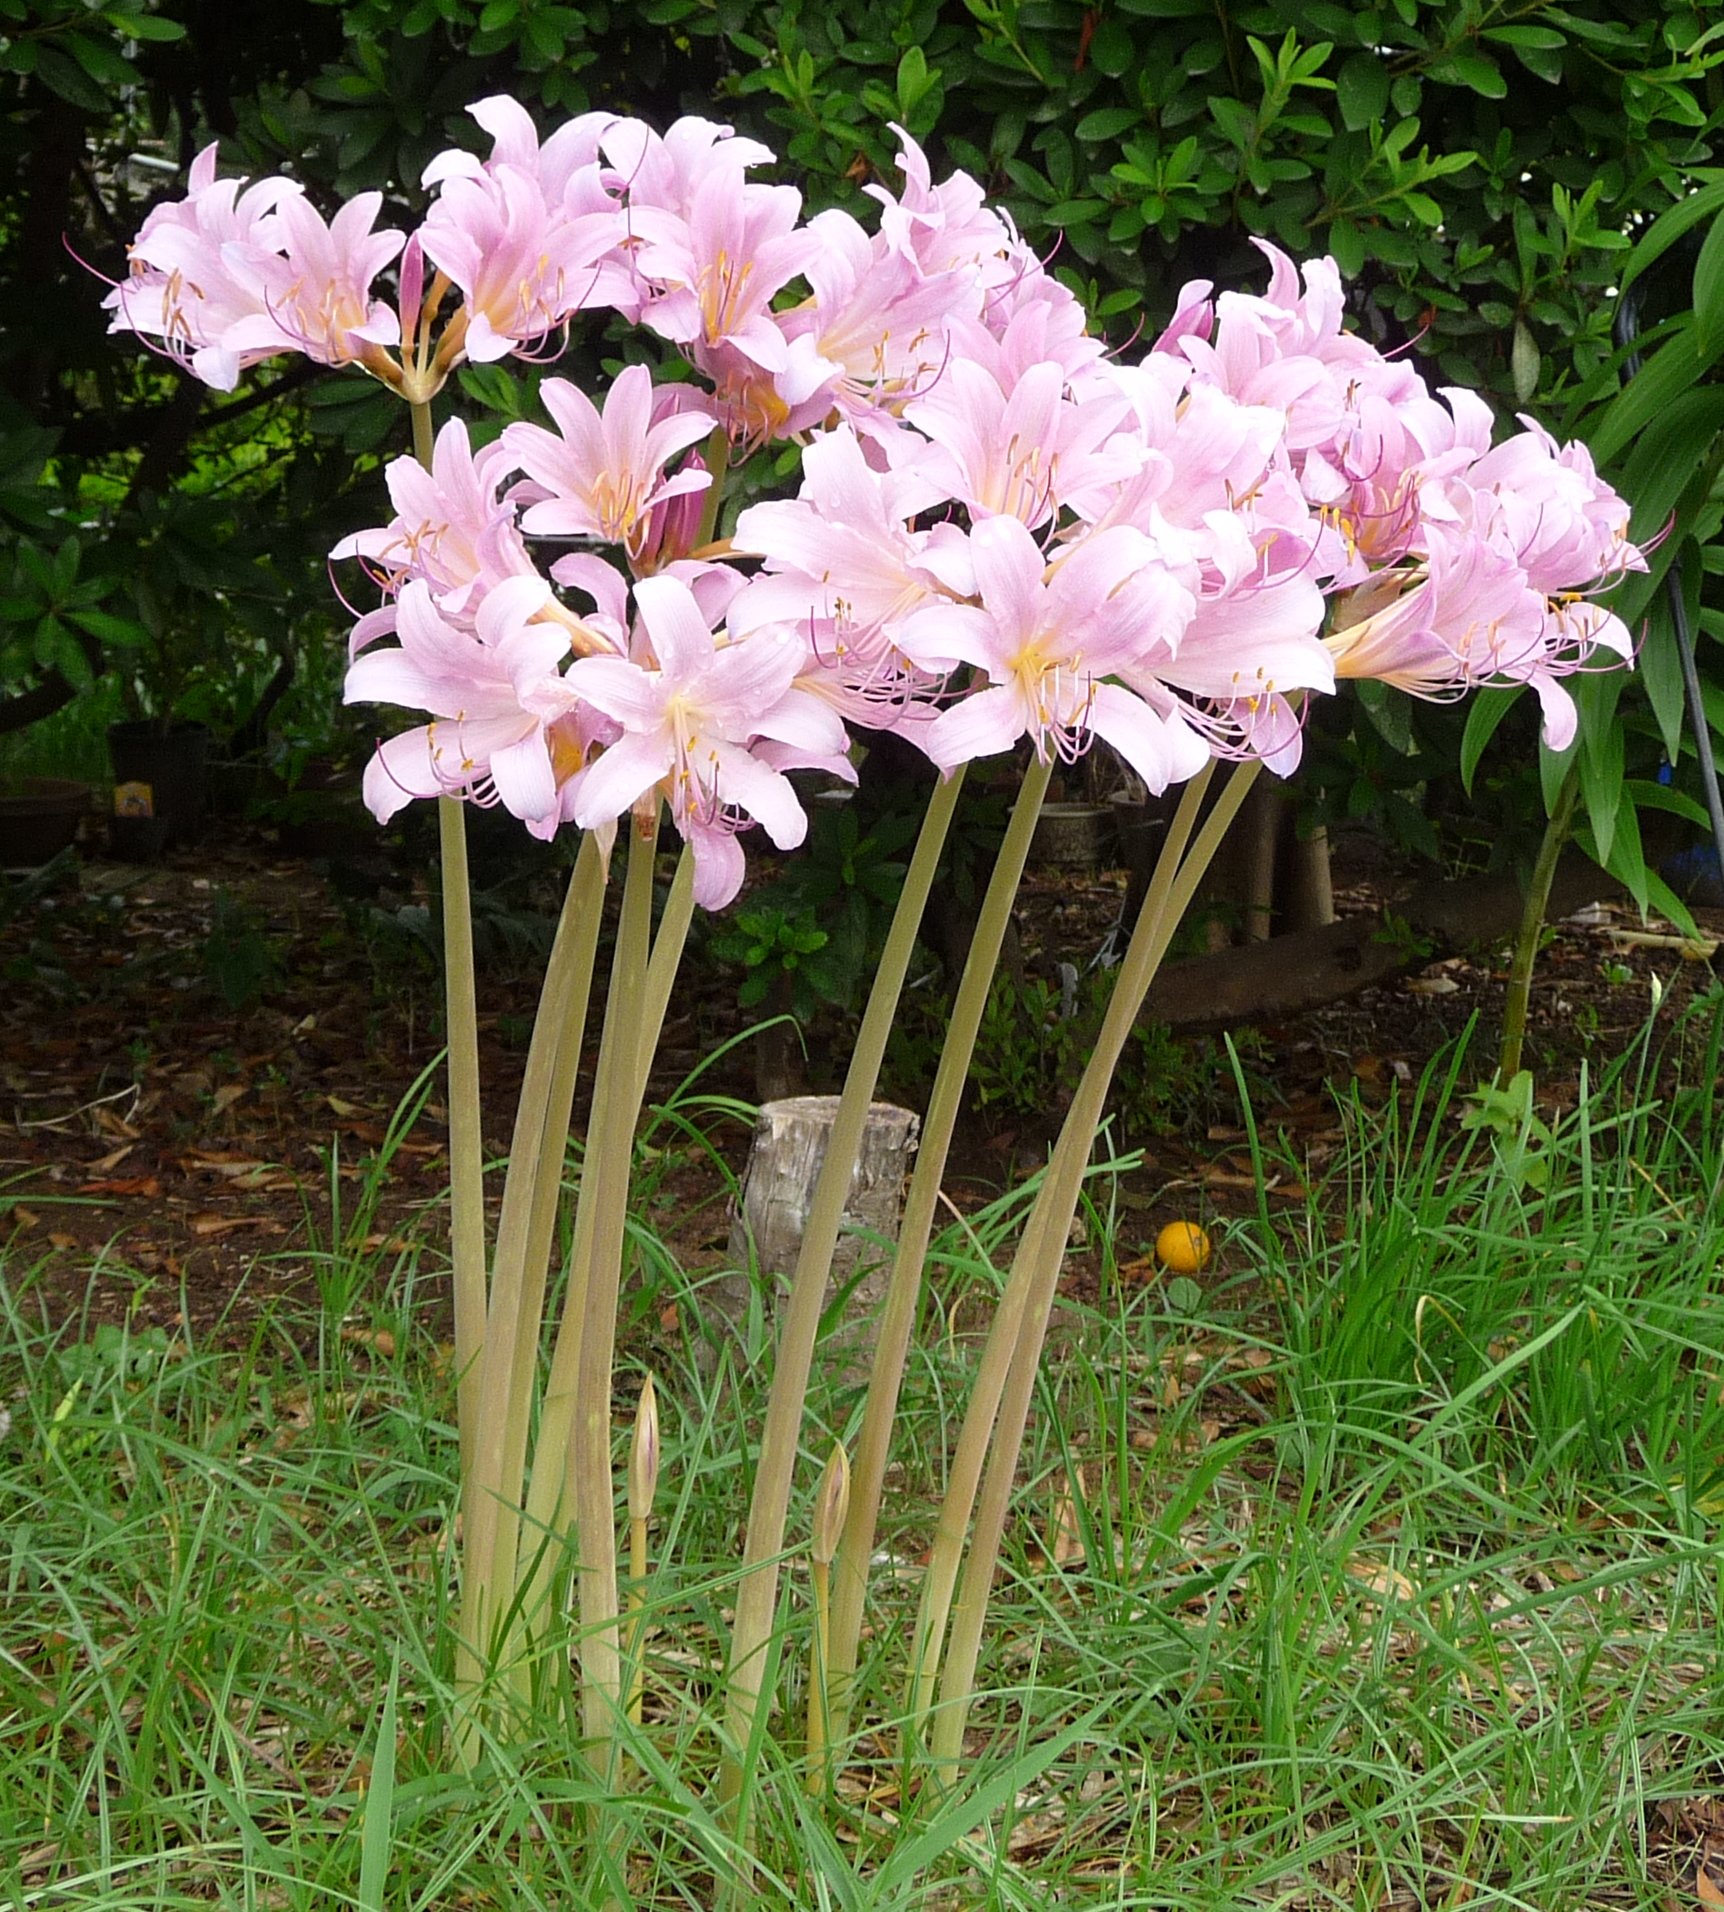
Bulbs – Beyond Tulips & Daffodils
By Paul James
When it comes to spring-flowering bulbs, the stars of the show are daffodils, tulips, crocuses, and hyacinths. But the supporting cast of players, although less familiar, are no less beautiful and deserve a spot in every garden. So when shopping for bulbs this month, you owe it to yourself to consider the following, all of which are easy to grow and come back year after year.


It’s Planting Time!

By Paul James
Every year for the past 30 years or more, I’ve tried to convince my friends and fellow gardeners that now is the perfect time to plant all kinds of things. So here I go again. But to be clear, I’m not talking about things that most folks know to plant in fall – mums, pansies, asters, ornamental kale and cabbage, cool-season veggies, fescue and rye grasses, spring-flowering bulbs – the stuff that practically defines fall planting. I’m talking about practically everything else, in particular trees, shrubs, and perennials.
The reason I’ve harped on the subject for so long is that I’ve witnessed firsthand for decades the enormous difference fall planting makes. Allow me to explain by getting to the root (or rather, roots) of the matter.
Planting in the fall gives roots a chance to grow quickly, because the plant isn’t forced to devote near as much energy toward producing foliage or flowers or fruit as it is in spring. Instead, it devotes nearly all of its energy into producing roots, a process that continues for weeks, even months. The reverse is generally true in the spring – a plant’s energy is devoted to new top growth at the expense of root growth.
Consequently, what you plant in fall will be far more prepared for the surge of new growth in spring, and be far better equipped to handle the heat of summer, thanks to its larger root mass. And fall planting greatly reduces the chance of transplant shock, largely because air temperatures are cooler and rainfall is more dependable.
Don’t get me wrong: I’m not saying you shouldn’t plant trees, shrubs, and perennials in spring. But I am saying that given a choice, I’d opt to plant the vast majority of plants from those categories in fall. And so should you.
The Beauty of Bulbs
By Paul James
No other plant on the planet gives you more bang for your buck than a single, solitary, spring-flowering bulb, be it a daffodil or a hyacinth or a crocus or whatever. (Yes, I intentionally excluded tulips for the moment – more on them later.)Think about it: in most cases you shell out less than a buck for a gorgeous flower that will return year after year for decades. And in that time all the plant requires is an occasional drink and a light snack.
Spring-flowering bulbs are, in fact, among the most carefree plants you can grow, and they’re pretty much pest and disease free. They’re also a snap to plant with a trowel, mattock, auger bit, or specialty bulb planter. Once you get a rhythm going, you’ll be amazed at how fast you can get them in the ground.
Bulbs typically begin arriving in nurseries a month or so before the ideal planting time, and it pays to shop early to make sure you get what you want. Just store them in the garage in a paper bag and they’ll be fine for a month. As for planting times, I usually start around the middle of October and finish by early November.
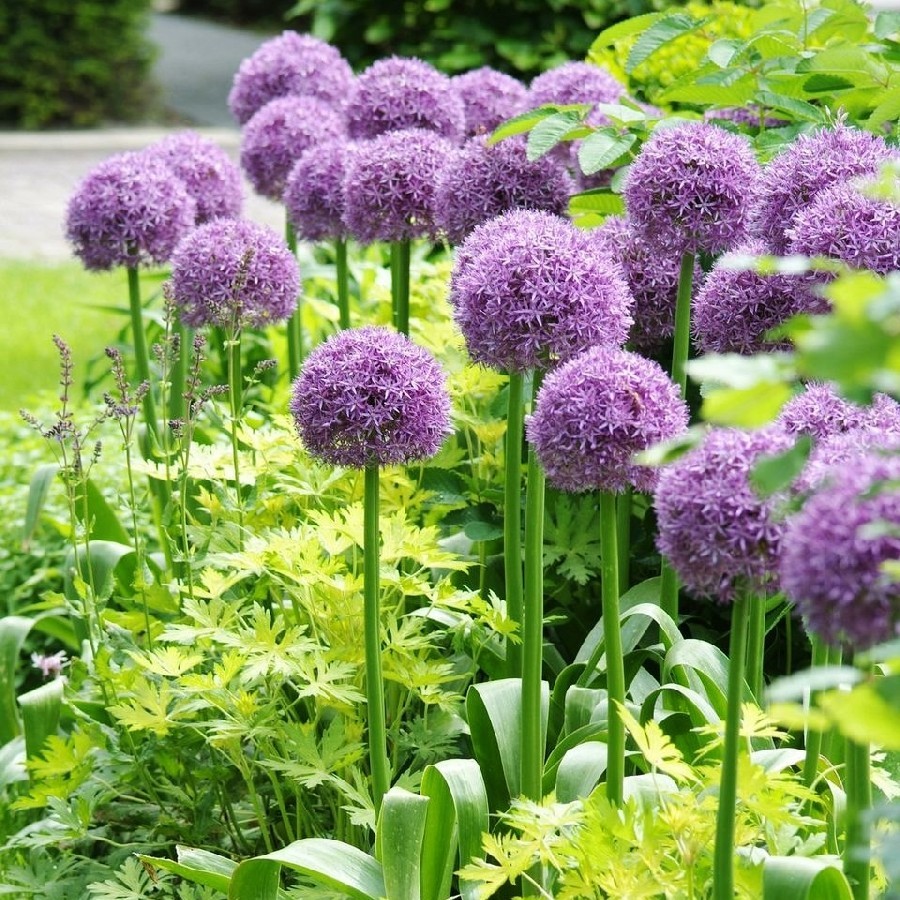
And just what do I plant? Well, I’ve always been partial to daffodils. They come in a dizzying array of sizes, colors, and bloom periods, and they’re one of the few bulbs gophers won’t eat. I also love crocuses, especially the fall bloomers, and fritillarias. In recent years I’ve grown fond of the alliums for the big, bold statement they make, and pollinators love their flowers.
As for tulips, well, they aren’t among my favorites, although there’s no denying their beauty. For me, the problem is that they don’t dependably behave as perennials, although some – namely the Darwin hybrids and species tulips – do better than others. However, recent research by the folks at Longwood Gardens suggests that by planting tulip bulbs deeper than usual, as in up to a foot deep, you can get them to return for a few years. I plan on trying that trick this year.
After all, what have I got to lose?
It’s Fescue Time!
By Paul James
Fescue is originally from Europe. It didn’t actually arrive in this country until the mid-19th century, but it’s been happy here ever since, first as a pasture grass and later as a turf grass in lawns across America, including Alaska and Hawaii. It’s even planted on the South Lawn of the White House. And here in Green Country, fescue is the go-to turf for shady spots, where it thrives with a little fertilizer and regular watering.
That’s not to say fescue is perfect, because it isn’t. It tends to thin out during really hot summers, it doesn’t grow all that well in the deep shade beneath large trees, and it needs not only regular watering, but quite a bit of water as well. Still, it performs well throughout most of the year, and it stays green during the winter months.
Fescue must be planted in spring or fall. Lots of diehard lawn lovers plant it twice a year and that’s fine, but fall planting tends to yield better results. Planting from seed is a simple, straightforward, and relatively inexpensive process that requires little effort. It’s best to use a blend of seeds that contains only tall fescues, or one that contains tall fescues blended with fine fescues, Kentucky bluegrass, or even ryegrass in varying percentages, rather than rely on a single variety. I’ve tried dozens of blends over the years, and while I’ve seen subtle differences in them, I truly believe that the best way to choose one over another is a coin toss.
The most important consideration when getting seed to germinate is even moisture, because dry seed simply will not sprout. Typically, that means watering every day to keep the top ¼-inch or so of soil moist. Do that, and you should see germination within seven to ten days.
Of course, there’s a lot more to learn about creating a lush fescue lawn, from tips on sowing the seed to weed control to fertilizing to mowing. That’s why I’m presenting a free seminar called “Fall is for Fescue” this Saturday at 10:00 am at Southwood. To register, CLICK HERE.
My First Garden
By Paul James
Carrie and I bought our first home in 1979, and before we’d unpacked all the moving boxes I was busy preparing my first vegetable garden. Step one involved removing (by hand) roughly 400 square feet of Bermuda grass, which took two weekends. Step two involved rototilling the entire area. Problem was, I didn’t own a rototiller. Nor did I have a way to transport one.
But fortunately, my father-in-law had a pickup, and a friend’s dad had a rototiller — a huge, fire-engine red Troy-Bilt with all the bells and whistles, including electric start.
So early one Saturday morning, more excited than a gopher in soft dirt, I borrowed the pickup and drove to my friend’s dad’s house to get the tiller. The two of us struggled to get it into the bed of the truck, but we finally got it loaded and secured, and off I went. Driving home, I realized that I hadn’t arranged for any help unloading the tiller, but I convinced myself that I could go it alone.
I was wrong. While attempting to unload the tiller, I lost my balance. I hit the driveway hard, and the tiller came crashing down on me. Thankfully, it fell upside down, which is to say tines side up. Otherwise I probably would have been cut up pretty badly. Instead, I only suffered a broken arm, wrist, thumb, and index finger.
Four or five hours later, back from the hospital with a giant elbow-to-fingertips cast and the calming effects of pain medication, I decided to finish the job I’d started, despite the warning on the pill bottle about operating heavy machinery, which to me at the time sounded more like a tractor than a rototiller.
One of Troy-Bilt’s claims to fame back in the day was that their tillers were so easy to use you could operate them with one hand. I found that to be the case. Within a couple of hours, I’d tilled my new garden and was ready to plant.
The next day I planted peas, potatoes, onions, broccoli and cauliflower, plus a dozen or so different salad greens and some spinach. As the weeks went by I proudly watched my patch of veggies grow and grow, and when it came time to harvest my first batch of spinach, I was just plain giddy. I’d harvested spinach before – in my father’s and grandfather’s gardens – but this was my spinach, and it was the best tasting spinach I’d ever eaten.
This weekend – 38 years after establishing my first garden, and in what will likely be my last garden — I’m going to plant peas, potatoes, onions, broccoli and cauliflower, plus a dozen or so salad greens and some spinach. And you know what? It’ll be the best tasting spinach I’ve ever eaten.
Be Wise – Fertilize
By Paul James
The window between the end of summer and the beginning of fall is the perfect time to fertilize deciduous plants and turf grasses. And the reason is simple: Providing nutrients that have been depleted during the growing season will enable plants to enter the winter months with the food reserves they need to stay healthy and begin robust growth in spring.
In fact, if you can only afford to fertilize once a year, late summer to early fall (as in now through the end of September) is the best time. Focus on deciduous trees and shrubs, perennials, and turf grasses, including warm-season varieties such as Bermuda and zoysia as well as their cool-season counterparts such as fescue and rye.
What you don’t want to fertilize now are evergreens, including azaleas, boxwoods, hollies, photinias, pines, spruces, cedars, junipers and so on. Both broad- and needle-leaved evergreens should be fertilized in early April through the first of July, but no later. Fertilizing this time of year will stimulate new growth that may not have a chance to harden off before freezing temperatures arrive, and that new growth can easily be damaged.
The choices among fertilizers are so vast and varied that it’s hard to make a specific recommendation. But if you stick with well established name brands – Espoma, Scotts, and Milorganite, for example – you really can’t go wrong. Synthetic fertilizers such as those made by Scotts are extremely water soluble, which basically means the nutrients dissolve quickly and produce rapid results. The nutrients in natural fertilizers made by Espoma and Milorganite are not very water soluble, so it may take a week to ten days to see results. However, the results are typically longer lasting.
For at least 30 years, I’ve used nothing but Milorganite on my lawns and gardens. Strictly speaking, it’s not organic, but it is all natural. It’s made from biomass (fancy word for “poop”) from the City of Milwaukee, and it’s one of the greatest and most successful recycled products in horticulture history. Milorganite is a slow-release fertilizer with an analysis of 5-4-0 plus 4% iron (an overlooked element that helps plants green up). It’s also non-burning, which basically means you can sling it on anything that grows (except evergreens this time of year).
Weather in a Word – Wow!

By Paul James
August is ordinarily so hot and dry that I discourage people from planting certain things, in particular large trees and shrubs as well as conifers. But given the current weather pattern we’re in – and the long-range forecast for the rest of the month — I wouldn’t hesitate to plant anything and everything, including large trees and shrubs and yes, even conifers.
After all, we’re seeing well-below average daytime temperatures, cool overnight temperatures, and well-above average rainfall. (The storm that blew through early last Sunday morning dumped twice the average monthly amount of rain in Bixby in only two hours!)In other words, it’s been more like early June or late September than the middle of August.
But it’s not just the daytime temps and rainfall that convince me it’s okay to plant. Most importantly, it’s the overnight temps. We can all recall years past when evenings in August were insufferable, like when the temperature at 10pm was in the mid-90s and the thought of sitting on the patio was the furthest thing from our minds, right? Well I don’t recall an evening this August when Carrie and I weren’t on the patio at night (maybe not at 10pm, however; at our age, we tend to retire closer to 9).
And given a choice, plants much prefer the cooler nighttime temperatures. It enables them to “rest,” and in the process carry out vital physiological processes that only take place at night.
Of course, I’m not saying we won’t see an occasional day in the upper 90s. After all, it is August. But so long as the nights are cool – which means soil temps will be cooler than normal as well and roots will produce new growth – I plan on planting whatever I want. And yes, my list includes conifers.
Ants: Friends or Foes?

By Paul James
I get asked so many questions about ants that some days I just want to scream, “Uncle!” So let me just say right off the top that most ants aren’t bad. In fact, most ants are enormously important little critters. And rather than seeing them as pests in the garden, I suggest you think of them as partners. Here’s why.
Ants are recyclers. Red and black tunneling ants commonly found in lawns and gardens scavenge the soil in search of dead insects and a host of other organic nibbles and turn them into fertilizer. They also aerate the soil and redistribute nutrients along the way.
Ants are predators. Several species of ants feed on fleas, fly larvae, and termites, as well as the larval and adult forms of numerous garden pests.
Ants disperse seeds. A number of wildflowers depend exclusively on ants for dispersal of their seeds, including bleeding hearts, bloodroot, trillium, trout lily, wild ginger, and violets. In fact, these plants are thought to actually time their bloom period for when ants are most active.
Ants protect plants. Ants are attracted to the sweet nectar found on plant stems and the bases of flowers, and while feeding they also patrol the plants and keep insects from attacking them. A familiar example of this is seen on peonies in late spring. Ants crawl all over the sticky flower buds devouring the sweet nectar, and in return they protect the peony from potential pests. (There is disagreement over the popular notion that ants actually help the flowers open.)
Ants are custodians. Leave a few crumbs or other morsels on a picnic table, and overnight they’ll likely be gone thanks in part to ants, who are extraordinarily gifted at finding and hauling away scraps of just about any and every food type.
Ants are food for others. Let’s not forget the way the food chain works – sometimes you’re predator, sometimes you’re prey. And ants are an important food source for other insects, spiders, frogs, lizards, birds, fish, some mammals, and even people (don’t knock them ‘til you’ve tried them).
Of the nearly three dozen ant species in Oklahoma, only two are cause for concern. Carpenter ants (red or black) are one of the largest species common in our area, and over long periods of time they can cause damage to trees and wooden structures, including homes. They don’t actually eat wood, but they do chew it as they tunnel. They probably should be controlled, especially when populations get out of control.
And of course there is the red imported fire ant that lives outdoors and whose sting packs a mighty wallop. They’ve been sighted in Tulsa and a few surrounding counties, and they’ve become prevalent in southern Oklahoma. If you suspect these little monsters have inhabited your yard, you definitely want to take steps to get rid of them.
In the home, I can see how most people might few them as pests. But in all fairness, household ant invasions are largely the result our own doing, meaning they aren’t likely to stick around if food sources aren’t available (juice spills on countertops, grease on stovetops, ripe fruit sitting out, for example.)
If you’re compelled to get rid of ants, there are several effective products on the market, most of which contain some form of boric acid (Borax) or synthetic pyrethroid. Diatomaceous earth is an excellent organic alternative.
Mushrooms in the Lawn
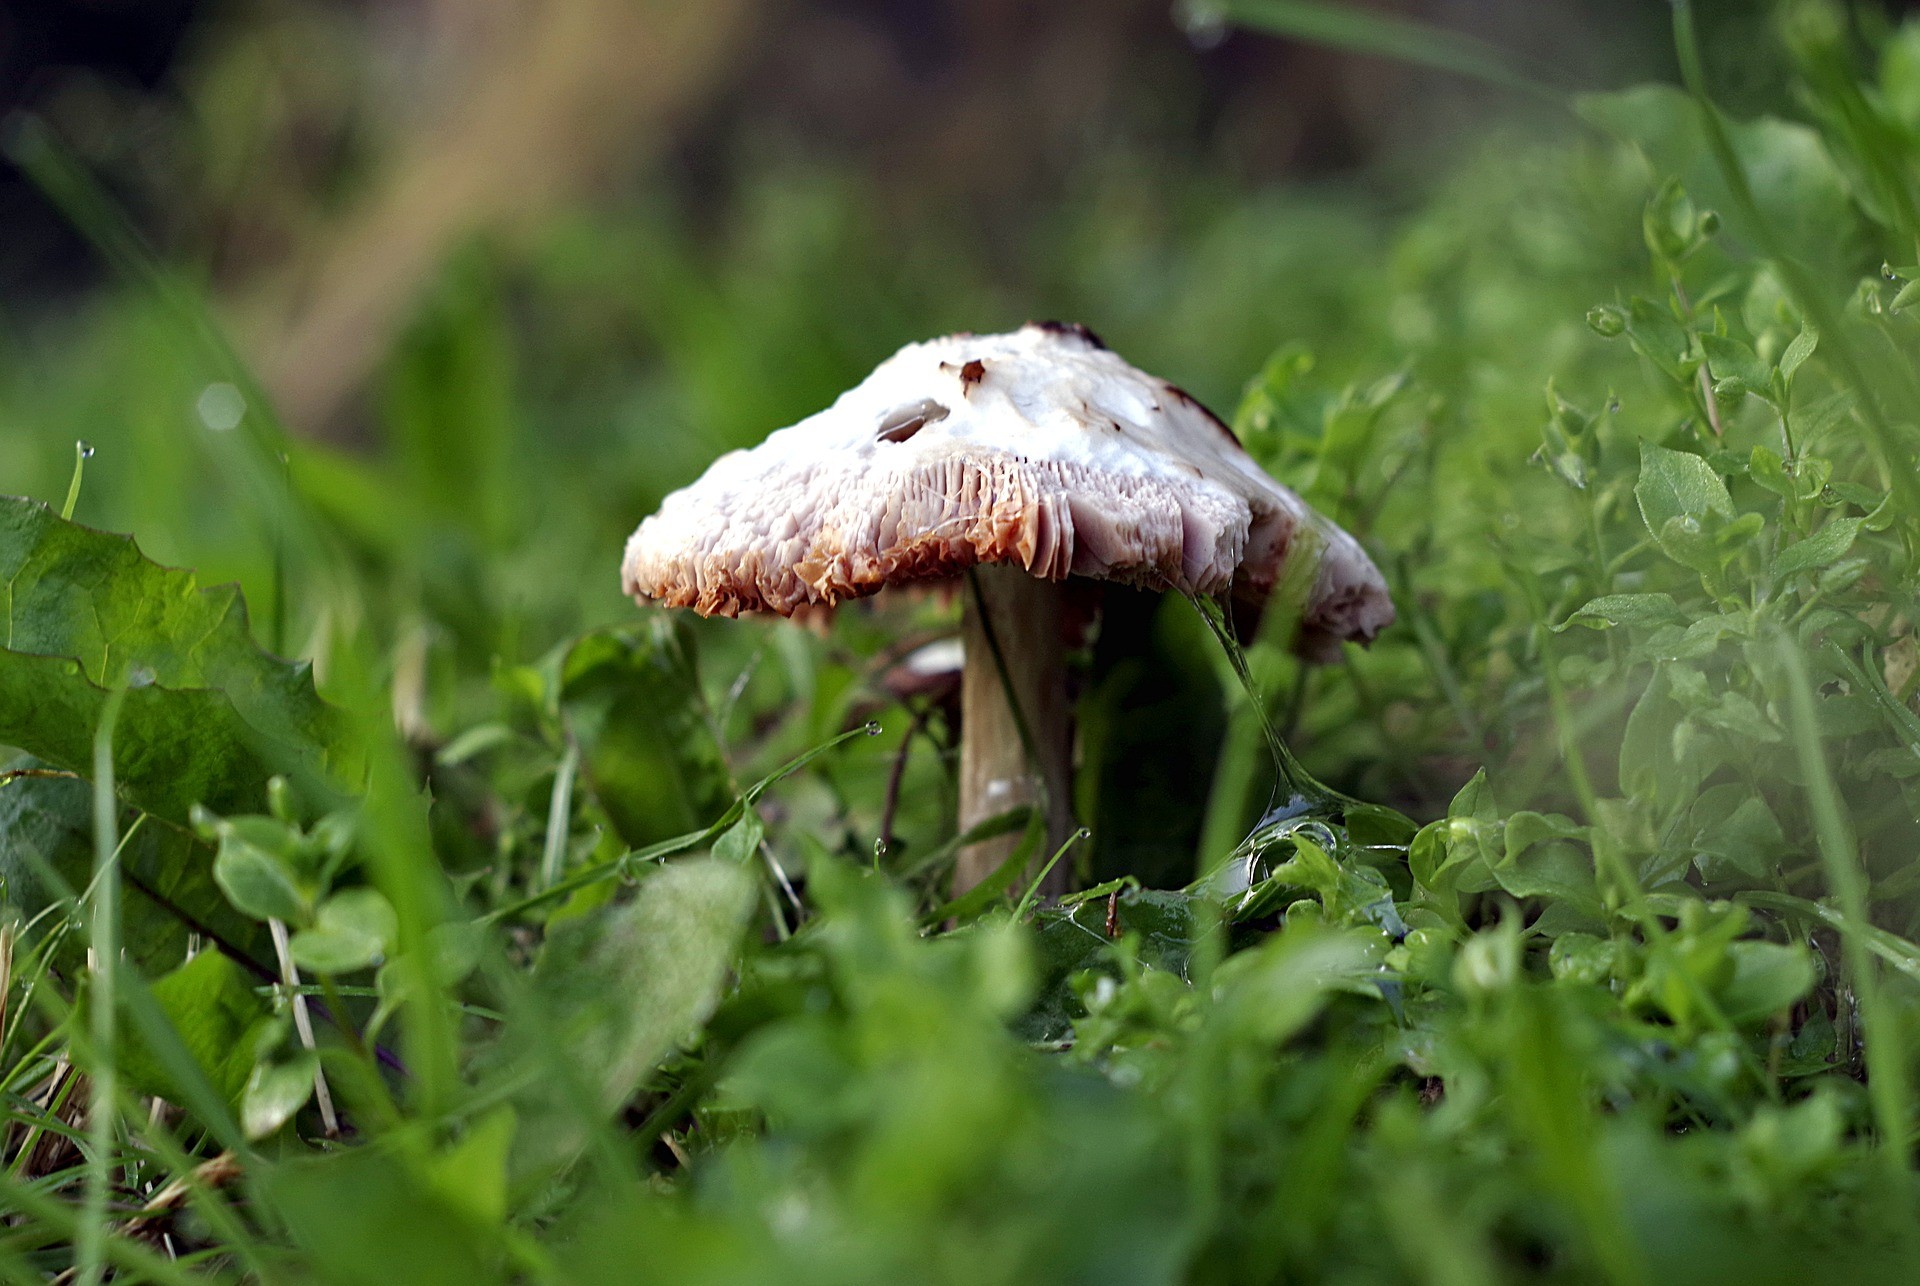
By Paul James
Mushrooms have been popping up in lawns all over town, and their presence causes many a homeowner to panic and wonder how best to destroy them – some sort of fungicidal spray or powder, or perhaps a pitching wedge? Well you might be surprised to learn that my approach to dealing with mushrooms in the lawn is much simpler.
That’s because I do absolutely nothing.
Truth is, I enjoy seeing the fruiting bodies of various fungi aboveground because it tells me that belowground their hyphae and mycelia (fungal roots, if you will) are busy feeding on and helping decompose little chunks of wood, old roots, and other organic matter and turning it into soil. And in the process, they’re releasing nutrients that feed the soil and plants. In other words, they’re part of a healthy soil ecosystem. Besides, fungicides absolutely will not control them, and a pitching wedge will likely do more harm to your grass than a million mushrooms ever could.
The presence of mushrooms in the lawn can tell you something about the condition of your soil, because most mushrooms prefer to grow in soils that don’t drain well. But even in soils that do drain well, excessive rainfall or overwatering can trigger their arrival.
There are a few destructive varieties of mushrooms, notably those that attack oak trees. The culprit is actually related to the shitake mushroom, but sadly once they show up at the base of a tree, there’s nothing that can be done to save the tree.
And of course there are poisonous mushrooms, though they’re rarely found in the lawn. Still, if you have young children or pets, it’s best to remove all mushrooms in the lawn just to be on the safe side.
Finally, unless you’re a trained mycologist or experienced amateur, you should never, ever eat the mushrooms growing in your lawn. Again, chances are the mushrooms in your lawn aren’t poisonous, but according to a friend who is a trained mycologist, most of them either have no taste at all or taste awful. And that’s reason enough not to eat them.
Mole Control

By Paul James
Been noticing a lot of mole tunnels popping up in your yard lately? That’s because a new generation of moles, born in April and May, has matured and is busy staking out new territory. The good news is that moles are very territorial, and rarely are there more than three in an entire acre, except perhaps during the late-winter mating season, so typically the average-size yard is harboring only one. The bad news of course is that even one can be a nuisance.
Fortunately, moles don’t eat plants (voles and gophers do, but that’s another story). Instead, they prefer a steady diet of primarily white grubs and earthworms, which they consume in huge quantities as they tunnel through lawns and gardens. It’s those tunnels – indicated by raised sections of dirt or grass — that announce their presence, although they occasionally leave behind above-ground mounds of dirt as well.
The tunnels you can see are known as runways, in which moles feed and use as pathways to deeper tunnels and their lairs. They may use the runways for several days so long as food is present, or they might abandon them after only one day of digging if food isn’t present, only to immediately create another.
So just how do you go about controlling moles? Well you could do nothing, and embrace the mole’s presence, knowing that he or she is gobbling up the grubs that might ultimately become Japanese beetles and attack your roses, and aerating the soil in the process.
You could try repellents, nearly all of which contain castor oil and do a pretty good job of moving moles elsewhere assuming you follow the label instructions to the letter and reapply after heavy rains. I’ve actually had excellent results with repellents.
You could use harpoon-style traps, which if placed properly can be highly effective, if not a tad gruesome.
You could hire an exterminator. They don’t come cheap, and some don’t even guarantee that they’ll be successful, but folks in my neighborhood who’ve relied on their services have been pleased with the results.
You could try poisons, but realize that moles aren’t likely to eat anything that doesn’t resemble a grub or earthworm, so poisons that control mice and other critters won’t work. Even the poison “worms” are only marginally effective at best, because moles can tell the difference between real and fake worms.
And finally, you consider any number of different home remedies, from stuffing tunnels with dog or cat hair to flooding the tunnels to using Juicy Fruit gum (which the moles are said to eat, but are unable to digest). Just keep in mind that the effectiveness of these approaches is purely anecdotal, with no basis whatsoever in science.
Homegrown Tomatoes
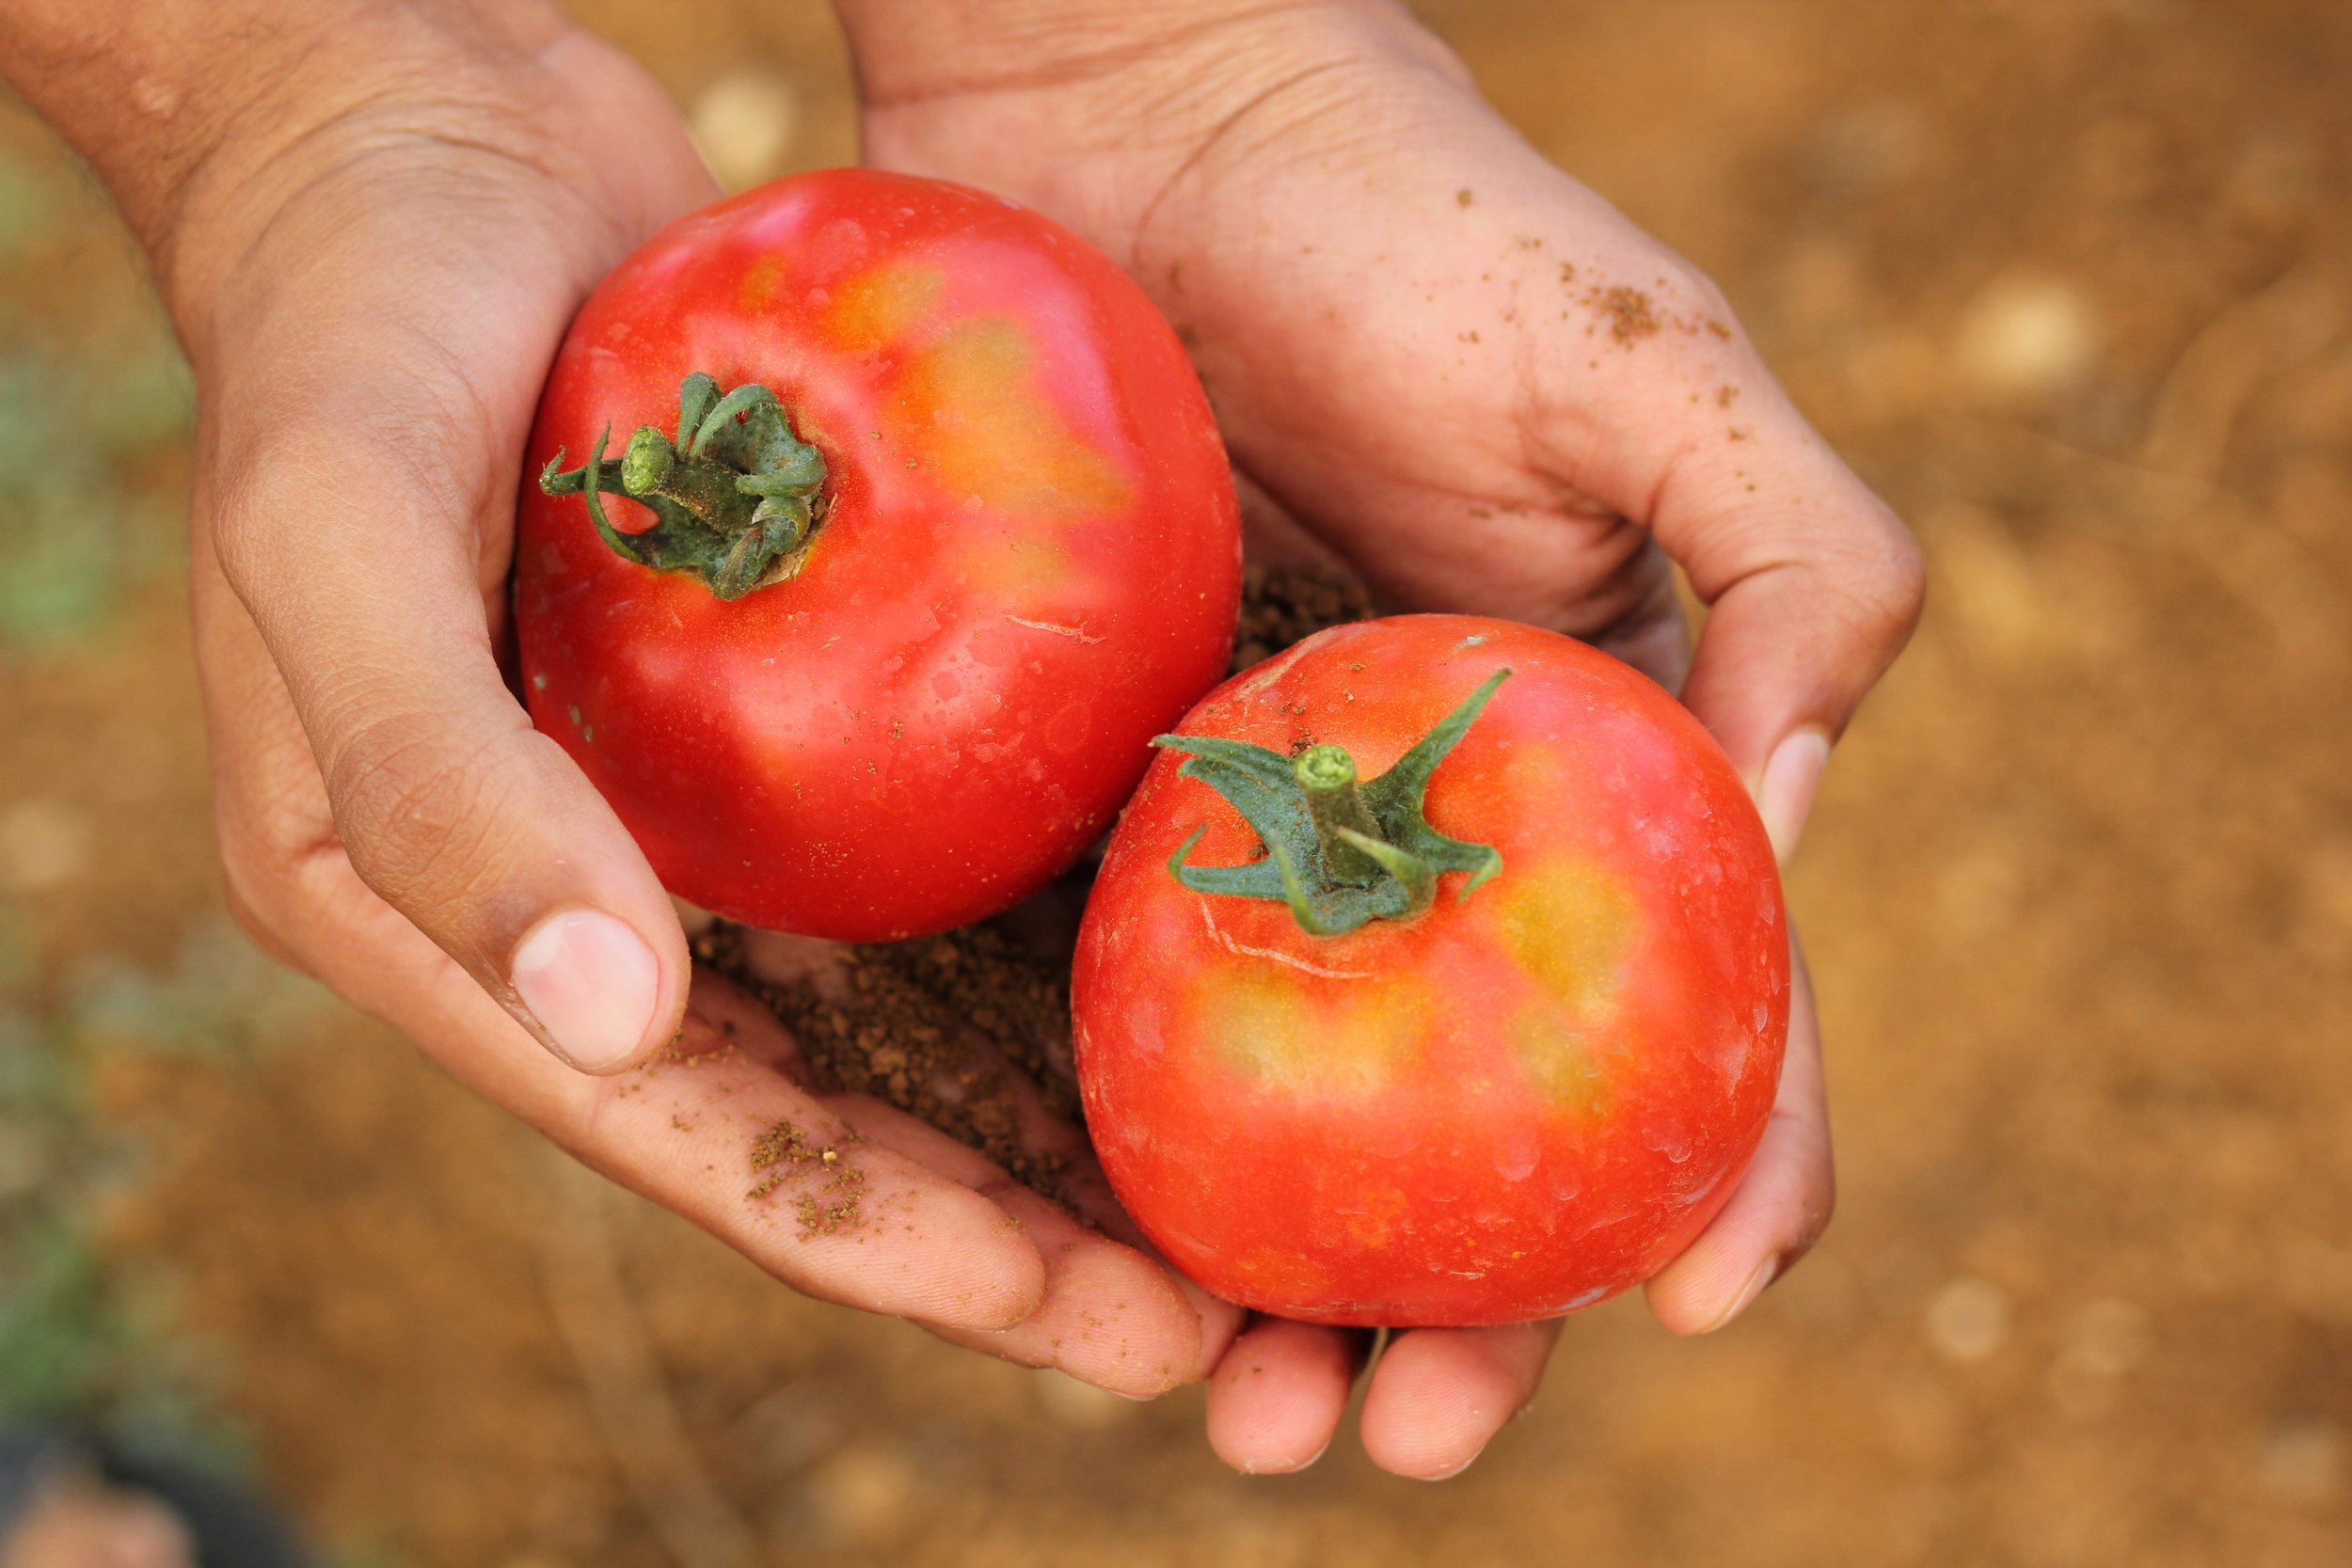
By Paul James
“Only two things money can’t buy. That’s true love, and homegrown tomatoes.” So said the late, great singer/songwriter Guy Clark in his 1983 ode to America’s most popular backyard crop titled, appropriately enough, “Homegrown Tomatoes.” No doubt most of us would agree with him, but getting a good harvest of homegrown tomatoes can be tricky.
After all, tomatoes are vulnerable to a number of diseases, including bacteria, fungi, and viruses. Some diseases prefer cool spring temperatures while others prefer the heat of summer, which means the plants are vulnerable to attack throughout the growing season. And all can be rather nasty and difficult to control. Insects can wreak havoc on tomatoes as well, although they’re generally easier to control than diseases assuming you act before the pest population gets out of control. And there are other issues such as blossom-end rot and cat facing and sunscald, just to name a few.
But for many gardeners, including me, the greatest threats to homegrown tomatoes are squirrels and birds, both of which have the uncanny ability to attack the ripening fruit the day before we intend to harvest.
And yet, despite what seems to be a doomed-to-fail scenario, we continue to grow tomatoes year after year because the lure of getting at least one tasty treat is as powerful as our quest for true love. Or the perfect BLT.
If your tomatoes have fared well so far this year, good for you. Keep in mind, however, that as daytime temperatures exceed 90 and overnight temps remain in the mid 70s, your plants may stop setting fruit. That’s a normal response, and there’s not much you can do about it. The condition tends to affect heirlooms more than hybrids, but in both cases the situation will reverse itself once temperatures moderate. And if temperatures remain mild from late summer to fall, the fruit that develops will have time to ripen.
In the meantime, be on the lookout for pests and diseases, consider fertilizing your plants to replace the nutrients lost in fruit production, water frequently — deep soaking the plants each time while keeping the foliage dry — and mulch heavily. And as you do all that, think of these two lines from the same Guy Clark song.
“Plant ’em in the spring eat ’em in the summer.
All winter without ’em’s a culinary bummer.”
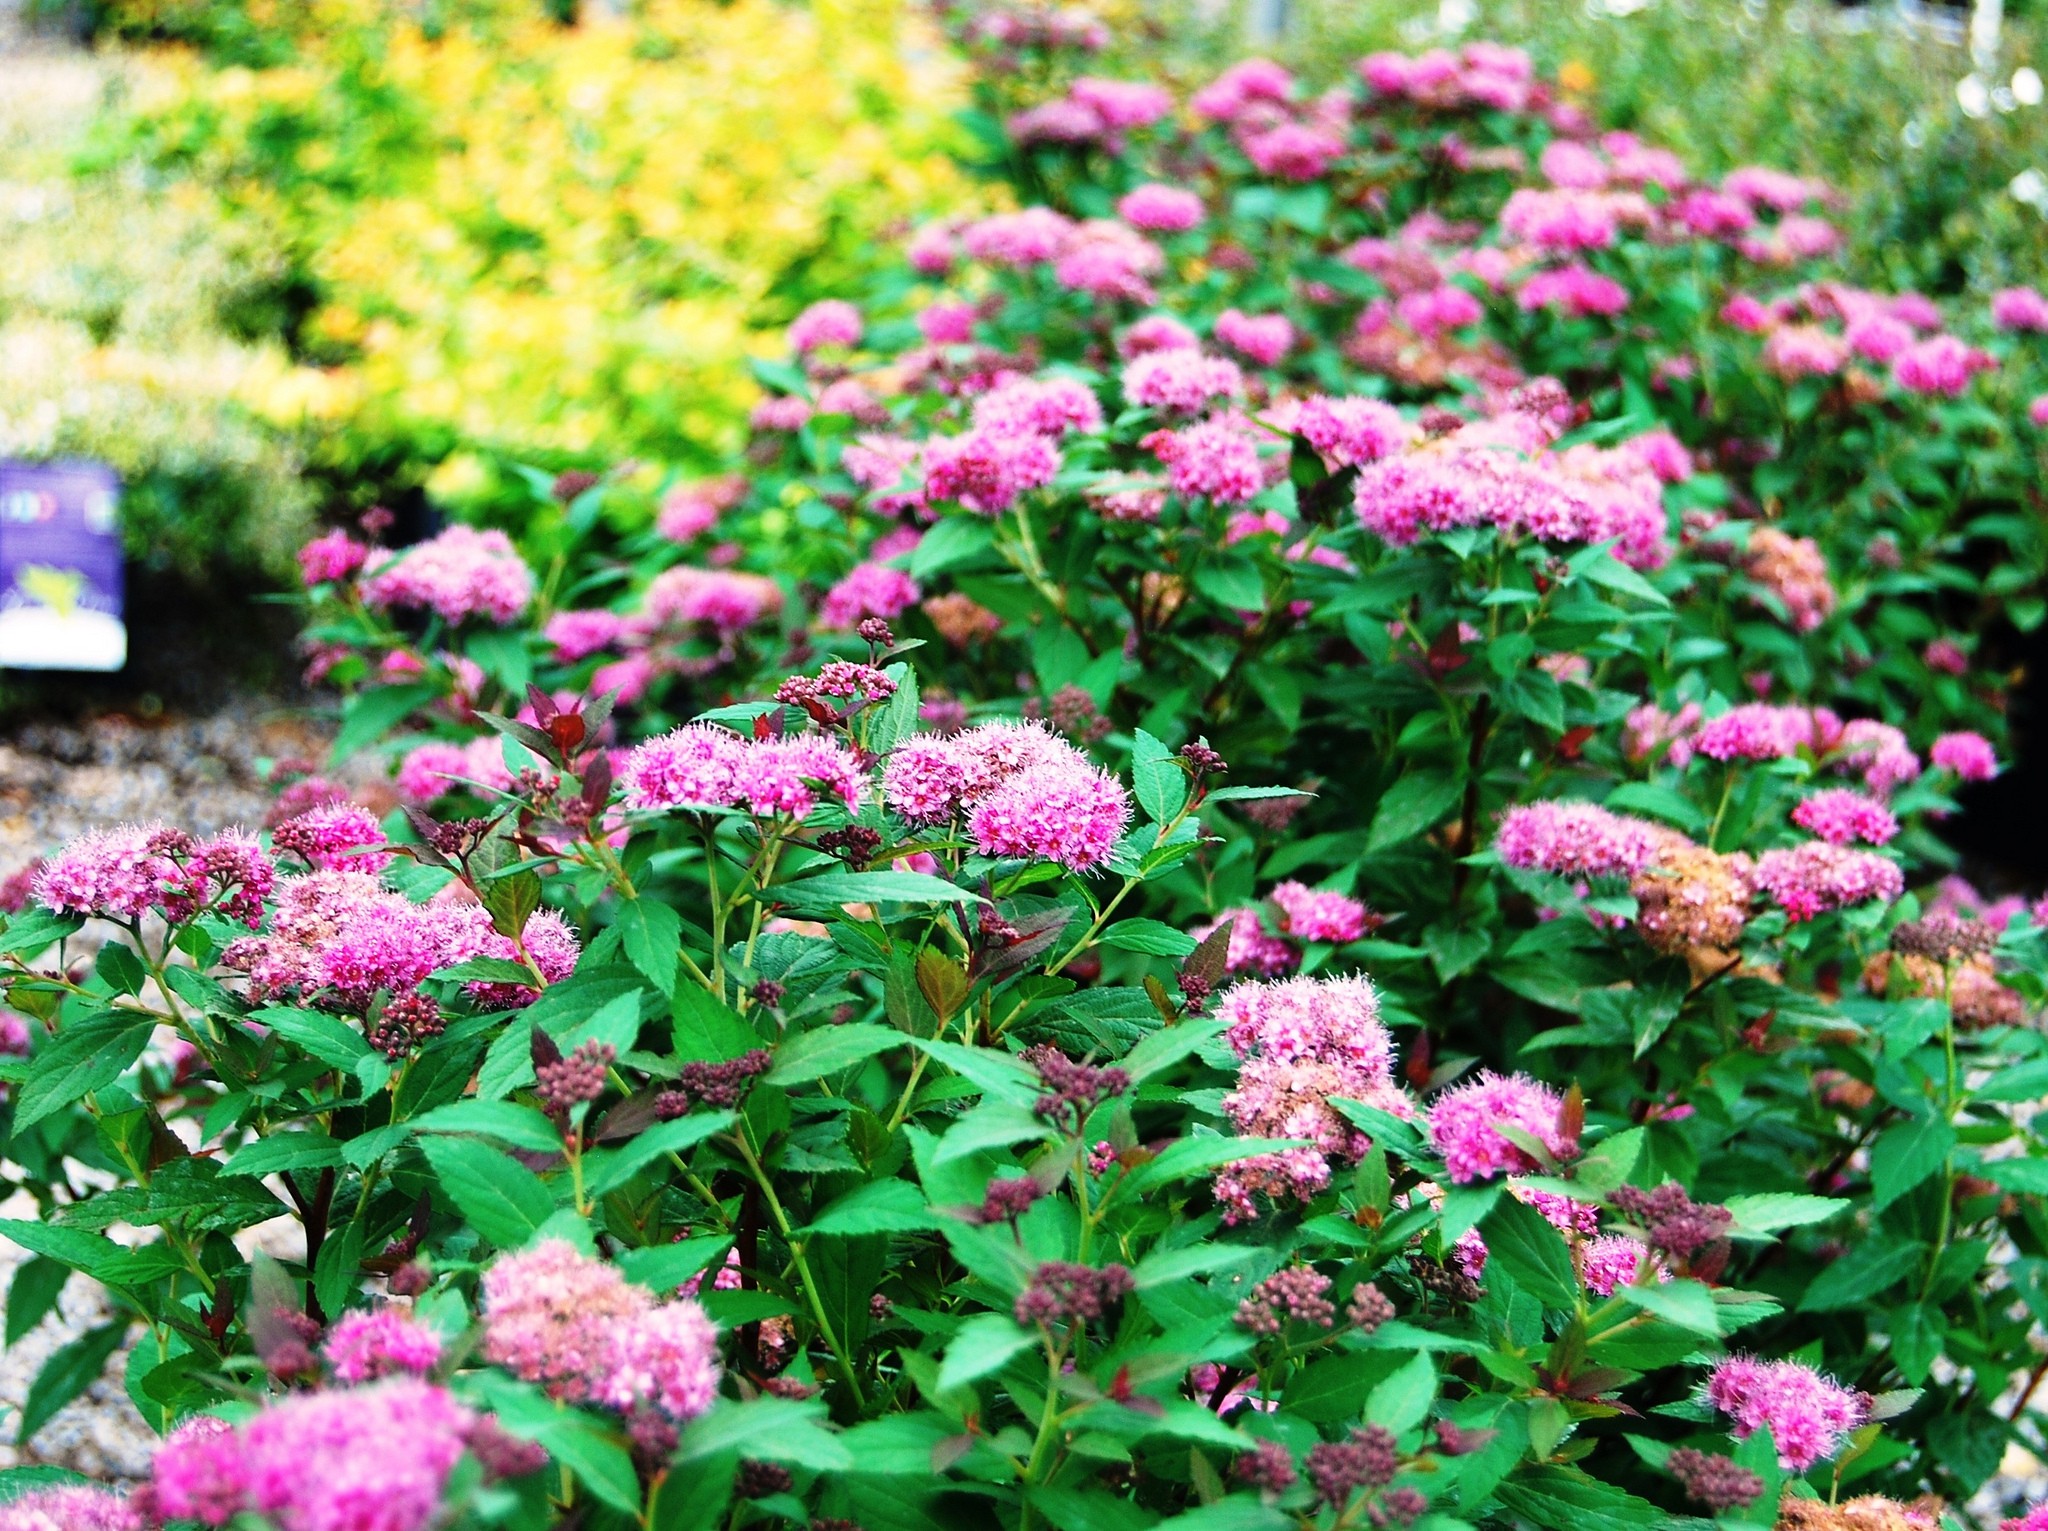
Summer-Blooming Shrubs
By Paul James
Shrubs rarely get the attention they deserve, and yet they tend to be among the most carefree plants in the landscape. Those that bloom in spring – azaleas and hydrangeas in particular – do briefly bask in the glory while in bloom, but it’s the summer bloomers that I find more rewarding, largely because their bloom period lasts so long. Aside from the obvious – crape myrtles and roses – here are some of my favorite summer-blooming shrubs.
Abelia: There was a time when there was only one Abelia on the market. Thankfully, that’s no longer the case. There are now over a dozen cultivars of this beautiful evergreen summer bloomer, and two in particular – ‘Rose Creek’ and ‘Kaleidoscope’ – are hard to beat. Rose Creek grows to about three-feet tall and wide, has dense green foliage and produces a profusion of white flowers. Kaleidoscope is a variegated variety that’s a tad smaller. It too produces white flowers.
Althea: Better known as Rose of Sharon, this deciduous shrub is as tough as it is beautiful, and its okra-like flowers (it’s actually related to okra) appear non-stop from summer to fall. Flowers are available in a variety of colors, including white, pink, red, violet, and blue. Most will grow to at least eight-feet tall, although dwarf cultivars are available.
Butterfly Bush: These are the most popular butterfly attractors on the market. But even if that weren’t the case, they’d be worth growing for their gorgeous colorful flowers that linger into fall. Plant in full sun, and prune back hard in early spring.
Chaste Tree: I know, I’ve mentioned this shrub in the genus Vitex quite a few times, but that’s only because I adore it. It blooms throughout the summer, and it’s pretty much always covered with bees, bumblebees, butterflies, and moths. And the best news of all? You can get a dwarf variety called ‘Blue Puffball’ that only tops out at three, maybe four feet.
Desert Willow: Blooming from spring through summer with large, orchid-like flowers, this drought-tolerant beauty makes a great specimen. Yes, it can get rather large for a shrub, as in 20-feet tall, but something so beautiful deserves to get big, don’t you think? And by the way, the Desert Willow isn’t a willow at all.
Oak Leaf Hydrangea: Okay, so here’s another shrub I brag about often, but so does just about everyone I know who grows it. Seriously, this is a hydrangea that tolerates sun, produces jaw-dropping white flowers, and is about as easy to grow as crabgrass. Oh yeah, and its fall color is pretty nice, too.
Spirea: Two of the best summer-blooming Spirea are ‘Neon Flash’ and ‘Magic Carpet,’ and you can’t go wrong with either. The former produces neon-red flowers, while the latter boasts rosy-pink blooms. Both are deciduous and grow to about three-feet tall and wide.
Early Summer Things To Do
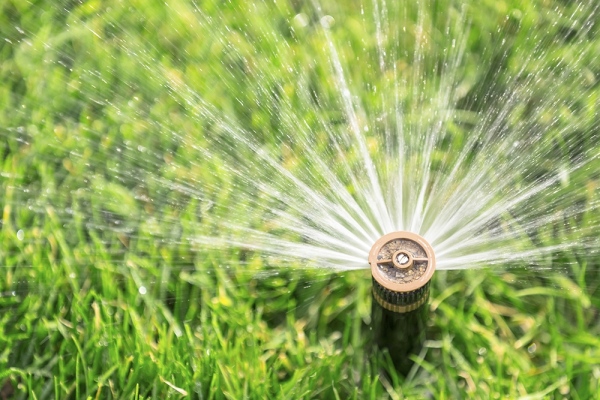
By Paul James
Not sure what you should be doing in the landscape now that summer has officially arrived? Here’s a list of things to consider, all of which will help insure that your lawn and gardens continue to look their best in the months to come.
In the lawn, the most important thing you can do is increase the deck height of your mower by at least one notch. Doing so will promote deeper root growth, keep the soil cooler, and prevent sunlight from reaching dormant weed seeds. Use a mulching mower to return the nutrients in grass clippings back to the soil. And when you mow, try not to remove more than one-third of the leaf blades to reduce stress on the grass.
Continue planting annuals and perennials. Just because it’s getting hotter doesn’t mean you should stop planting. On the contrary, most flowering plants popular in this area are popular because they thrive in the heat. After planting, apply a thick layer of mulch (at least two-inches deep) and water well and often to promote rapid root growth.
Speaking of rapid root growth, there are a number of trees and shrubs whose roots grow best in warm soils, especially Crape Myrtle, Vitex (Chaste Tree), and Desert Willow, just to name a few.
In the veggie garden, consider sowing from seed a second crop of beans, corn, cucumbers, squash, and melons. All are warm-season crops that can take the heat. Keep an eye out for bugs, especially on the undersides of leaves. Use products containing spinosad to control most garden pests. It’s all natural and extremely effective. Apply a thick layer of mulch to tomato plants to lessen the likelihood of blossom-end rot on developing fruits.
Light pruning this time of year is perfectly acceptable, especially if your goal is to reduce the overall size of trees and shrubs or to thin out interior branches. Fruit trees in particular benefit from summer pruning.
And finally, water everything routinely. Container plants, veggies and herbs, and newly planted plants may need to be watered every day. Turf grasses and most ornamental plants need at least one inch of water every week. And trees and shrubs should be deep soaked every week as well.
The Heat is On!
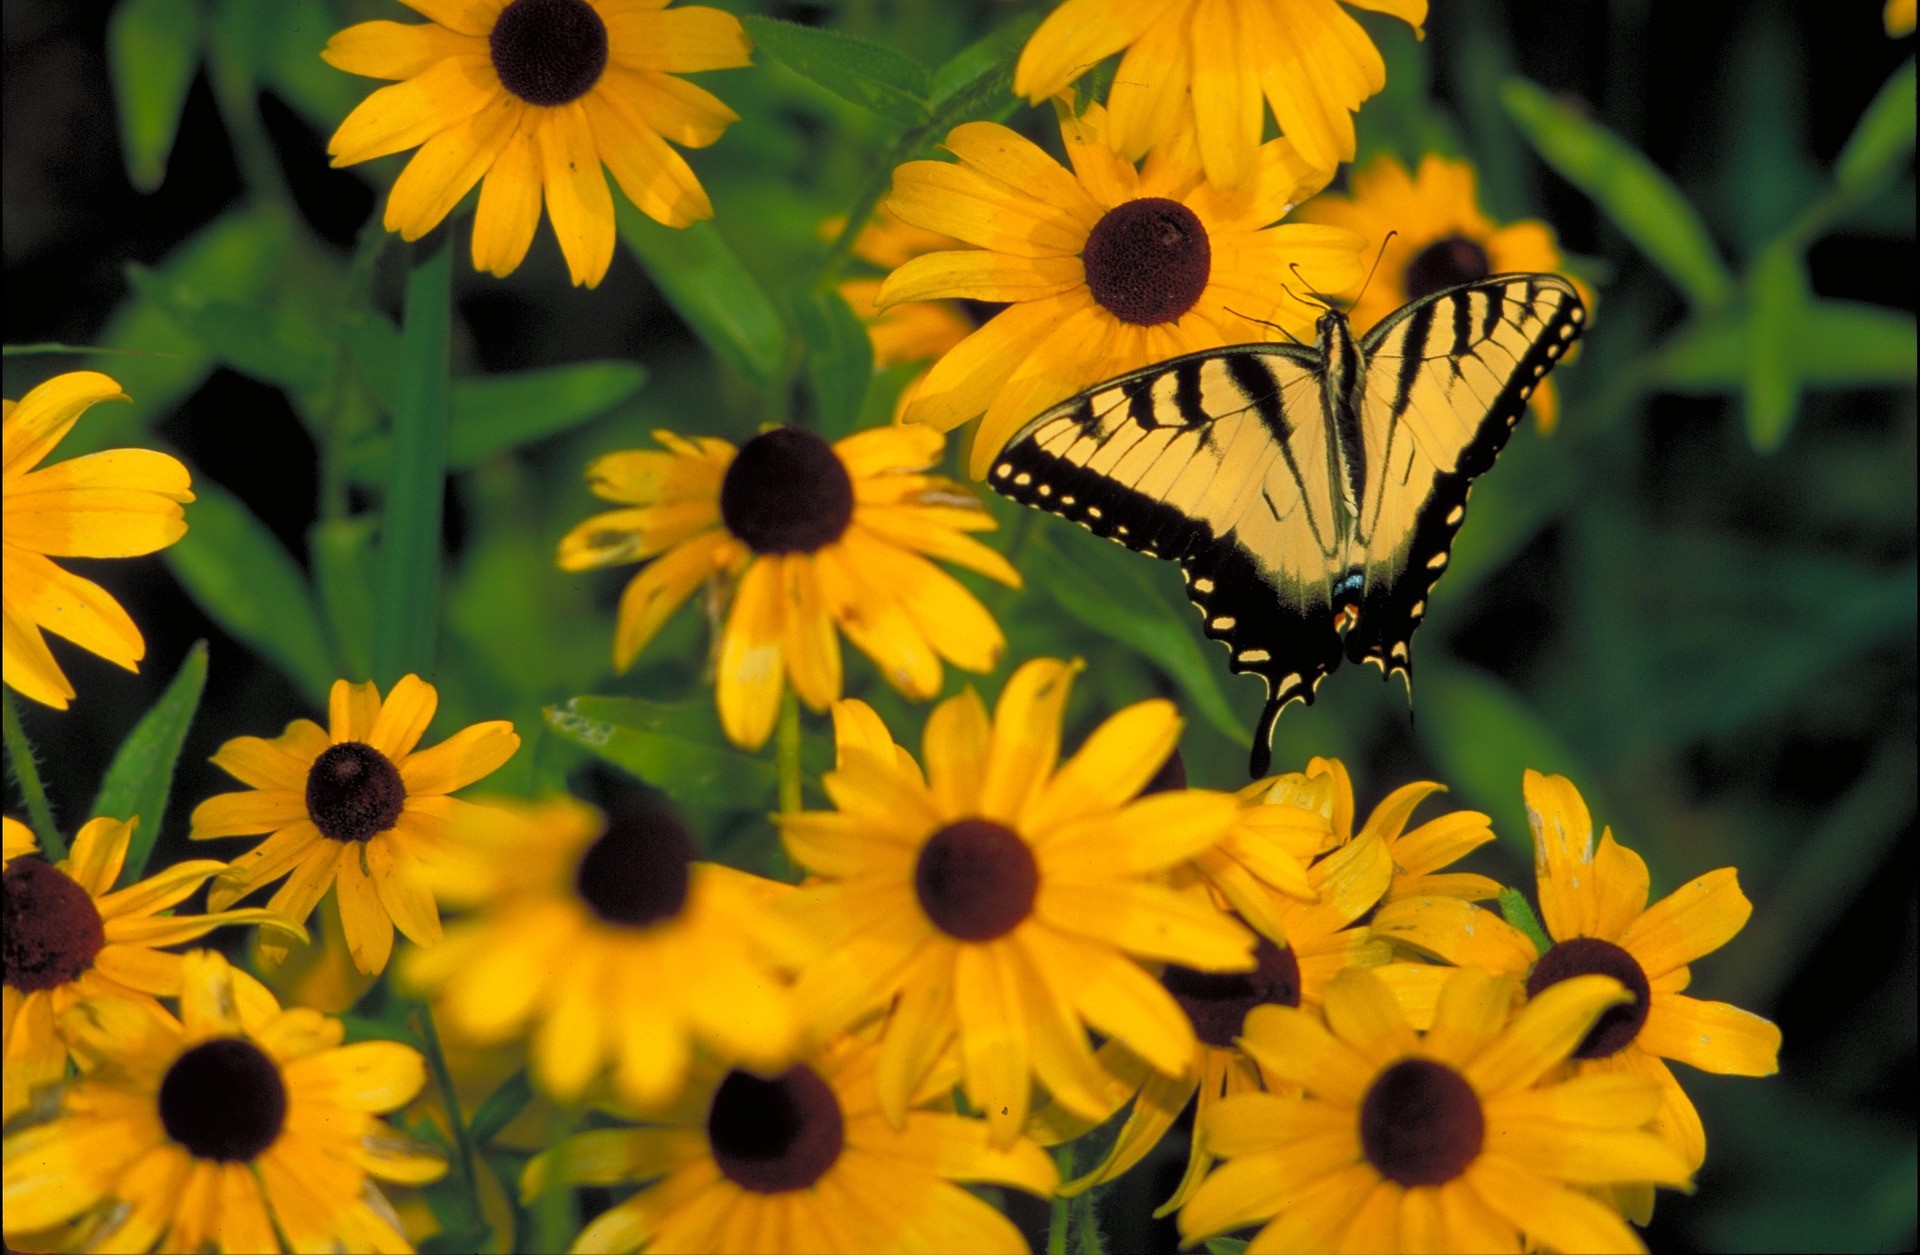
By Paul James
In just about every landscape, there’s a sunny spot that’s not just hot, but crazy, insane, over-the-top hot. It might be an area adjacent to a sidewalk or driveway or concrete patio. It might be near a light-colored brick or stucco wall. It might be in a bed that’s mulched with stone. Regardless, spots like that require plants that can take not only full blazing sun but intense reflective heat as well. And thankfully, quite a few plants fit the bill.
Annuals
Nearly all popular annuals used for seasonal color can take the heat, including Marigolds, Petunias, Vinca, and Zinnias. But two in particular stand out: Lantana and Portulaca. They’ll thrive in the most unforgiving heat imaginable, and both come in several color choices. What’s more, both are great in the ground or in containers.
Perennials
Among perennials, my top picks for the heat are Black-Eyed Susan, Daylilies, Hardy Hibiscus, Ice Plant, Salvia (especially the Salvia greggii selections) and any and all Sedums. They’re all tough as nails, and beautiful to boot.
Shrubs
When it comes to heat tolerance, you can’t go wrong with Althea (Rose of Sharon), Barberry, Crape Myrtle, Spirea, and Vitex. They all welcome the heat with open arms (or branches). Althea and Vitex are especially tolerant of intense heat, and both attract pollinators.
In addition to be able to withstand the heat, these plants look great when combined, which means you can have a beautiful mix of sizes, colors, and textures even in the most inhospitable spot in your landscape. Do keep in mind, however, that while these plants can take the heat, they still need to be watered once a week or so during the summer months. Beyond that, however, they don’t require much care, which means you’ll have more time for fun in the sun.
The Trademark Tree of Tulsa
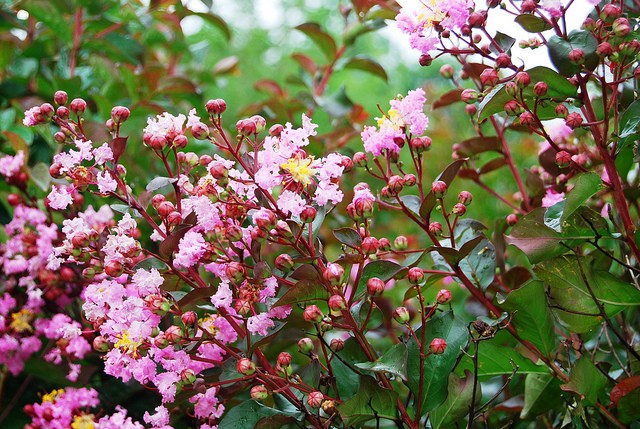
By Paul James
With all due respect to our state tree — the redbud — I think the crape myrtle defines Tulsa and its environs better than any other tree. That’s not to say it’s my favorite tree, because it isn’t, but it’s certainly among my favorites, and it vaults to the top of the list when it’s ablaze in summer blooms.
I remember a time when essentially all crape myrtles on the market were destined to grow at least 15-feet tall, the choices in terms of flower color were limited, and the leaf color was pretty much the same no matter which variety you chose.
All that’s changed. Leaf colors are now available in reddish to purple to almost black, and although the basic colors haven’t changed, the range of hues certainly has.
But the greatest thing about crape myrtles these days, as opposed to just a decade or so ago, is that there are so many sizes available, from less than two-footers to over 20-footers, and just about everything in between. And in addition to the familiar tree forms, there are some awesome shrub forms as well. In other words, there’s a spot somewhere in your garden for a crape myrtle, assuming it gets plenty of sun.
And just in case you’re wondering what is my favorite tree, it’s the Ginkgo. Except when crape myrtles are in full bloom.
Ten Terrific Tropicals
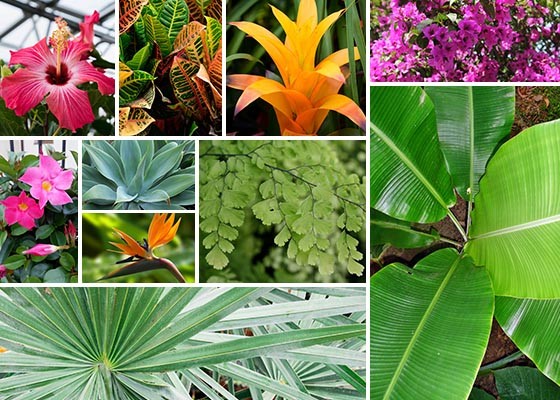
By Paul James
I’ve been growing tropical plants in containers for decades, and this year is no exception. Yes, I know they likely won’t survive past October. And no, I don’t attempt to overwinter them indoors as I once did on a grand scale. But no matter. I love the way they look, and that’s reason enough to plant them.
Here’s a rundown of my favorites, any and all of which love the weather here in summer, and will do wonders to liven up the pool, porch, or patio for several months to come.
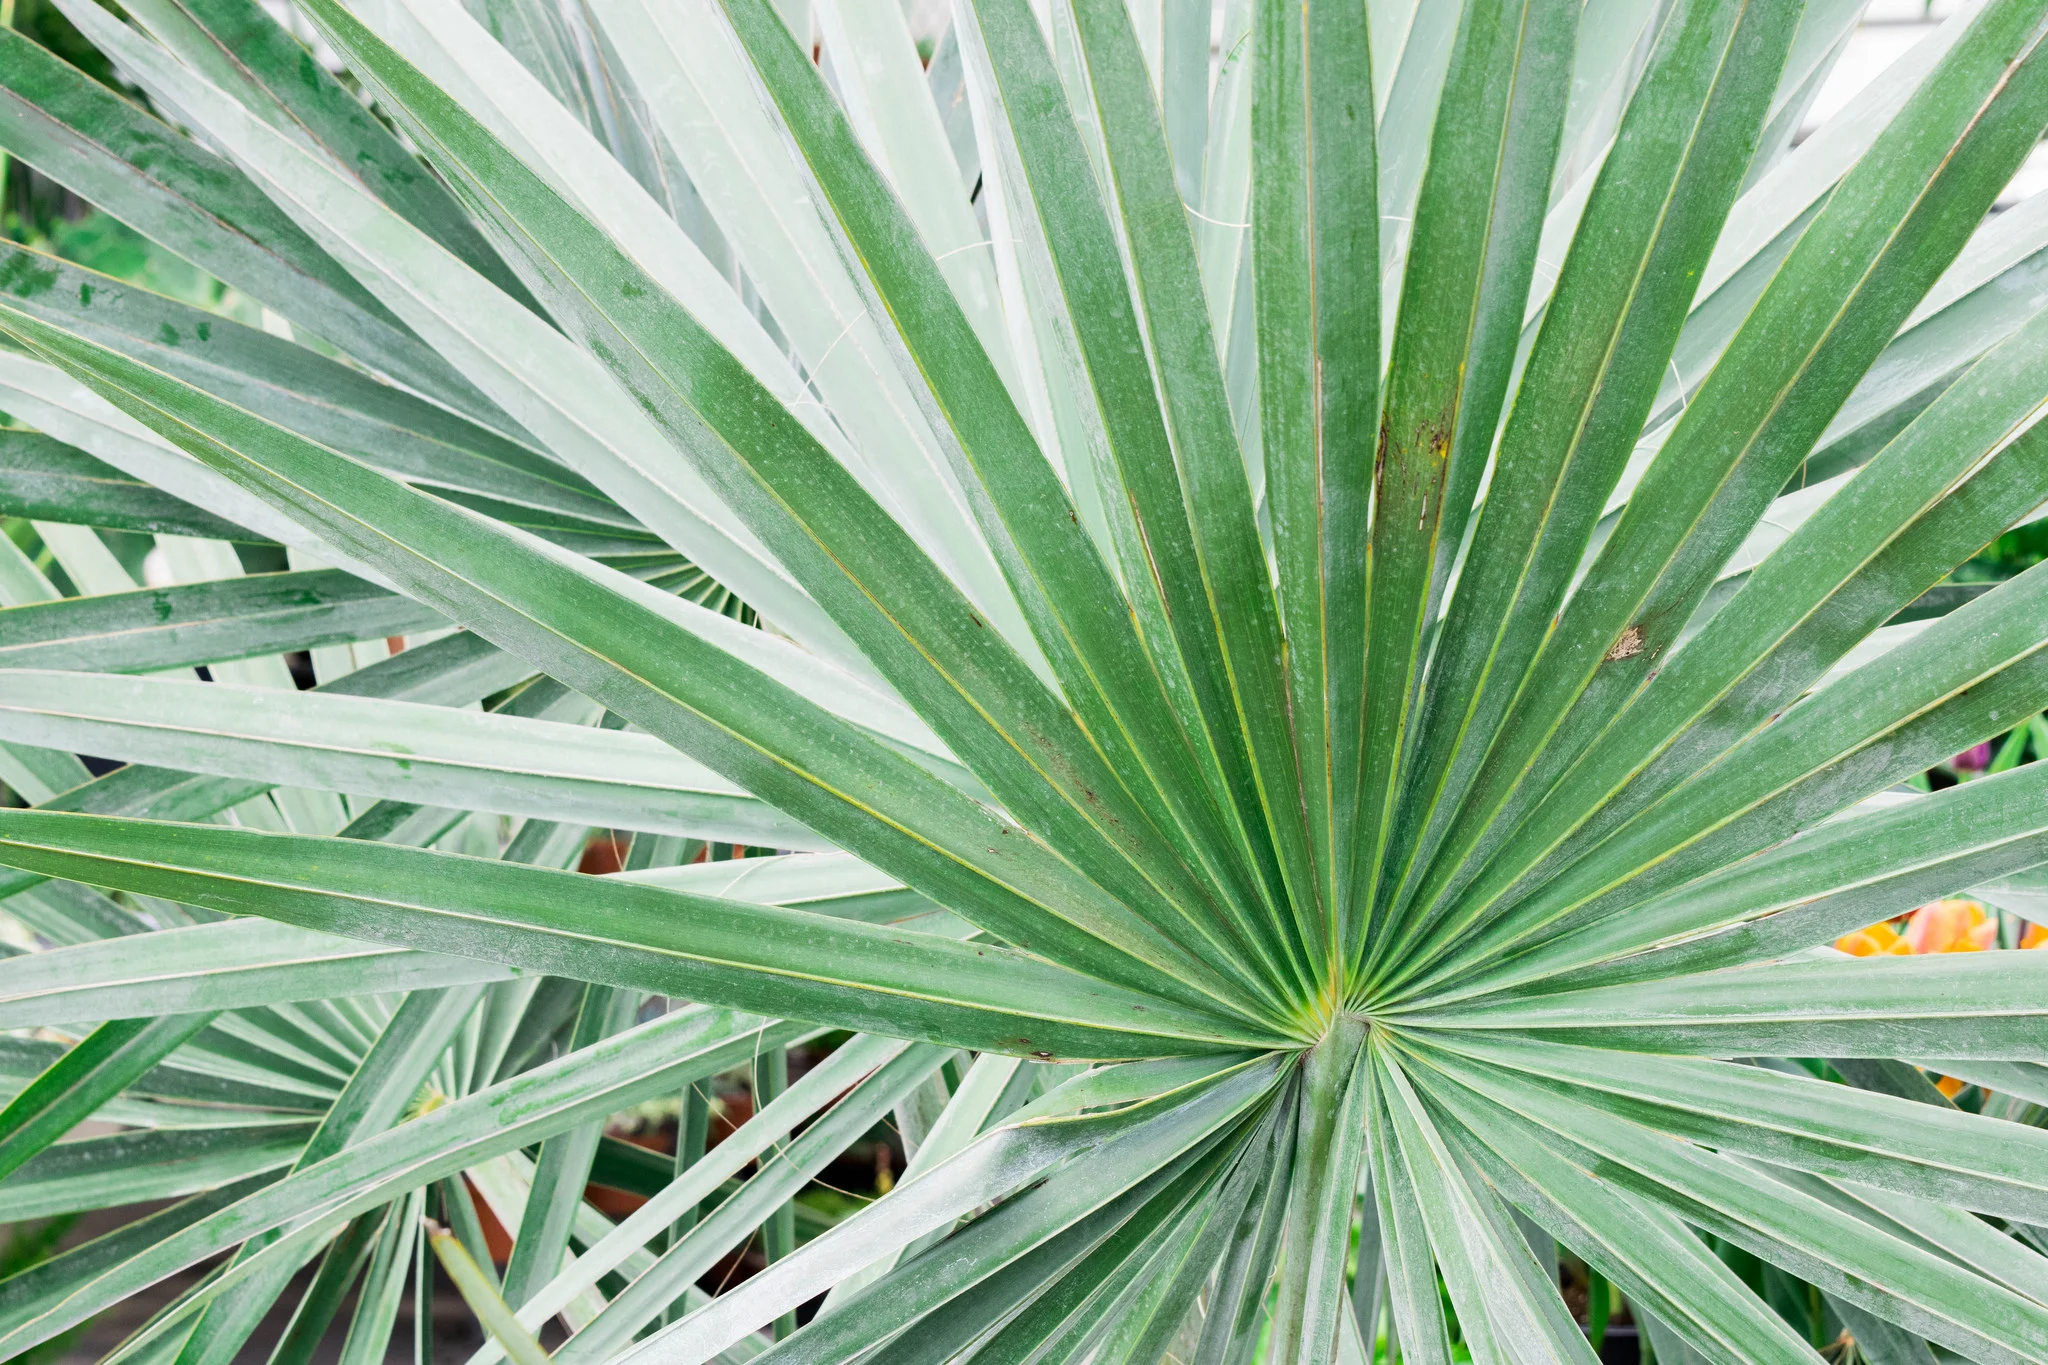


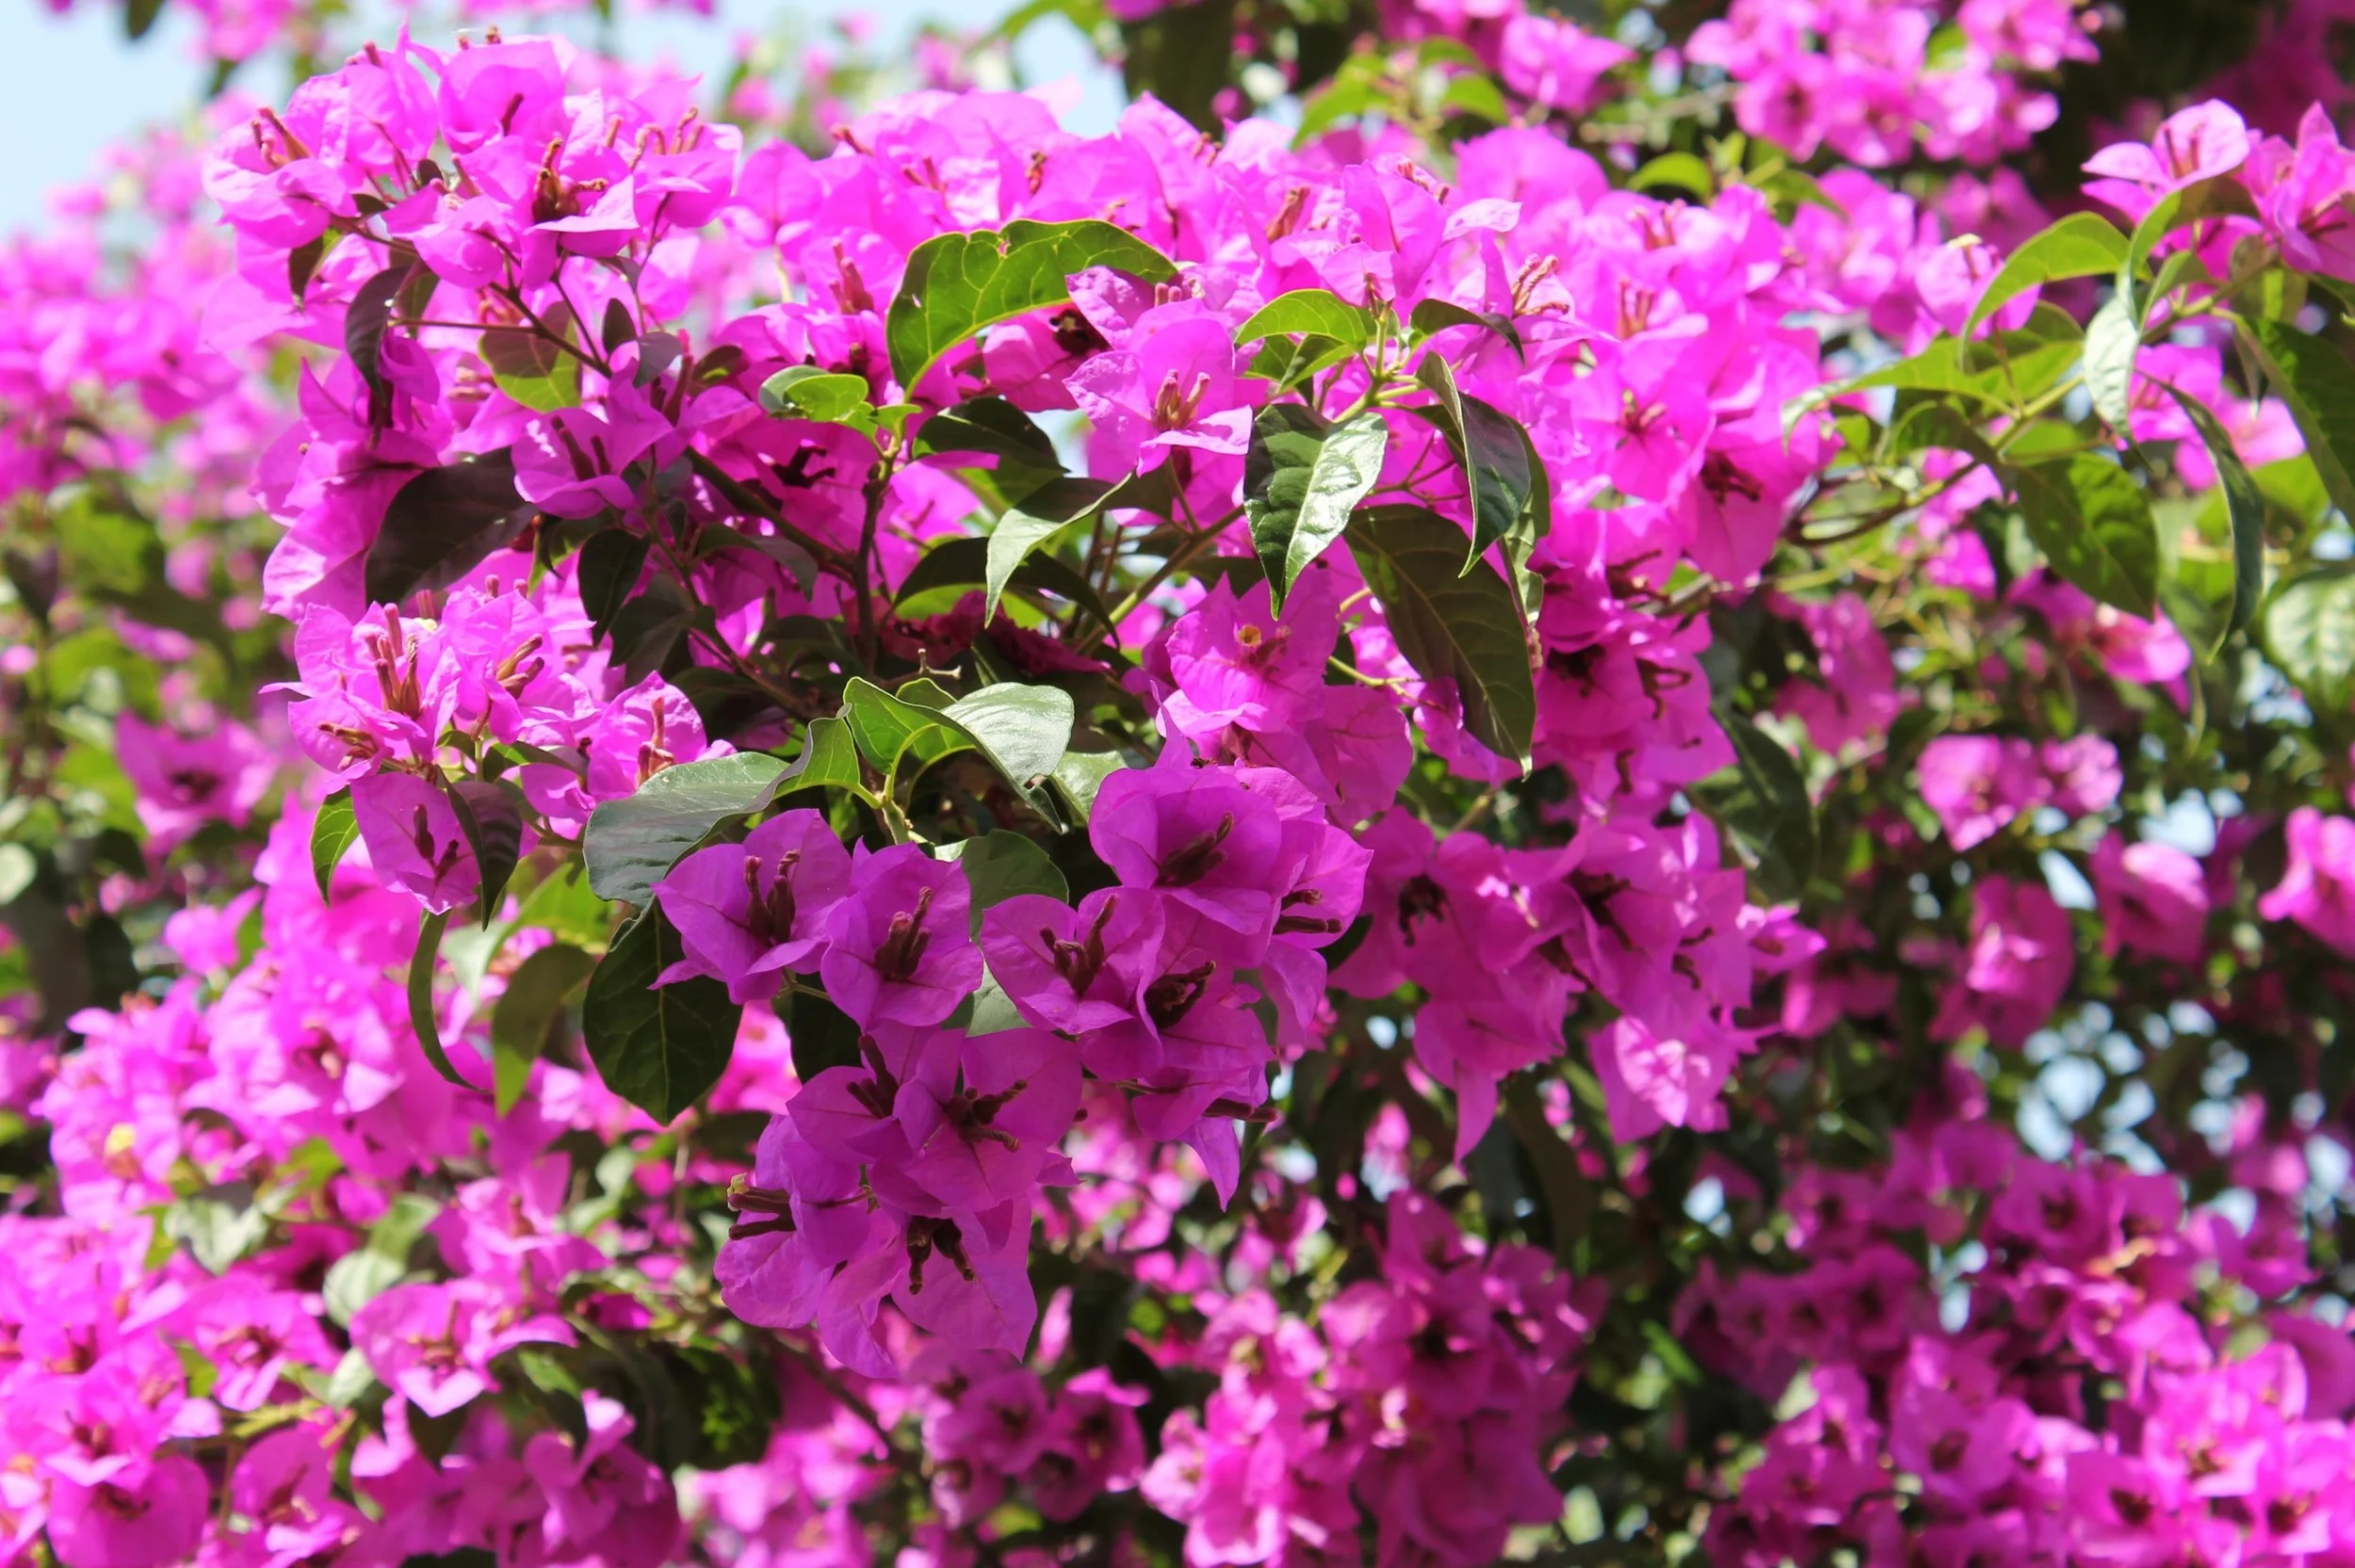

And BTW – these plants don’t have to be grown in containers. You can plant them in the ground as well, and create a cool tropical oasis in your own backyard.
Mosquito Alert!
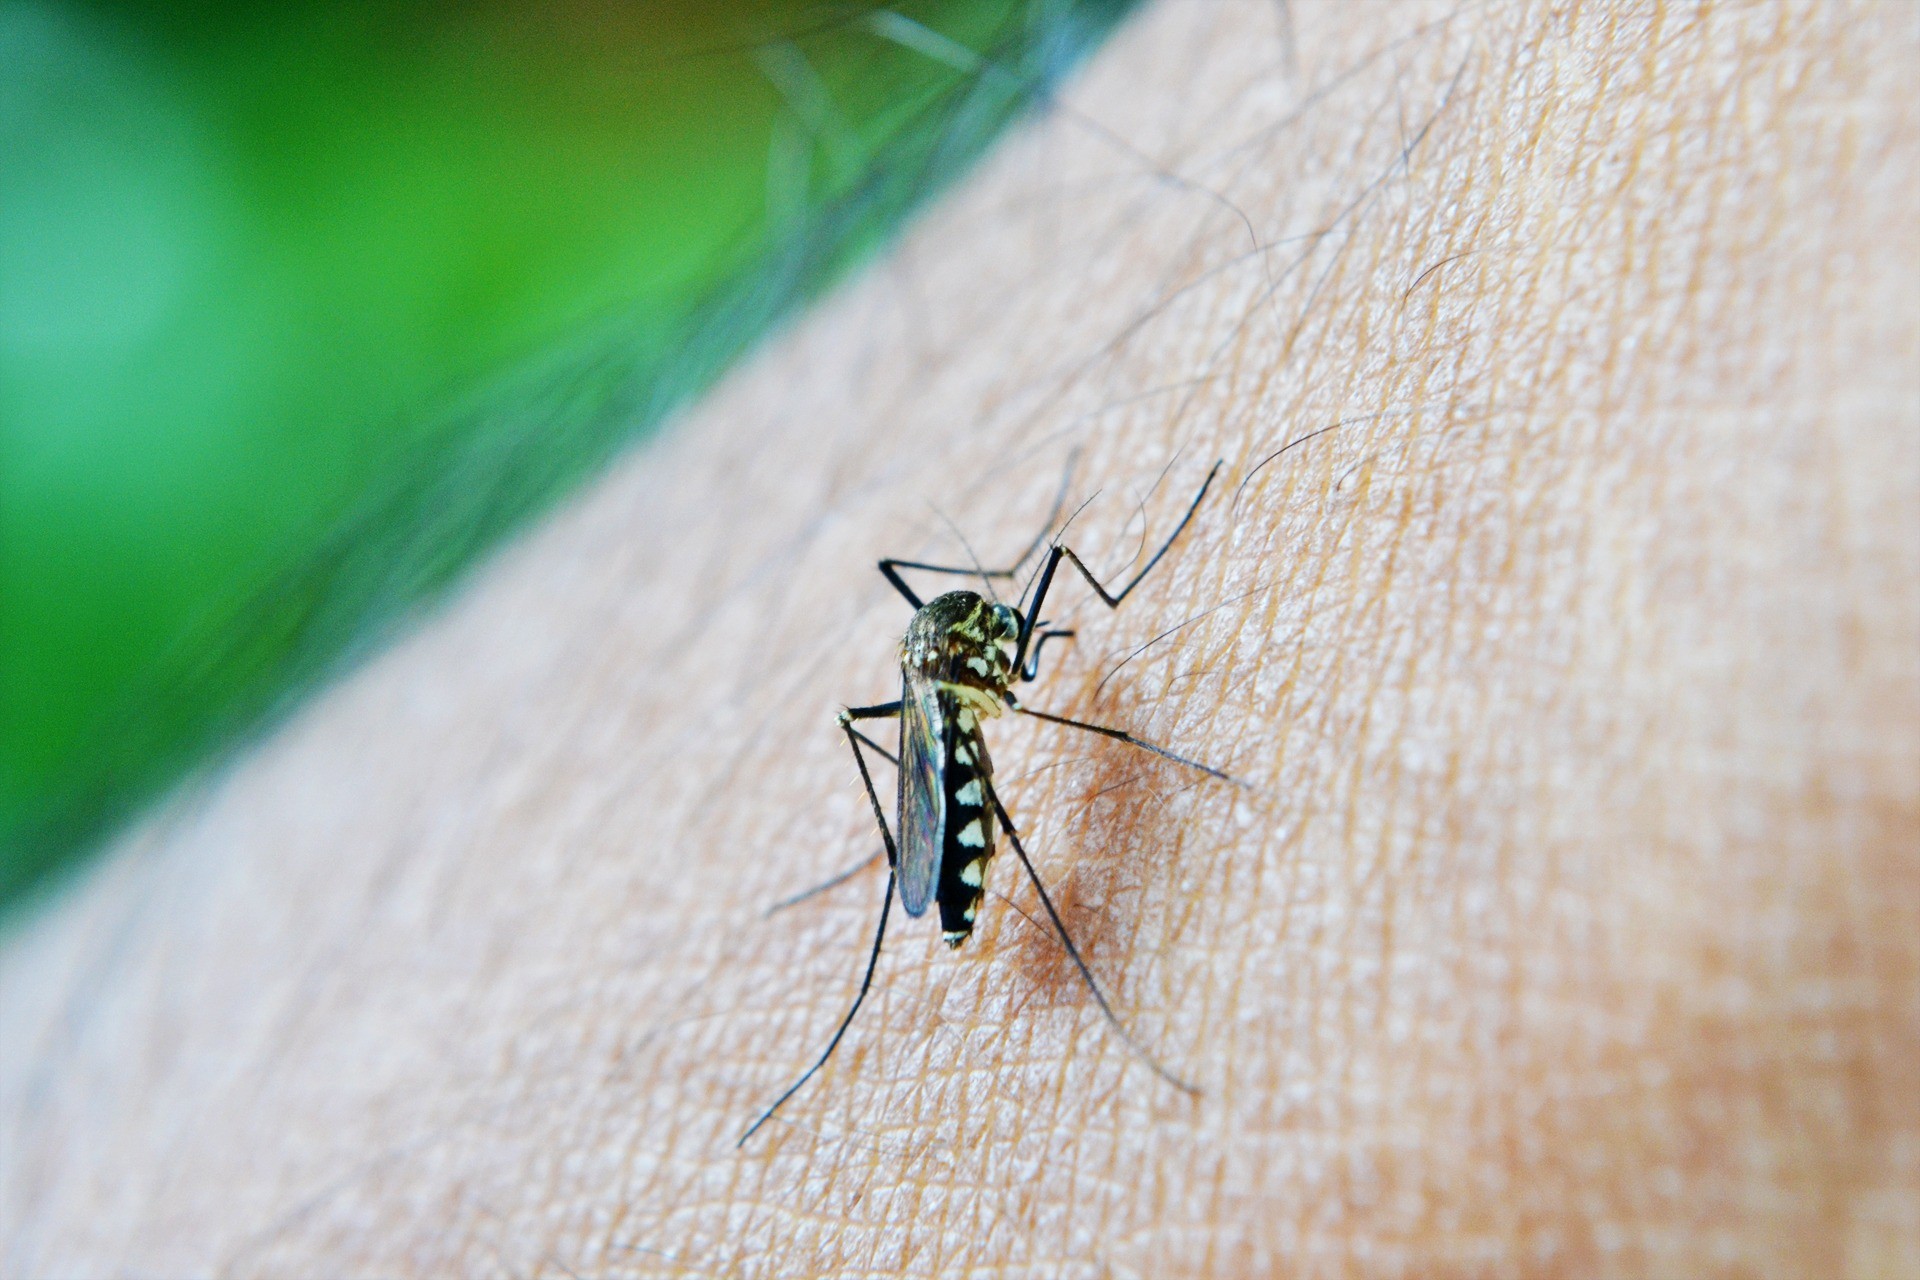
By Paul James
A small percentage of people on the planet don’t get mosquito bites. I’m one of them. My daughter in law and granddaughter, on the other hand, can be sitting right next to me on the patio and get two dozen bites in five minutes. So what gives? And what can they do to protect themselves?
First, the what gives. Turns out mosquitoes don’t like the way I smell, and according to microbiologists who study such things, that’s due to a particular scent emitted by the trillion or so bacteria that inhabit my skin. (And for the record, most people think I smell just fine, thank you. At least most of the time.)
But the bacteria that live on my daughter’s and granddaughter’s skin emit an odor that’s apparently and unfortunately attractive to mosquitoes, which explains why they’re both basically mosquito magnets. And by the way, there’s nothing they can do to change that.
So now let’s talk protection. First and foremost, you have to eliminate the habitat mosquitoes love, and that’s standing water – in plant saucers, in wheelbarrows, in clogged or sagging gutters, in kiddy pools – anywhere and everywhere water remains for more than a few hours. And you’ve got to encourage your neighbors to do likewise, because mosquitoes can travel from their yard to yours.
Bt dunks, donuts, or granules should be used in birdbaths, water features, holes in trees where water collects, and anywhere else standing water can’t be eliminated. Bt (Bacillus thuringiensis israelensis) is an all-natural biological control that targets only mosquitoes, and it’s extremely effective.
Beyond that, you need to rely on repellents, of which there are many. When trying to control mosquitoes on the patio, options include citronella candles (which may also contain rosemary, thyme, and other oils), incense sticks that also contain those and other oils, and various sprays. Deet is still the most effective spray, but a lot of folks think it’s harmful, despite considerable research to the contrary. Picaridin, an alternative to Deet that was developed in Australia, has for decades been used there and throughout Europe with no reported health risks. Plants such as citronella and lemon grass, despite what you may have heard or read, simply do not work unless you crush the leaves and rub them on your skin. However, a powerful fan will work because mosquitoes can’t fly in winds above 15 mph.
For broader control, there are also repellents that contain various natural oils, are pleasantly scented, and can be applied as granules or sprays to the entire yard. Many of them last for up to three weeks depending on rainfall. And there are chemical foggers, including automated systems that spray chemicals in the air at preset intervals. I’m not too keen on having chemicals in the air while I’m hanging out in the yard, but then I’m the guy who doesn’t attract mosquitoes.
As for bat and purple martin houses, research makes it clear that while they do indeed eat mosquitoes, neither can eat enough in a day to make a noticeable dent in the population. After all, even though female mosquitoes generally don’t live longer than a week, they lay up to 300 eggs a day.
And finally, there’s one sure way to attract mosquitoes, and that’s to drink a beer. Mosquitoes are attracted to carbon dioxide, and there’s plenty of that in the beer and in the belches that invariably follow consumption.
Sun or Shade? (Or Something in Between?)

By Paul James
When shopping for plants, one of the first and most important questions you’ll likely be asked is, “Will they be growing in sun or shade?” And most often, it’s one or the other. But that’s not always the case. And the whole sun and shade discussion can sometimes get rather confusing.
After all, there’s morning sun followed by afternoon shade (my favorite) and there’s the exact opposite. There’s the dappled light found beneath large trees, which might also be referred to as part or partial shade, and that may exist even on homes that face west or south, where you would ordinarily expect full blazing sun. Those that face north may actually get a lot of sun depending on the pitch of the roof. And of course there are situations in which the sun (or shade) is in and out throughout the day.
So let’s get one thing clear from the outset: Plants that require full sun won’t grow well in the shade. They may survive, but they won’t thrive, and they’ll forever lack the vigor that they would otherwise have. However, they may do just fine in dappled light, or a spot that gets some sun throughout the day. Plants that require full shade will croak in the sun. Period.
Thankfully, there are plants that will adapt to all situations. The palette of possibilities might be limited, and you may not be able to plant what you want, but a solution exists. What you need to do is actually observe how much light an area is getting throughout the day. Then and only then will you be able to figure out what plants you can and can’t have in your situation.
Finally, I should explain why I’m so fond of morning sun followed by afternoon shade. You see those are the conditions that allow me to grow my favorite plants, including Japanese maples and Japanese forest grass, Hydrangeas, Viburnums, Yews, ferns of all kinds, Hosta, Heuchera, and so many more shady characters.
Put it in a Pot!

By Paul James
Rains this week have put on damper on gardening, but that doesn’t mean you can’t plant. After all, putting all kinds of things in containers is something you can do regardless of weather – in the garage, on a covered patio, even between downpours. And while obvious choices include flowers and tropicals, there’s a group of plants that’s often overlooked when it comes to container planting.
And that would be trees and shrubs, which can be used in a number of effective and dramatic ways, from formal to funky. For example, to flank the entrance to your home, especially if the surrounding surface is concrete; to use in a spot where nothing will grow due to poor soil or drainage issues; to add a special decorative touch to a garden bed; and to draw attention to a specimen tree or shrub.
Practically any and trees and shrubs are contenders for containers, but here are three things to keep in mind before you make your selections. First, realize that you’ll need to fertilize the tree or shrub more frequently than if it were planted in the ground, because fertilizer leaches more rapidly out of a container. Second, be prepared to top-dress the container with a two- or three-inch layer of fresh potting mix every year. And finally, plan on repotting every three to five years, ideally in mid to late February. The process is straightforward: use a sharp knife to loosen the soil and roots from around the inside of the pot. Gently remove the plant (tipping the container on its side if necessary). Discard (or better yet, compost) the old potting mix. Repot using fresh potting mix.
If you want to return the plant to its original container, prune about a third of its roots. If you want to move the plant into a larger container, simply trim the ends of the roots to encourage new growth before potting up.
One more thing: Try to balance the size of the plant and the pot. A six-foot tree in a 12-inch pot will look weird, and the plant won’t grow well.
I’ve grown dozens upon dozens of trees and shrubs in pots over the years, but among those I like best are Japanese maples, Japanese snowbells, crape myrtles, dogwoods, evergreen conifers of all kinds, and hydrangeas. Of course, there are dozens more trees and shrubs to choose from, and I encourage you to try anything that strikes your fancy. And realize that once you start planting trees and shrubs in containers, you’re likely to discover a whole new world of gardening.
What I’m Diggin’ Now
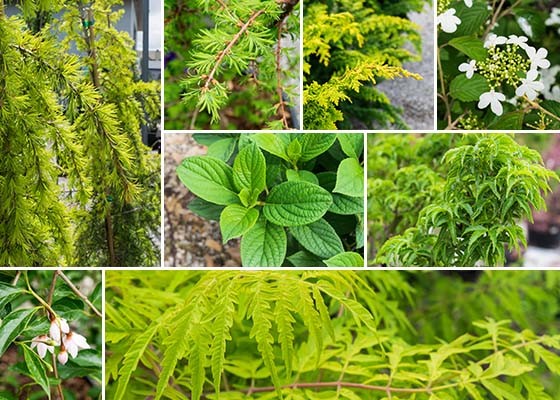
By Paul James
Being a plant geek, I’m always on the lookout for new plants. At the same time I’m drawn to what’s not necessarily new, but just plain cool, and in my opinion overlooked by too many of my fellow gardeners. So with those thoughts in mind, here’s a look at what I’m diggin’ now.


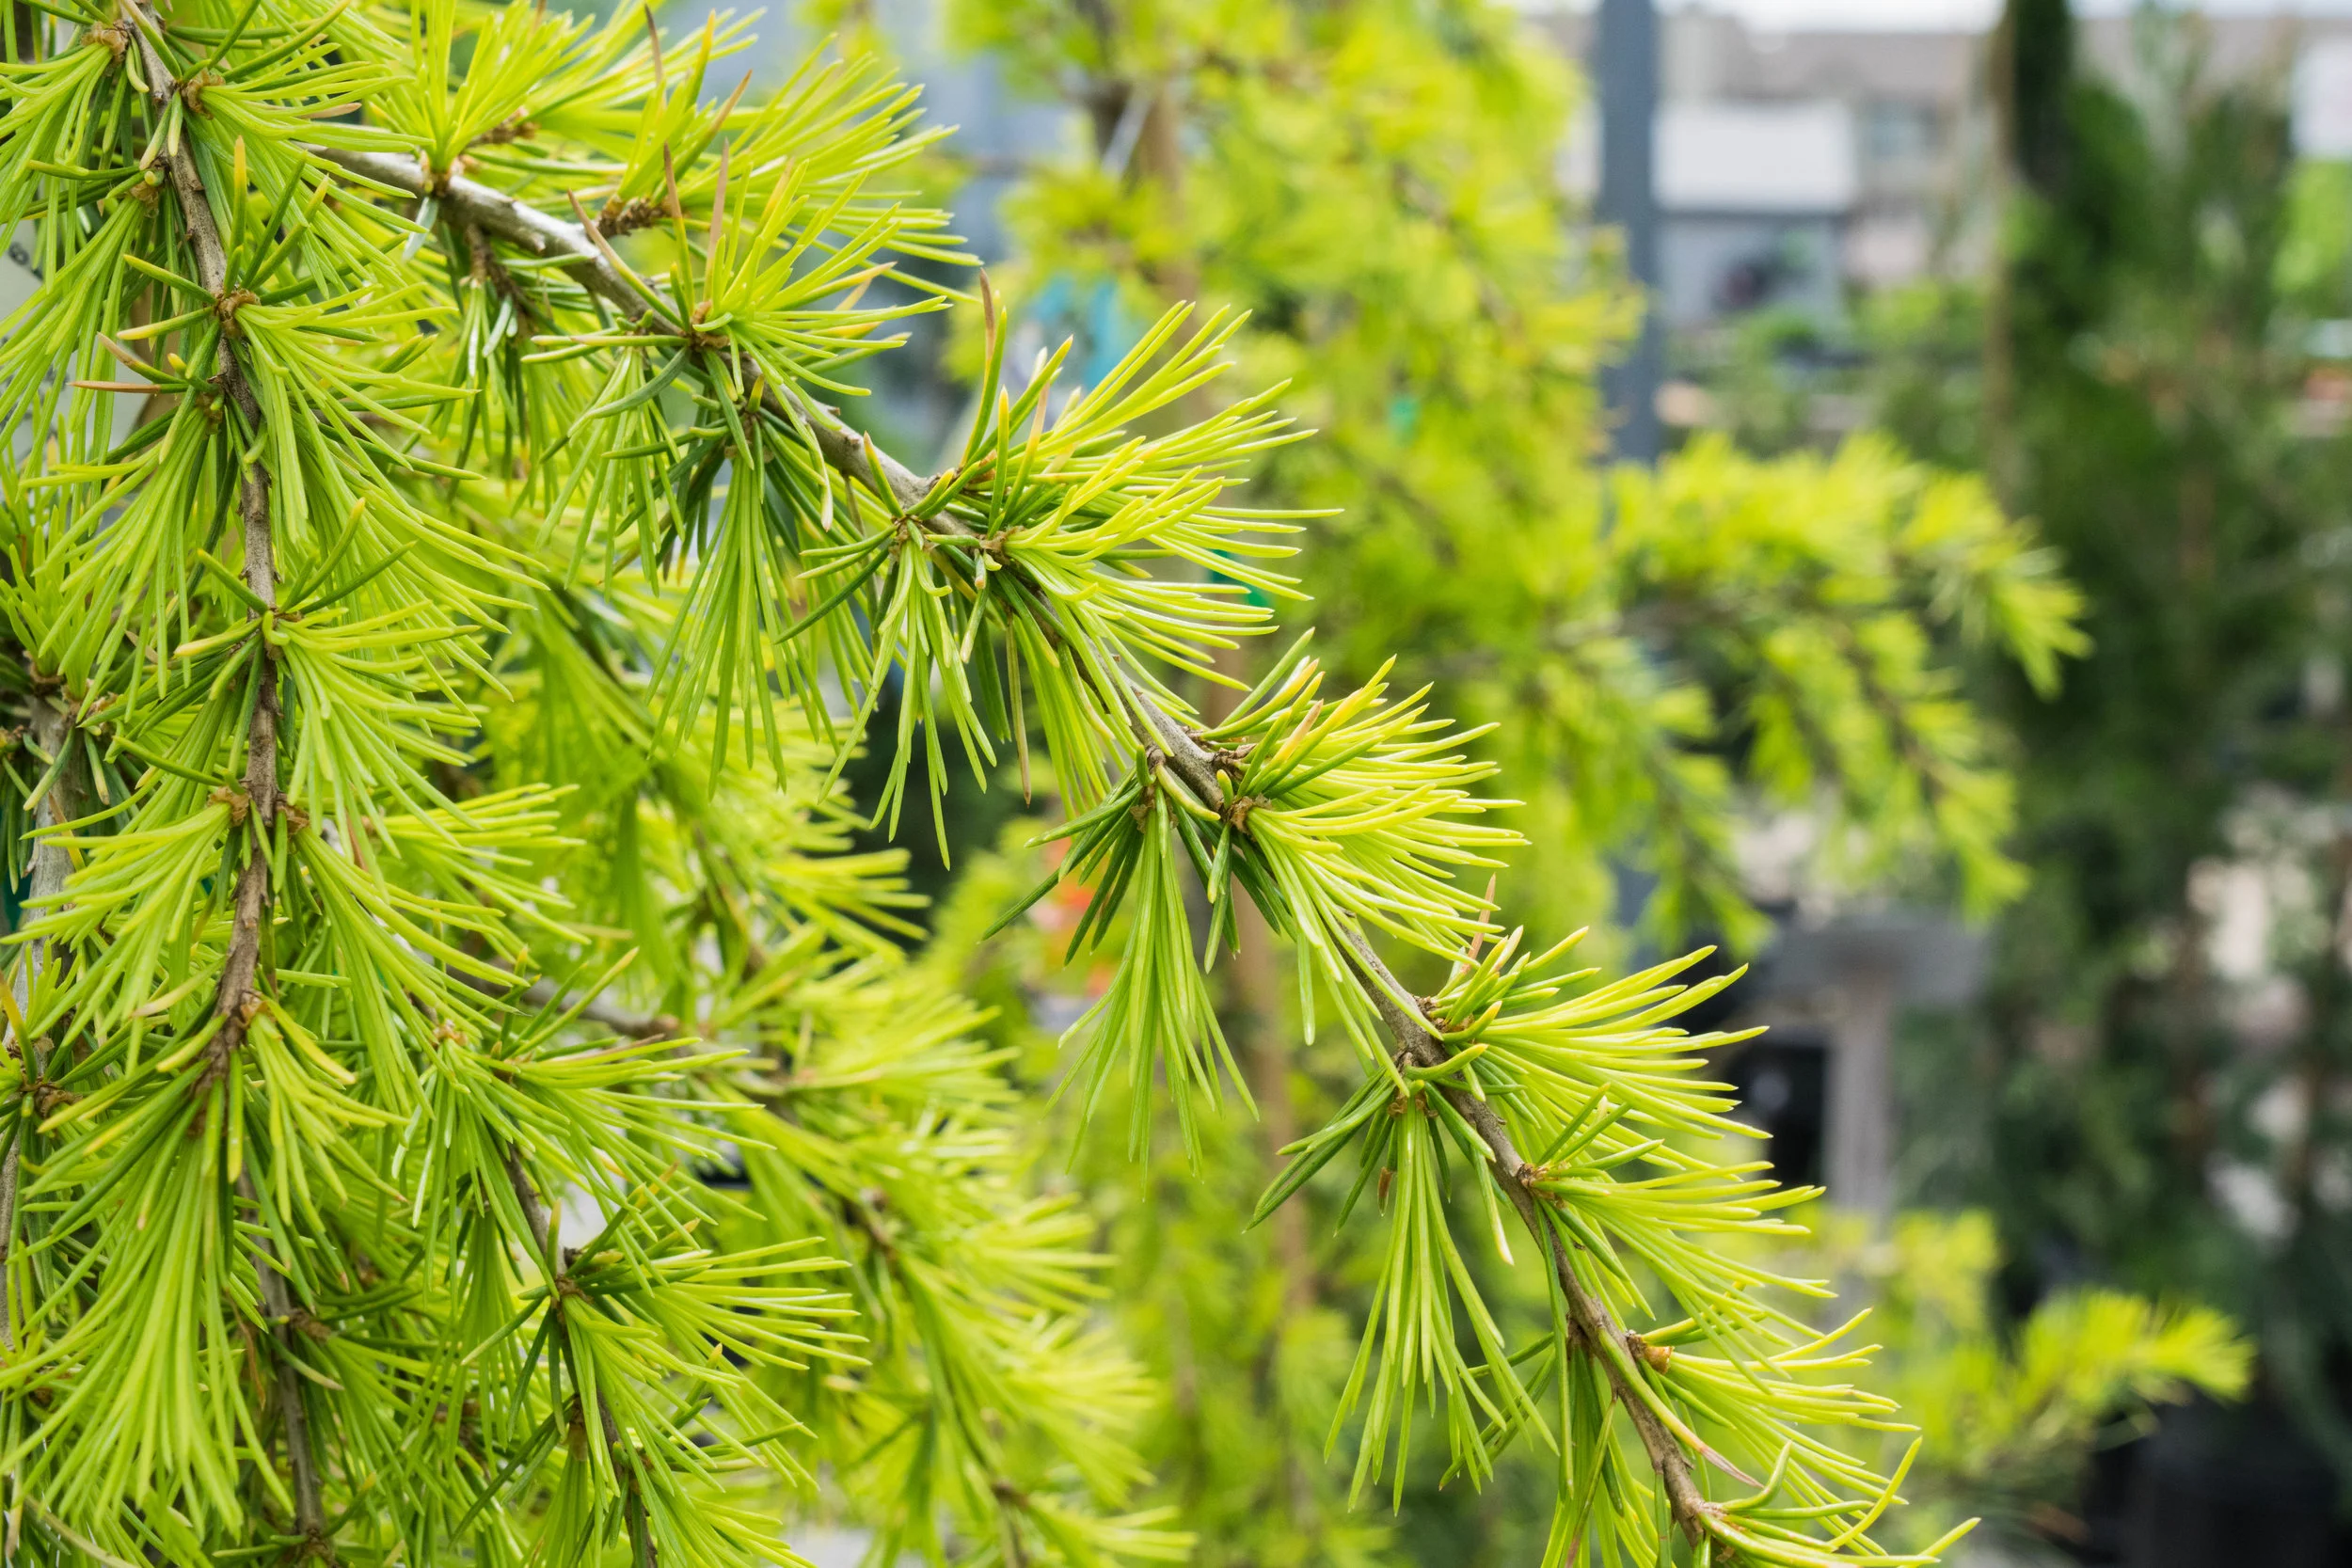

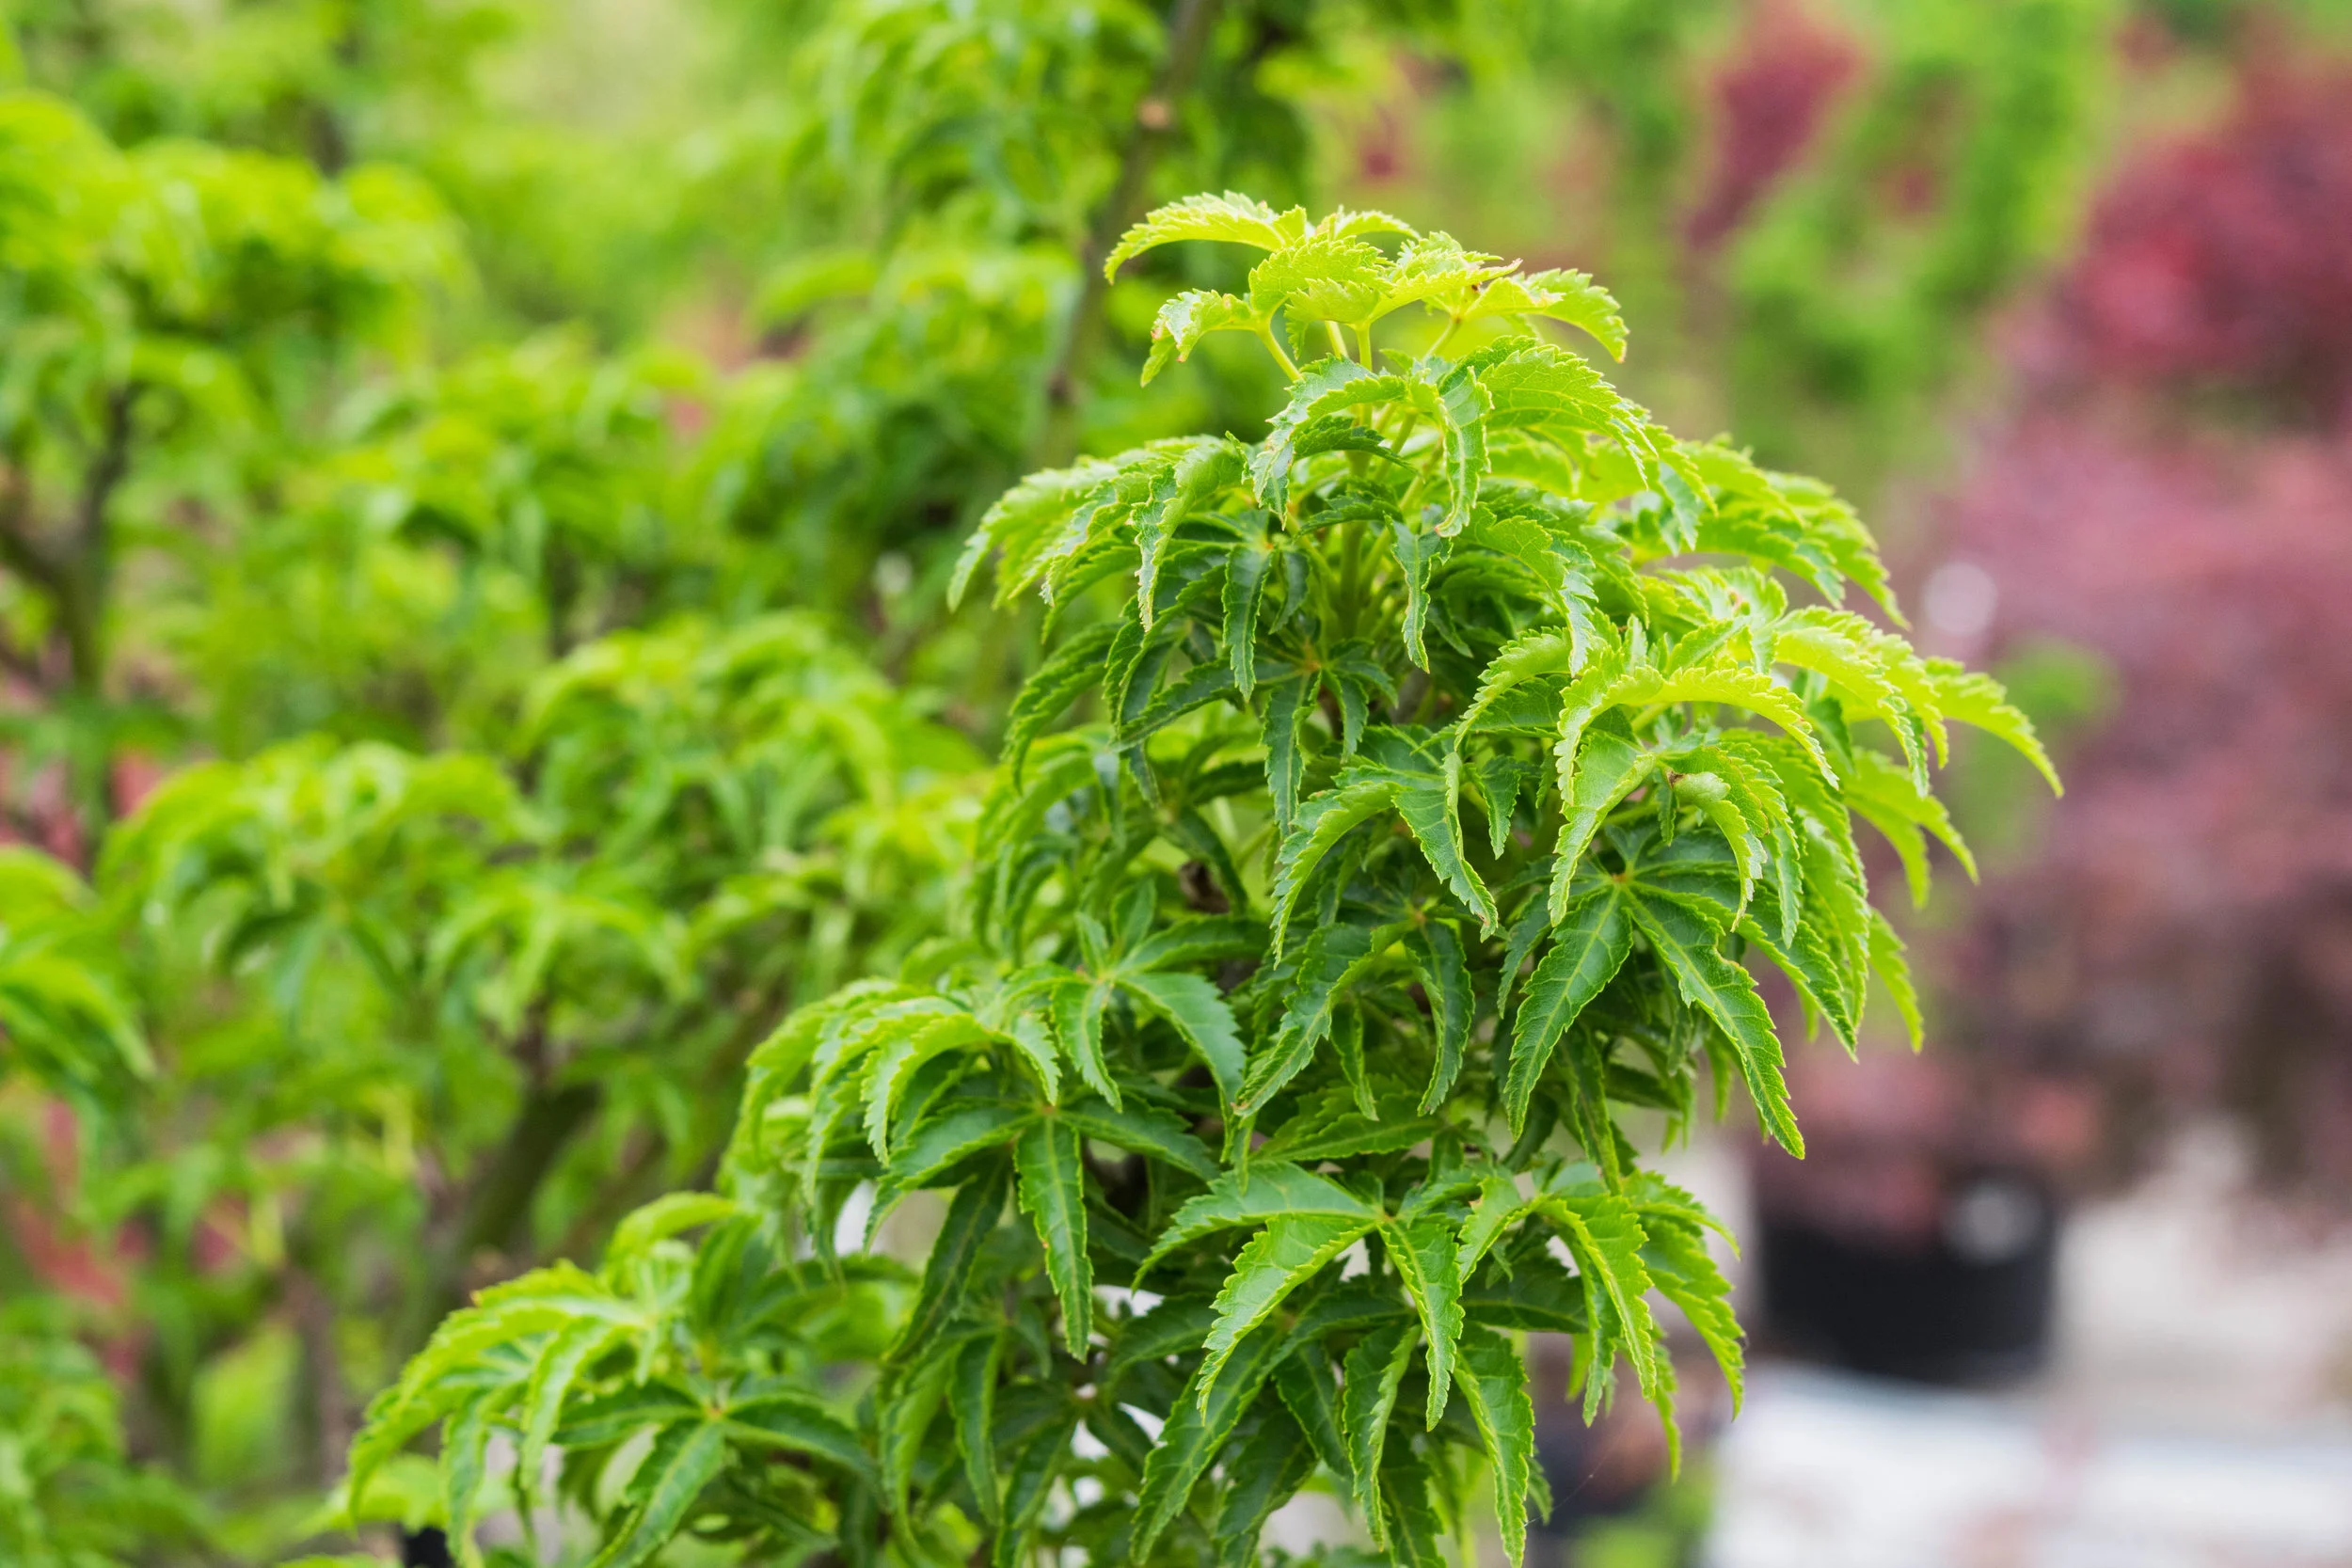
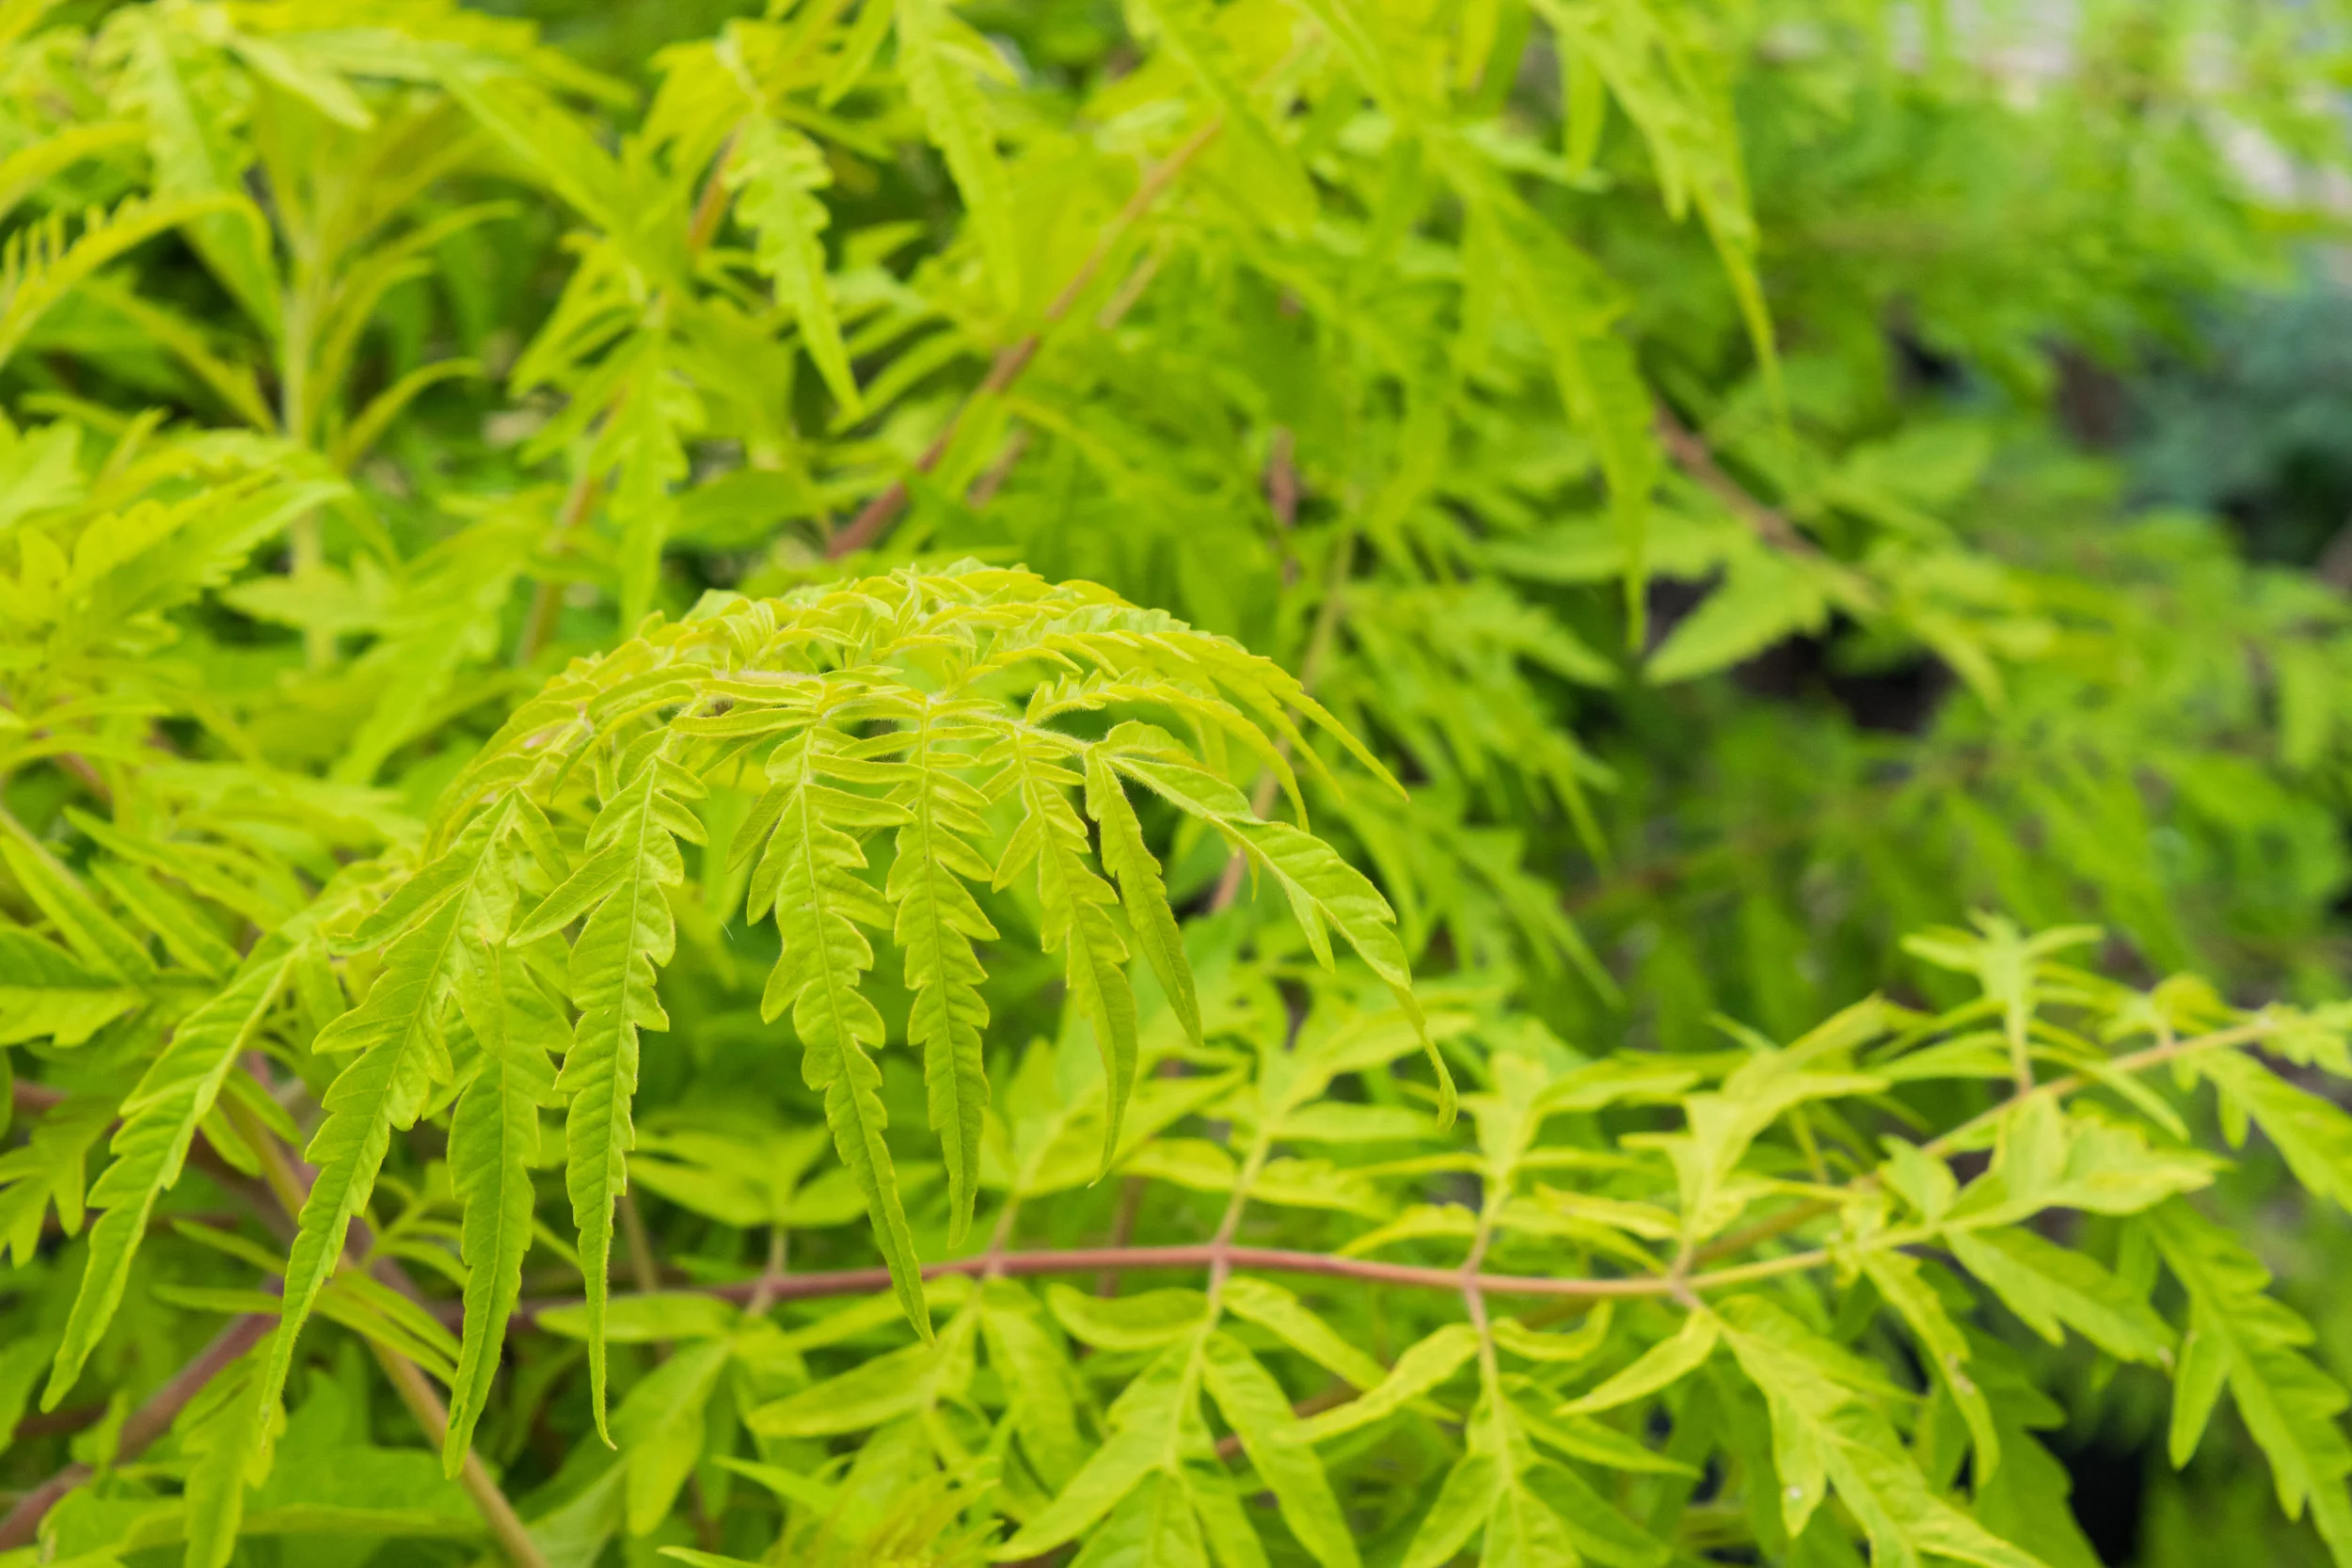
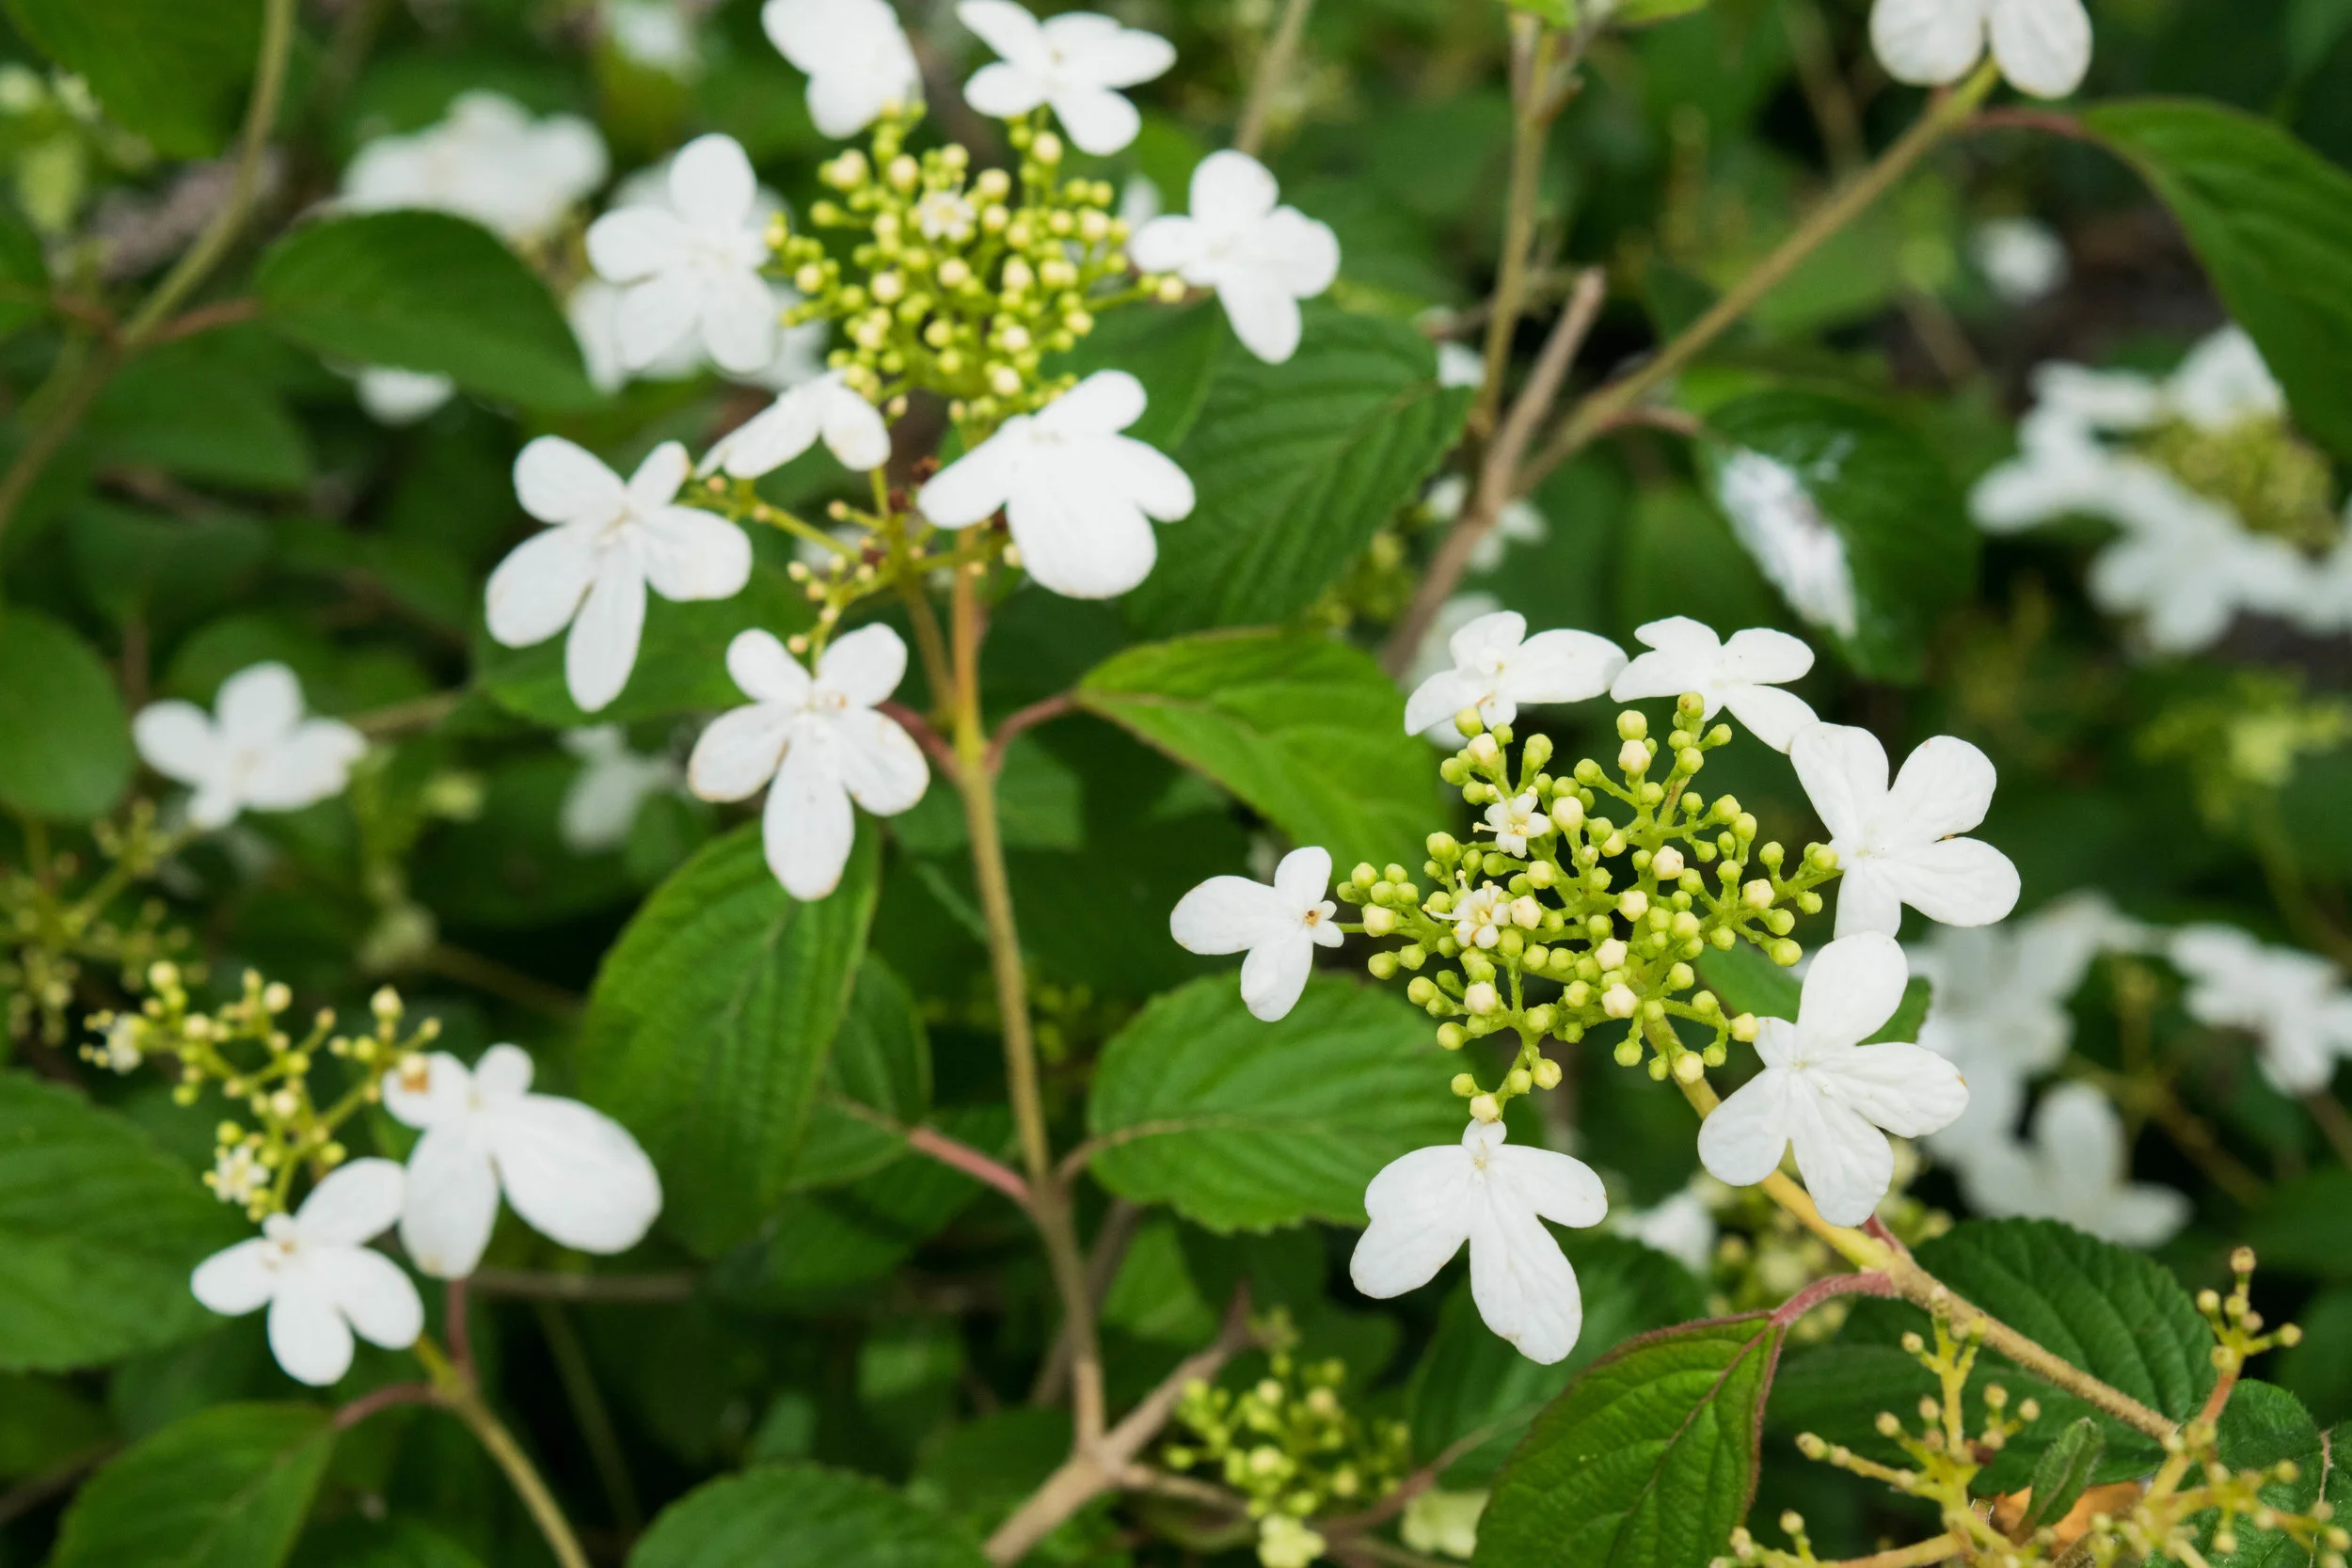
Plant Away!
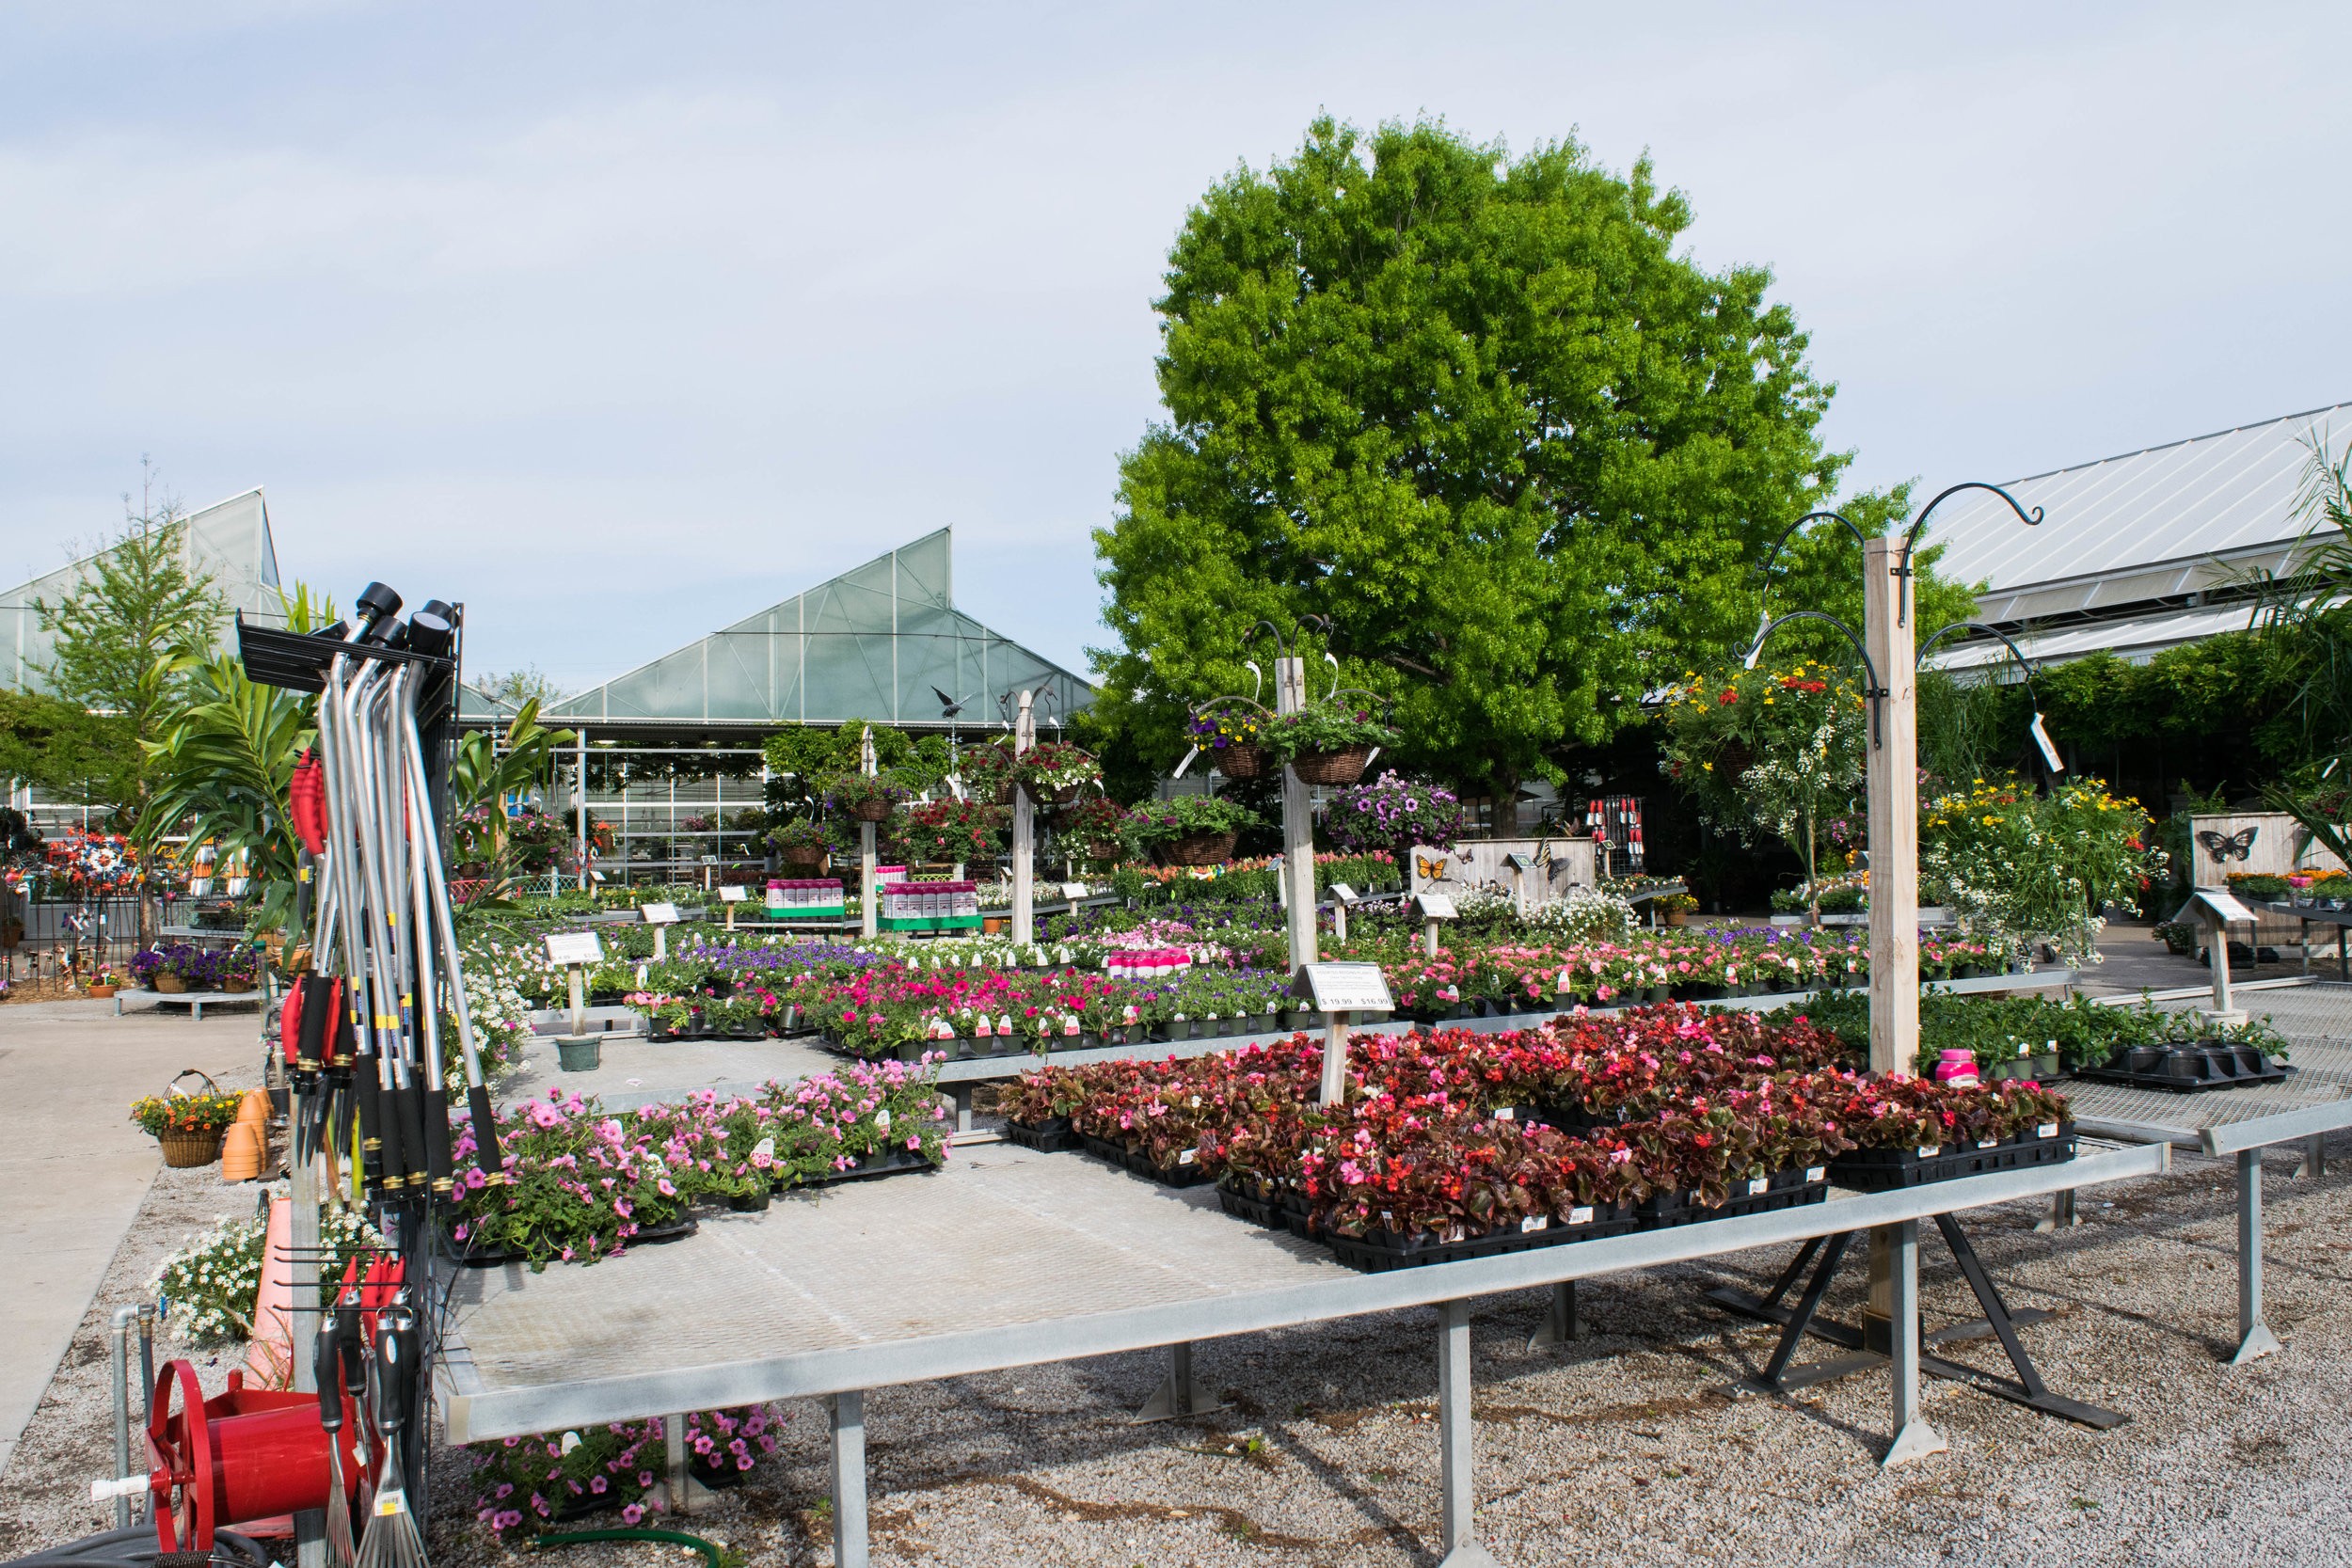
By Paul James
Last Sunday I was having lunch with my father at his assisted living center, when out of nowhere a woman shouted at me from across the dining room. “Is it time to plant tomatoes?” she asked. “Yes, and everything else that grows,” I answered, which prompted a collective chuckle from the diners. And to everyone else who’s asked me that question in the past week – in the grocery store, at the pharmacy, while walking the dog — my answer is the same…but with one caveat.
And that has to do with weather. Because let’s face it, none of us knows what nature has in mind. There’s still the very real, albeit miniscule, chance that we could get a freeze, perhaps even a hard freeze, even into early May.
But that’s always been the case. And the fact is the damage done by a freeze this time of year rarely amounts to much. Sure, you might lose your tomato crop (as well as other warm-season veggies), but most of those can be replanted. Once the leaves of ornamental trees and shrubs have hardened off (which they have for the most part), they can withstand temps in the upper 20s. Even if they lose their first set of leaves, secondary leaf buds will often produce a new flush of growth in no time. The same is true of perennials, whose top growth may take a hit but will invariably reemerge. And even most annuals can withstand those same temperatures for a few hours or so, which is usually about how long the cold snap lasts.
Sure, there are a few plants that you might want to hold off planting for another ten days or so – caladium bulbs come to mind, maybe even basil – and I’d still wait another week or two to move houseplants outside, but pretty much everything can and should be planted now.
That’s why, after saying goodbye to dad, I went straight home and planted my tomatoes…and everything else that grows…even basil.
Mulch Madness

By Paul James
I have a confession to make: I’m a compulsive mulcher. You might even say I’m a mulch maniac. It all started nearly 40 years ago when I used a light layer of straw to cover my first vegetable garden, something I’ve done every year since. A year later, I started using bags of chipped and shredded wood mulch in my ornamental beds, a practice that continues to this day. So clearly, I’m hooked on mulch. And you should be too.
By using mulch in the garden, you’re mimicking what nature has been doing for eons – covering, and thereby protecting and enriching the soil with organic matter. Deciduous trees and shrubs blanket the forest floor with leaves that prevent erosion, maintain soil moisture, and prevent noxious weeds from germinating. As those leaves decompose, they provide nutrients to plants and food for soil-dwelling critters, especially earthworms, and they improve the soil’s structure and tilth. When you mulch at home, you’re doing essentially the same thing. And you get an aesthetic bonus too, because mulch is beautiful. To me, it’s like icing on the cake.
There’s really no such thing as the best mulch. What you choose to use is entirely up to you. These days, pine-bark chips are my favorite for ornamental beds, although for decades I used shredded cedar as well. In my vegetable garden, I use a lot of shredded leaves, homemade compost, and straw. At a previous home, I controlled slugs in a hosta bed using pecan shells. They looked great, and slugs won’t walk across them.
Ideally, you should mulch to a depth of two to four inches for maximum benefit. Keep the mulch off the crowns of annuals and perennials to prevent them from rotting, and several inches away from the base of trees and shrubs to prevent damage by voles and field mice that feel protected under the cover of mulch. Consider “fluffing” the mulch once or twice a year with a metal rake just to loosen it up and bit so that water can easily percolate through it. Beyond that, all you need to do is add a fresh layer every year to maintain the proper depth.
I’m convinced that mulch offers the biggest bang for your buck in the garden, and it protects the investment we gardeners have in our plants. So do yourself and your plants a favor by adding mulch to your garden. But be forewarned: You might soon discover that you too are a mulch maniac.
Is it Spring Yet?
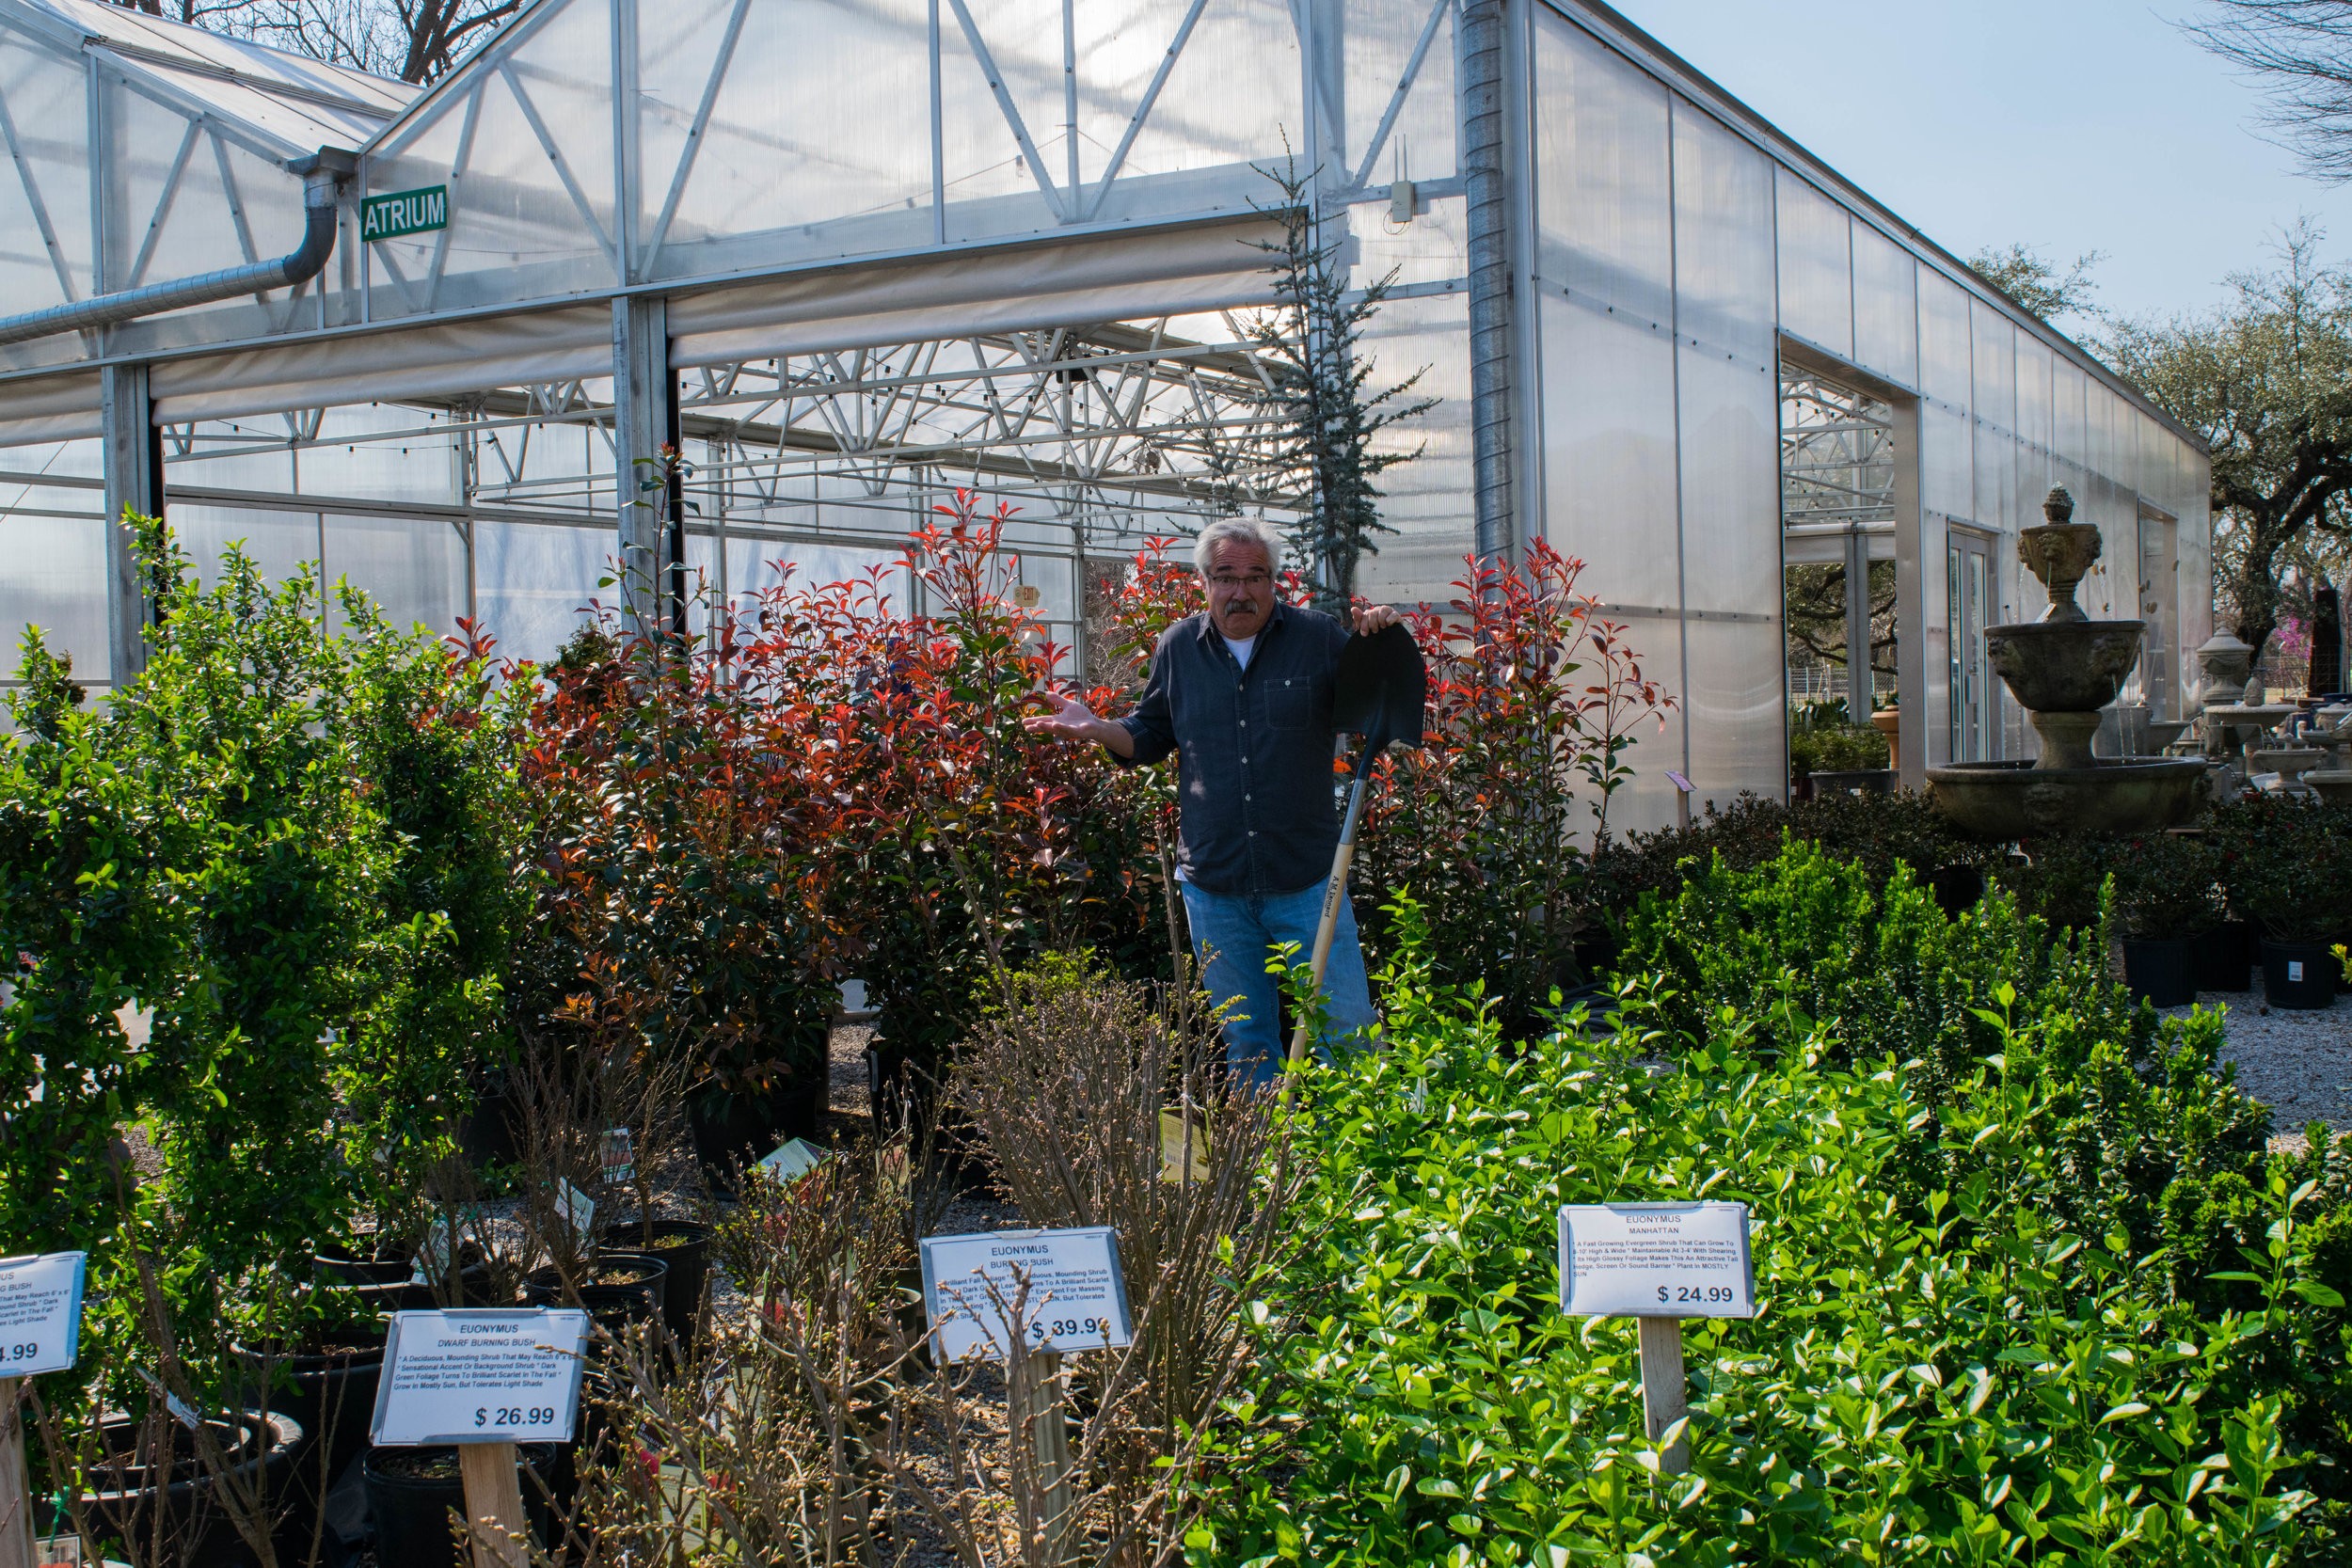
By Paul James
Officially, spring doesn’t arrive until Monday, March 20, at precisely 5:28 AM. But if plants could talk, they’d tell you that it’s already here. And according to experts, they’d be right. Climate scientists at the U.S. Geological Survey have confirmed that in terms of average temperatures, spring has arrived in much of the south-central and southeast areas of the country between 20 and 25 days earlier than normal. So does that mean it’s time to plant anything and everything?
My response to that question, which I’ve been asked a lot lately, is no. After 40 years of trying to second guess the weather, I’m hesitant to suggest that gardeners move up their planting dates just because it’s warmer than usual. After all, despite the weirdly warm and wacky weather pattern we’ve been experiencing lately, there’s still a very real likelihood of a freeze – perhaps even a hard freeze – this month or next.
Now is a great time to plant trees and shrubs, both deciduous and evergreen, and all but the tenderest perennials. Annuals can be planted in containers, but be prepared to move them indoors if temps drop below 28F or so. Other than pansies, you should probably wait at least another two or three weeks before adding seasonal color, but that date could change a week or more either way depending on what happens weatherwise.
In the veggie garden, it’s definitely time to plant potatoes, onions, asparagus, greens of all kinds (arugula, spinach, lettuce, kale, etc.) beets, carrots, turnips, and cole crops – broccoli, cabbage, and cauliflower. These are by definition cool-season crops, so they grow best under cool conditions. It’s also time to plant a number of culinary herbs, including oregano, marjoram, thyme, mint (see Tip below) and cilantro.
However, I’d wait at least another two weeks (perhaps even longer) before planting warm-season veggies such as tomatoes, eggplant, beans, melons, and peppers, and tender herbs such as basil, because they can’t handle temps below 45F or so, and even colder overnight temps are in the forecast. I’d also hold off on planting parsley, because although it can take cold temperatures, anything below 40F may cause it to bolt later in the spring. And I’d be prepared to protect those crops with blankets or row covers through the end of April.
Let’s face it, folks, making predictions about the weather is tricky at best. And that’s why I think the safe bet is to stick with normal planting dates and simply pay close attention to forecasts. Besides, even if you wanted to plant Lantana or Begonias this time of year, you’d have a tough time finding them because growers and retailers schedule their deliveries for “normal” planting dates.
And there’s a very good reason for that.
How to Plant a Tree
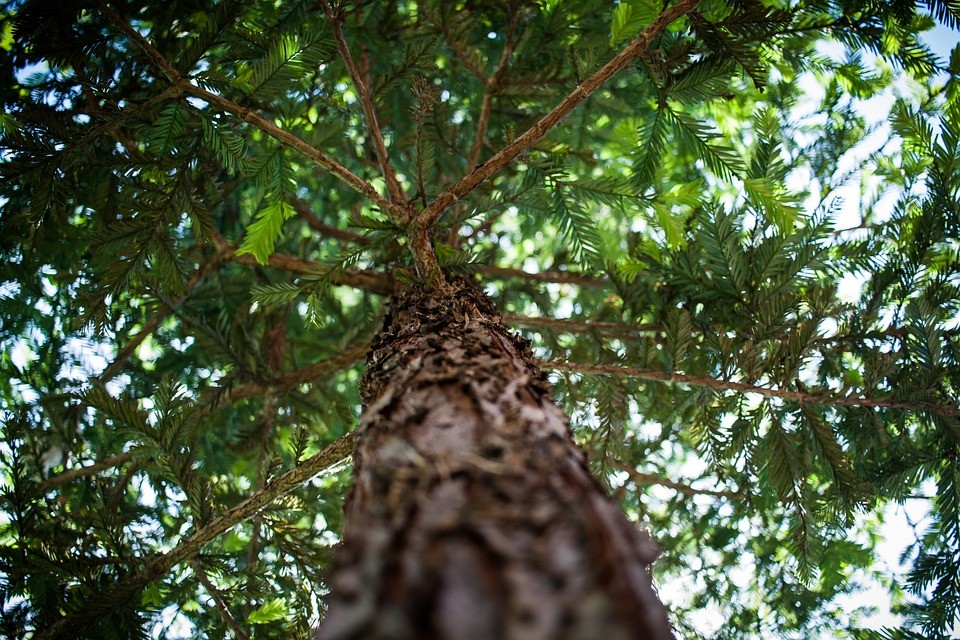
By Paul James
Back in the mid 90s, researchers proposed a new way of planting trees that involved digging a wide, shallow, saucer-shaped planting hole that measured five times the diameter of the tree’s root ball. The idea was that roots would grow more rapidly in the monstrous planting hole, thereby enabling the tree to become established faster. Lots of so-called experts immediately jumped on the bandwagon and praised it as the most important revelation in tree planting since the invention of the shovel. But the question is, Does it really work?
Well, I’m not saying that it doesn’t work. I planted a Shumard oak using that method back in 1996, and it’s doing great. The root ball of the tree was three-feet wide, so I wound up digging a 15-foot diameter planting hole roughly two-feet deep at the center, which took me an entire day. However, I also planted three other trees that same week using a more traditional approach (more on that in a moment) and they’re doing great too.
So what I am saying is that the “new” way of planting a tree is just too much work! And more to the point, it isn’t even necessary!
What then, is the best way to plant a tree? In truth, the planting hole only needs to be a foot or so wider than the root ball. One of the biggest advantages to keeping the hole relatively small (aside from the fact that it’s a much, much easier task) is that the tree will be well anchored in the hole from the start. The more important thing to consider is the planting depth. Keep this thought in mind: You’re planting a tree, not burying it. If a tree is planted too deeply it’ll likely die. That’s why you should always plant a tree above grade, and how much above grade depends on your soil type.
In heavy clay soil (Hello, Broken Arrow and Owasso!) you should leave as much as a third of the root ball above grade. Clay soil holds water, and most trees don’t like wet feet, so planting above grade keeps roots from drowning. In sandy soil (Howdy, Bixby!) you should do likewise because the tree will settle in the soft sand. In most other areas of Green Country, you should leave approximately four to six inches of the root ball above grade.
Adding soil amendments such as compost to the planting hole is rarely necessary, and can actually cause more harm than good because roots will remain in the area of amended soil rather than reach out to the native soil. It’s best to simply let the tree adapt to your native soil. In extremely heavy clay or super sandy soil, it’s okay to amend the soil somewhat, but don’t add more than 25% to the native soil used to backfill the hole. Adding a root stimulator at planting time is a good idea, and a two- to four-inch layer of mulch is a must.
And finally, a word on staking. Unless you live in an open area where the winds come sweeping down the plains, or you’re planting a bare-root tree, staking isn’t necessary. In fact, letting the tree sway in the wind without stakes will result in a stronger trunk.
So grab a shovel and plant a tree. And feel free to thank me later for saving you from hours of unnecessary digging.
February “To-Do” List
By Paul James
For me, the 2017 gardening season officially began last Sunday. I planted potatoes and onions. I pruned some fruit trees, a few Japanese maples, and several shrubs. I spread five bales of straw in the paths of my veggie gardens. I tidied up my ornamental beds in preparation for planting. And I raked and composted well over a dozen trash cans full of leaves. Then, just as the sun was setting, I sat on the porch with a beverage and admired my accomplishments. (Full disclosure: Later that evening I also took two tabs of Aleve PM.)
As gardeners, we know that sense of satisfaction that comes from getting things done in and around the yard. The big question is, When should we do what? So here’s a rundown of what you might want to get done between now and the end of the month, beginning with a list of what to plant.
Topping the list are trees and shrubs, both evergreen and deciduous. This is a great time to get them in the ground, and with any luck we’ll have plentiful spring rains. Roses (which are of course a shrub, but one worthy of special mention) can also be planted now, along with pansies and all but the tenderest of perennials, and nearly all groundcovers.
Now is the time for cool-season vegetables, although I’ll say at the outset that yes, there’s always the possibility of a hard freeze in March, even April, that could damage crops. So, be prepared to cover if temps drop into the mid-20s. However, cool-season crops by definition love cool temperatures, so I plant mine early, as in now through the end of the month.
The list of cool-season veggies includes asparagus, beets, broccoli, cabbage, carrots, cauliflower, chard, collards, kohlrabi, lettuce, onions, peas, potatoes, radishes, spinach, and turnips. Asparagus is best planted from roots, cole crops (broccoli, cabbage, and cauliflower) from transplants, onions from sets or transplants, potatoes from tubers, and everything else from seed.
Now for a list of things to do other than planting between now and then end of the month, beginning with pruning.
Nearly all deciduous trees and shrubs (including roses) can be pruned this month. The exceptions are those that bloom in early spring – dogwoods, redbuds, Hydrangeas, Viburnums and such. Now is also a good time to cut back ornamental grasses to about six inches above ground.
To get rid of pesky weeds in the lawn, now is the time to apply pre-emergent herbicides to control both grassy and broadleaf weeds.
Adding a two-inch (or more) layer of organic matter to the soil will get new and existing plants off to a good start. Bagged products such as mushroom compost, composted cotton burrs, and even topsoil work great, although I must say that the greatest composted product I’ve come across in years is called Happy Frog, which is made by Fox Farm. I use it as a top dressing on everything that grows.
And last but hardly least, now is the perfect time to fertilize spring-flowering bulbs, even those that are already in flower.
Sure, there are more things to do in the garden, but these are among the most important. Besides, I didn’t want to overwhelm you! And don’t forget that the most important thing you can do in the garden, regardless of the time of year, is to simply enjoy it.
Plants Looking Puny?
By Paul James
A lot of landscape plants are looking pretty sad right now. In fact, some of them look downright dead. The question is, will they bounce back this spring, or should I dig them up and start thinking about what to plant in their place?
Before I answer that two-part question, let me share with you what I’ve been witnessing on my walks lately. First and foremost, I’ve seen leaves still clinging to a number of deciduous trees, in particular Japanese maples, some oaks, and even roses, which is somewhat odd for this time of year. I’ve seen azaleas that looked great (and green, and in some cases in flower) early in December that now appear as though they’re on their last leg. I’ve seen the tips of boxwoods that look like somebody took a blowtorch to them. I’ve seen Taylor junipers that have gone from green to a weird, dull gray-purple. And Nandinas, well, it’s been a long time since I’ve seen so many crinkly, crunchy leaves on them.
For the most part, these conditions are the result of abrupt weather changes, specifically warmer-than-usual December days followed by temperatures in the single digits. When that happens, plants don’t have the opportunity to smoothly transition physiologically from late fall to winter. And remember, we’ve had several relatively mild winters in a row, so it’s been a long time since we’ve experienced single-digit temps.
Getting back to the questions I posed earlier, let me tackle the second part first: Don’t dig anything up, at least not yet. Remember, the vast majority of plants common to landscapes in this area are dependably hardy. Many of them are able to tolerate temperatures of -20 degrees, and some can handle temps even lower. And a number of plants – crape myrtles for example – may die back to the ground because their top growth isn’t hardy enough, but they’re rootball is, in which case new growth will begin to appear in spring.
And while I’m not a gardening psychic, nor do I have a crystal ball, I think just about every plant that grows – assuming it was hardy in the first place – will bounce back and be just fine come spring. Some may require a bit of cosmetic pruning to get rid of scorched leaves (wait another few weeks before doing that), but that’s a small price to pay. The exceptions would be those plants that didn’t have enough soil moisture (meaning you failed to water!) before the bottom fell out of the thermometer. If that’s the case, you won’t actually know the verdict until late spring or early summer when the plant starts growing (or at least tries to grow) rapidly.
Feel better now?
Coral Bark Maples
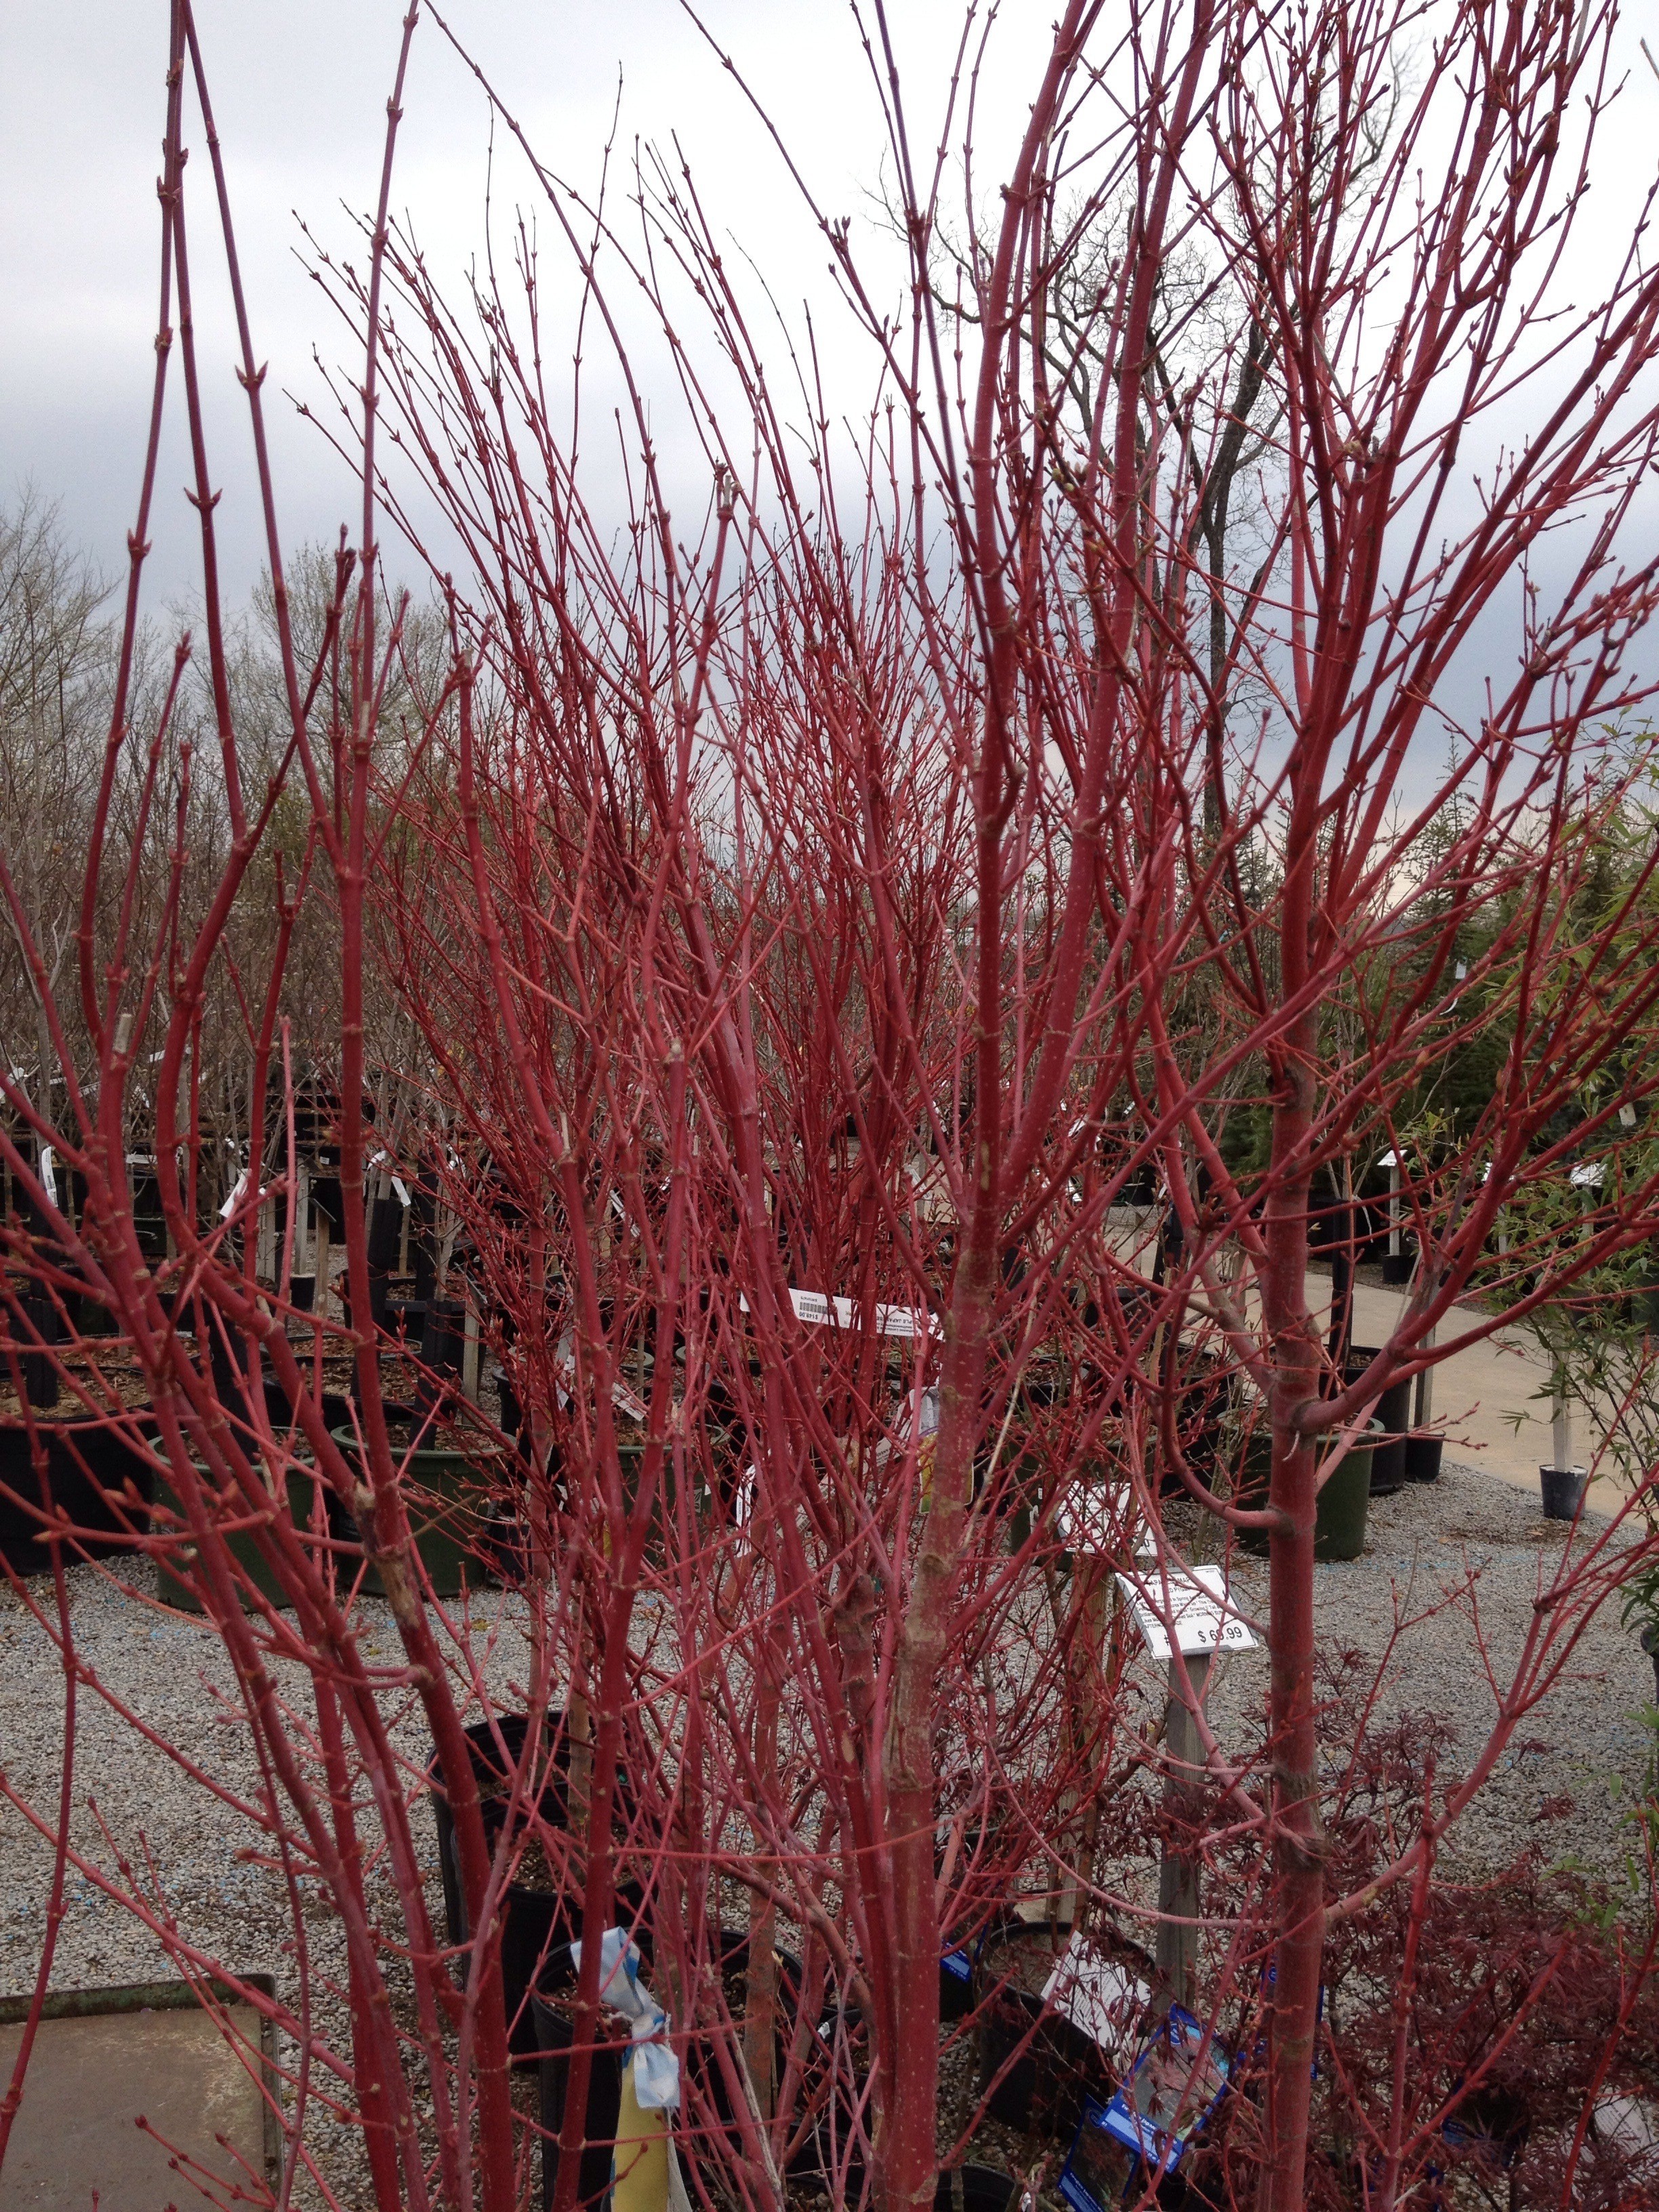
By Paul James
Acer palmatum ‘Sango kaku’, better known as the coral bark maple, has been growing in popularity in recent years, and with good reason: It’s beautiful all year long, even in the dead of winter – as in right now — when its show-stopping, coral-colored trunk and twigs are at their peak.
But the coral bark maple has plenty of other attributes. It stays relatively small, growing to about 12’ in ten years (maybe 25’ at maturity), which makes it ideal for small properties or as a specimen close to the house. And it typically maintains an upright, vase-shape. Its deeply lobed, almost fernlike leaves start out light green in spring, and in fall turn spectacular shades of yellow, reddish-purple, and bronze. Its reddish-purple flowers, though inconspicuous from afar, are beautiful when seen up close. And it does great in containers, where it rarely grows taller than eight feet or so.
Like other Japanese maples, the coral bark grows best in organically rich, slightly acidic, well-drained soils where it receives a few hours of morning light followed by afternoon shade, or dappled light throughout the day. Even in the best of locations, leaves may get scorched in the middle of a hot summer, but consistent moisture and a thick layer of mulch will keep that to a minimum. Pruning isn’t often necessary, but if needed it should be done during the dormant season. Spring or summer pruning will likely cause significant bleeding.
It’s hard to say which Japanese maple is my favorite, but the coral bark is definitely on the short list. Plant one, and I think you’ll agree it’s a tree worth having.
Creature Comforts
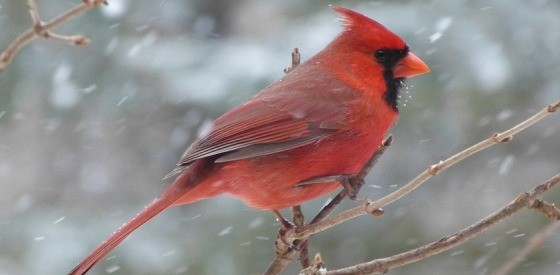
By Paul James
Not every bird is lucky enough to find a warm, cozy spot when the weather turns foul. Even those that do find shelter still need food and water to survive. And there’s a genuine payoff for gardeners who tend to their flock: The birds will call your garden home and eat everything from weed seeds to pesky plant pests.
Bird houses are generally thought of as nesting sites, but they provide much needed shelter as well, especially during the winter months. They should be installed roughly six feet off the ground to discourage cats, and face south to southeast so that they warm up quickly when the sun is shining. Birds will gather materials from the wild to build their nests, but you can help them out by placing shredded newspaper, bits of yarn or string, even lint from the clothes dryer near the house, whether on the ground or hanging from tree limbs.
When it comes to food, there are lots of choices, from suet to seed blends to single-seed varieties. Suet is basically fat, and it provides a high-energy boost to hungry birds. Pre-formed suet cakes are great, but you can also ask the butcher for suet and simply wedge it in the crotch of a tree. Birds also love peanut butter, both smooth and creamy, which you can smear on a branch. Seed blends are great for attracting a number of different species, but most birders agree that the best all-round seed is black-oil sunflower. If squirrels are a problem, consider safflower (which they don’t like) or use seed to which hot pepper — which doesn’t bother the birds — has been added. You might also consider buying a squirrel-proof feeder.
And speaking of feeders, the choices are many. Tube feeders are hard to beat, but those made of wood have a more rustic look and are available in a number of different types and styles. They too should be mounted high enough to keep cats away, although there are bird species that prefer to feed off the ground (doves in particular). Placing a bell on your cat’s collar will give the birds advance warning.
It’s tough to keep fresh water available when temps drop below freezing, but an inexpensive heater made specifically for bird feeders can solve that problem quite nicely.
Beyond knowing that you’re providing birds with all the comforts they need to survive the winter, you’ll also experience the joy of having them hang out in your yard. And that’s pretty darn comforting too.
Houseplant Care in Winter
More houseplants bite the dust during winter than any other season, and that’s too bad. But it’s really not all that hard to keep your houseplants healthy and happy this time of year. Just follow these suggestions.
Nearly all houseplants are native to the tropics, where they enjoy warm temperatures and high humidity. In the home this time of year, warm temps are a given, since folks crank their heaters up in the house as the mercury nosedives outdoors. But as you crank the heat, you dry the air, and whereas houseplants prefer humidity levels in the range of 60% to 70%, the humidity in the average house in winter hovers around 15, maybe 20%. And that can be devastating to most houseplants (cacti and succulents excluded).
The trick, then, is to increase the humidity as best you can, and the best way to do that is to mist your plants frequently. As in daily. Or even twice daily. You can also group your plants together and place a humidifier near them, or set the plants on a tray filled with pebbles. Make sure the water level in the tray is slightly below the top layer of pebbles so the pots aren’t submerged in water. (Note: Don’t mist plants with fuzzy leaves, such as African violets.)Also, try to keep your houseplants away from floor or ceiling registers so they don’t get blasted with warm, dry air.
Resist the temptation to water as often as you do during spring and summer. The growth rate of houseplants slows considerably in winter, so they really don’t need to be watered as often. In most cases, you should water only when the top two inches of soil is dry.
And again, because of their slower growth rate, houseplants really don’t need fertilizer this time of year unless they’re in flower. Even then, it’s best to apply the fertilizer at only 25% of the recommended amount.
What houseplants do need, however, is an occasional dusting to remove residues that accumulate on leaf surfaces. A paper towel – either dry or soaked in warm water — works just fine, or you can use products such as Green Glo.
Finally, be on the lookout for pests, especially if your houseplants spent the spring and summer outdoors. The most common invaders are scale and mealy bugs, both of which can be controlled easily with insecticidal soap or products that contain neem.
Poinsettia Pointers
Sales of Poinsettias in the U.S. will top $250 million in the six weeks leading up to Christmas. That’s a lot of green spent on a plant most people toss in the trash after the holidays. But then again, can you imagine Christmas without Poinsettias?
So the goal, then, is to keep your Poinsettias healthy and happy for at least six weeks. And here’s how to do just that.
Try to buy your Poinsettias on a day when temperatures are well above freezing, and make sure they’re wrapped regardless of the temp. Exposure to low temperatures even for a few minutes can permanently damage the plants. And don’t leave your plants in the car while you do more shopping. Depending on the weather, it may be too cold – or perhaps even too hot – inside your car.
Once home, carefully unwrap your Poinsettias and place them in an area that gets roughly six hours of indirect light a day. Most often, that’s an eastern or southern exposure. Keep the plants away from warm or cold drafts from air registers or open doors or windows.
Thankfully, Poinsettias are happy with the same daytime temperatures people are – 60 to 70 degrees during the day, and a bit cooler at night. Temps above 70 degrees will shorten the plant’s lifespan.
Check the soil daily, and water to maintain even soil moisture. If your plants are wrapped in foil, punch holes in the foil so water can drain into a saucer. Discard excess water in the saucer shortly after watering. Keep in mind that soggy soil will lead to root rot.
Do all that, and your Poinsettias should last at least six to eight weeks indoors.
Fall Color
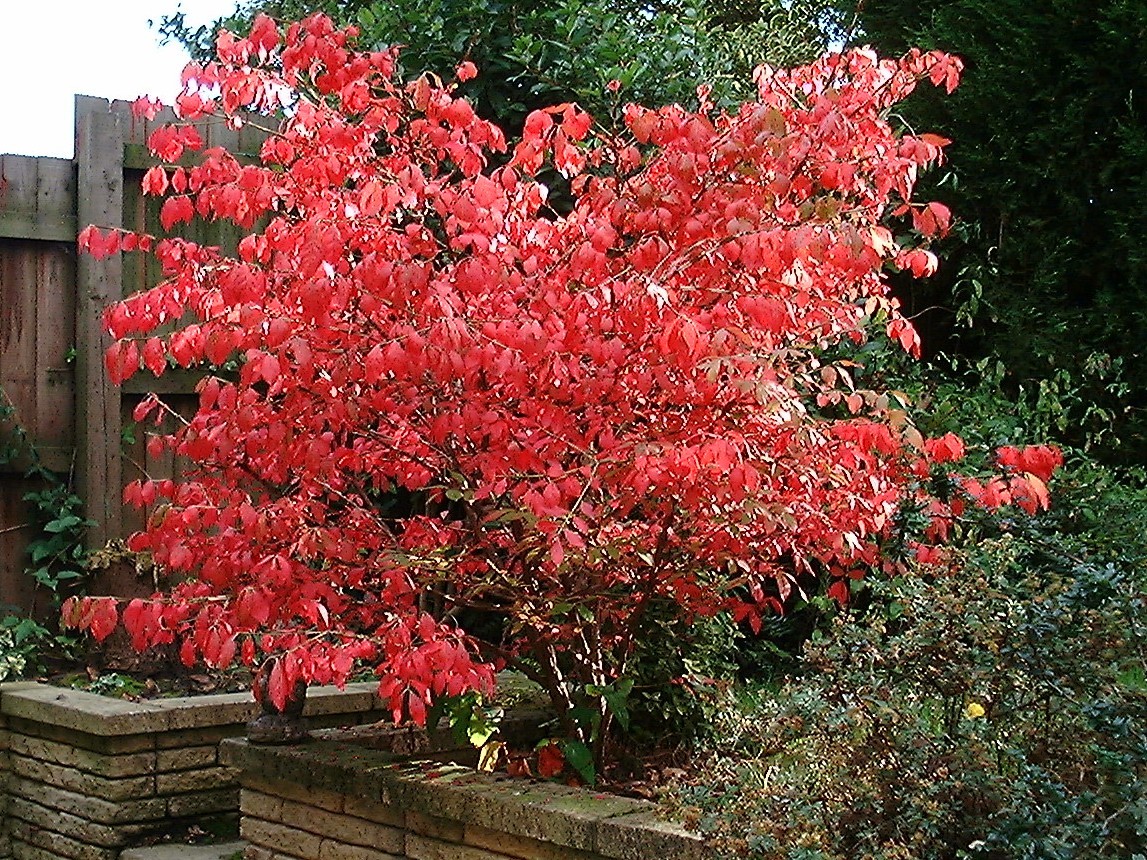
By Paul James
When it comes to gorgeous fall color in the landscape, trees tend to get all the glory. And deservedly so. But there are a number of spectacular shrubs whose fall color rivals even the showiest of trees, and here are a few of my favorites.
Oakleaf Hydrangea – As if its stately form, beautiful flowers, and ease of care weren’t enough, this native shrub also produces amazing fall color that typically lasts for several weeks. What’s more, its dried flowers look great in arrangements. And they’re available in sizes ranging from three-feet tall and wide to twice that.
Euonymus ‘Burning Bush’ – Aptly named, this shrubs practically appears to be on fire in the fall, thanks to its brilliant scarlet leaves. This beauty will grow to about six-feet tall and wide, and is dynamite as a specimen or in a mass planting.
Virburnum ‘Brandywine’ – I’m a huge fan of Viburnums, and this native vies for the most colorful-of-all award with its wine-red fall foliage. As a bonus, it produces breathtaking pink and blue fruit that birds adore. It’ll get five- to six-feet tall and wide.
Virginia Sweetspire – This is my favorite shrub, period. It offers four seasons of interest (including long panicles of scented white flowers in spring), but its fall color of deep red to burgundy is arguably the most interesting of all. And when the leaves finally drop, the red twigs continue to put on a show all winter. Grows to roughly three-feet tall and wide, and can handle a lot of shade and moisture.
Nandina ‘Firepower’ – There was a time when I wasn’t all that keen on Nandinas, but in the past two decades there have been some great introductions. The one that produces the best fall color is ‘Firepower,’ but given enough sun, ‘Burgundy Wine’ and ‘Moonbay’ won’t disappoint either.
Fothergilla ‘Blue Shadow’ – Here’s an underused shrub if ever there was one. Its powder-blue leaves are awesome, as are the sweetly scented flowers in produces in spring. But the big bang comes in fall, when the leaves turn various shades of orange, yellow, and red. It’ll get roughly five-feet tall and wide, and it’ll never disappoint.
Chokeberry – This shrub’s glossy-green foliage turns a jaw-dropping red in fall, and it produces dark purple, nutrient-rich berries that birds – and people – find hard to resist. Expect it to reach five- or six-feet tall and four-feet wide.
Buckthorn ‘Fine Line’ – I love this plant. It’s very columnar – six-feet tall by two-feet wide — making it ideal for tight spaces or as an accent plant and it looks great in containers. Fall color is a bright yellow that really stands out no matter where you plant it.
Blueberries – Surprised to find this edible delight on my list? Well guess what, blueberries are extremely showy in fall, which is why I suggest they be planted in ornamental beds. And there are several sizes to choose from, including dwarfs. So take your pick!
More Terrific Trees
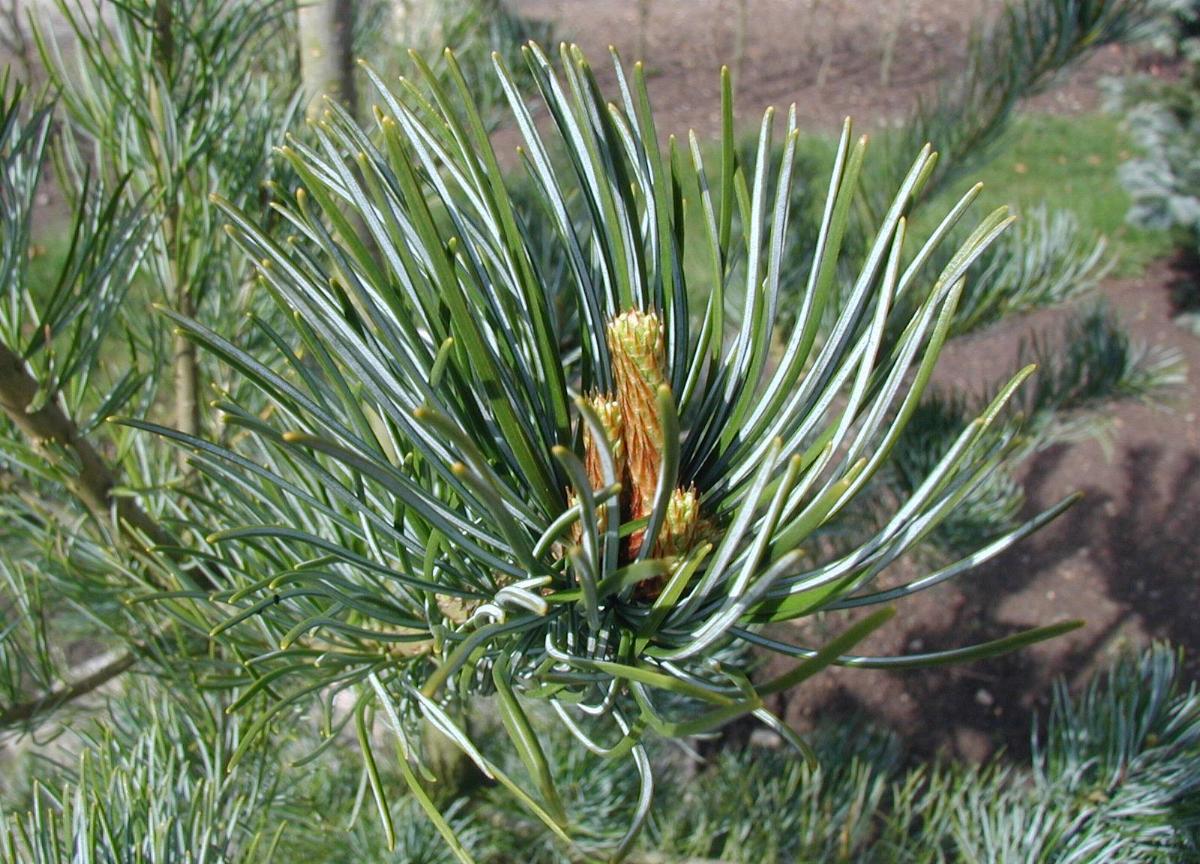
By Paul James
In my final installment of terrific trees, I’m gonna go out on a limb and focus on several not-so-well-known trees, all of which are white pines. But before I get started, let me just say that these trees aren’t for everybody. Nor are they right for all areas of Green Country. However, if you’ve got relatively rich, well-drained soil that’s slightly acidic – or you’re willing to create those conditions – then you owe it to yourself to consider them, because by any definition, they’re terrific.
Pinus strobus ‘ Louie’ is one of the most beautiful white pines I’ve ever seen. Its needles are soft and wispy, and its golden-yellow needles are drop-dead gorgeous, especially in the middle of winter. ‘Louie’ grows in a dense, pyramidal form, and only gets maybe ten-feet tall and half as wide. ‘Louie’ does best in morning sun followed by afternoon shade, but it will also grow well in areas that receive dappled light all day.
Another great choice is ‘Billow,’ a dwarf, globe-shaped white pine with long, blue-green needles. This baby only grows to about three-feet tall and wide – and slowly at that — making it ideal for small gardens, courtyards, or even containers. Interestingly, although this is still considered a conifer, so far not a single plant has been known to produce cones. This is a relatively rare selection, and worthy of inclusion in any setting.
‘Angel Falls’ is a striking, weeping white pine with extremely long, blue-green needles and branches that cascade all the way to the ground. Growing to about ten-feet tall and only four-feet wide, this will make a statement in any landscape. Give this beauty at least a half day of sun or dappled light, and it’ll slowly but surely become one of your all-time favorite plants.
Pinus parviflora includes the Japanese white pines, and among the best for this area are ‘Blauer Engel’ (or if you prefer, ‘Blue Angel’), which grows to about six-feet tall and three-feet wide; ‘Glauca Brevifolia (ten-feet tall and wide); and the stunning ‘Fukuzumi,’ an irregularly shaped, shrub-like form of Japanese white pine with a wind-swept look and twisted, silvery-blue needles.
Yes, there are more choices out there, but for those of you who are looking for something a bit unusual, these are hard to beat. They’re also in short supply, so get ‘em while they last.
Three More Terrific Trees
By Paul James
Last week I discussed three of the best trees for this area – Chinese Pistache, Shumard Oak, and Lacebark Elm. Now it’s time for three more that perhaps aren’t as well known, but are nevertheless great choices, especially if you’re looking for something a bit more unusual.
Topping the list is the Black Gum, known throughout much of the southeast (where it is native) by the more appealing name, Tupelo. Regardless what you call it, this is a fantastic tree. It typically grows to around 30-feet tall and 20-feet wide (although it can get bigger in time), is tolerant of clay soils, and thrives in wet soils as well. Interestingly, however, it will adapt to dry soils if watered regularly when young, and in time will become quite drought tolerant.
Spring flowers aren’t especially showy, but they are a fantastic source of nectar for bees (Tupelo honey, anyone?). And as many as 90 different bird species enjoy the fruits that follow. As the tree matures, its bark develops deep furrows that resemble alligator skin. Green leaves turn a brilliant scarlet in fall, earlier than most other trees.
And speaking of color, the variety ‘Wildfire’ produces ruby-colored leaves in early spring, which then turn bronze, and finally green in summer before turning fiery red in fall. Is that cool or what?
Next up on the hit parade is the Shantung Maple, a tree that definitely deserves to be planted more. The Shantung is relatively small at maturity, topping out at around 20-feet tall by 15-feet wide, which makes it ideal for smaller yards. Although native to China and Korea, it’s easily grown here in Green Country provided it’s planted in well-drained soil in sun to part shade.
The five-lobed leaves of this maple are bright green in spring and summer, and in fall they produce a kaleidoscope of colors ranging from yellow to orange to purplish to red. And finally, unlike most maples which have smooth bark, the Shantung’s bark resembles the skin of a cantaloupe. What a great tree!
And finally, there’s the Bald Cypress, which has been a favorite of mine for decades. A deciduous conifer, the Bald Cypress is native to swampy areas, including southern Oklahoma, so it can handle being planted in a wet spot. But like the Black Gum, it will adapt to dry areas as well. There are several varieties of Bald Cypress available these days, from the species – which can grow to 80 feet or more – to those that max out at 50 feet or so. There’s even a dwarf version called ‘Peve Minaret’ that only grows to about 12 feet, and there’s a stunning, cascading variety call ‘Falling Waters’ that grows to roughly 12 feet by 8 feet and produces pendulous branches that bend all the way to ground.
I’m going to select three more trees for next week’s post, so stay tuned. In the meantime, feel free to add to the urban forest by planting any of the six trees I’ve already described. And in case you’re wondering, When is the best time to plant a tree? The answer is, now.
Three Tough and Terrific Trees
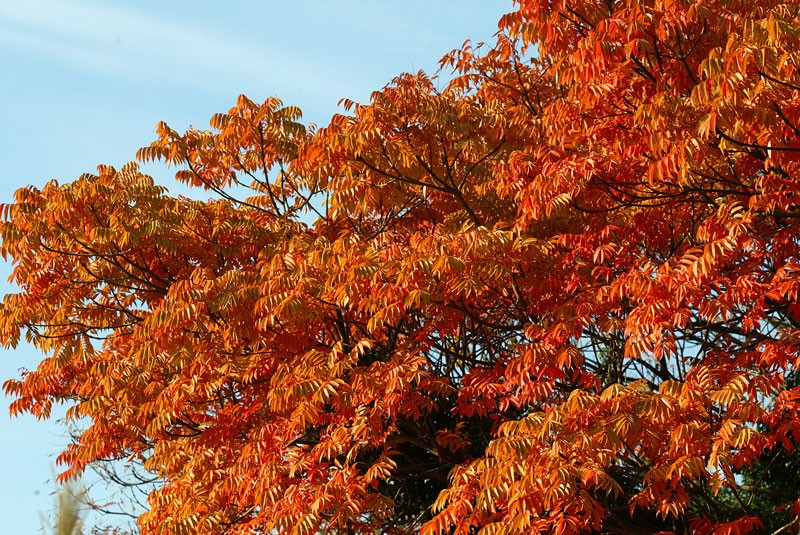
By Paul James
Here in our neck of the woods, we have dozens of great trees to choose from, both deciduous and evergreen. But there are three in particular that are as close to foolproof as you can get because they tolerate an incredibly wide range of soil conditions, are relatively pest and disease free, and are tough as nails. Oh and on top of all that, they’re beautiful.
First up is the Chinese Pistache (pictured above). Yes, it’s related to the tree that produces pistachio nuts, but unfortunately this one doesn’t produce those tasty treats. (Darn!) Chinese Pistache grows at a medium clip, and typically tops out at around 25-feet high and wide. It can get taller – up to 40 feet or more – but that’s the exception. Both male and female trees produce green panicles of flowers; females also produce small, inedible fruits that ripen in fall. Dark green leaves turn shades of yellow, orange, and red in fall, and as it matures, its gray-brown bark often peels away to reveal a salmon-colored inner bark.
Although it’s native to China, Taiwan, and the Philippines, this tree loves Oklahoma. In fact, I wouldn’t be surprised if it naturalizes here some day.
Next is the Shumard Oak, one of the best red oaks ever for Green Country. It’s a pretty fast grower when young, and generally grows to about 40-feet tall. Given plenty of room, it can ultimately reach 60, even 80 feet or more. It maintains a pyramidal shape for many years, then spreads to form a broad, open crown. Its shiny, dark green leaves turn a reddish orange in fall. This tree is native to our area, in particular moist locations in low spots and along streams, lakes, and swamps. Thankfully, however, it adapts quite nicely to dry sites.
And last but hardly least is the Lacebark Elm. Another Chinese native that is perfectly at home in Oklahoma, this baby will grow to about 40 to 50 feet in as many years, but generally hovers around 25 to 30 feet in most landscapes. It’s a quick grower with small green leaves that turn yellow in fall. My favorite feature of this tree is its exfoliating or peeling bark, which flakes to reveal patches of gray, cream, orange, and brown.
Of course, there are lots of other trees to choose from, and I’ll feature three lesser-known choices next week. In the meantime, remember: If you’ve been contemplating a new tree on your property, the time to plant is now.
The Secret to Successful Gardening
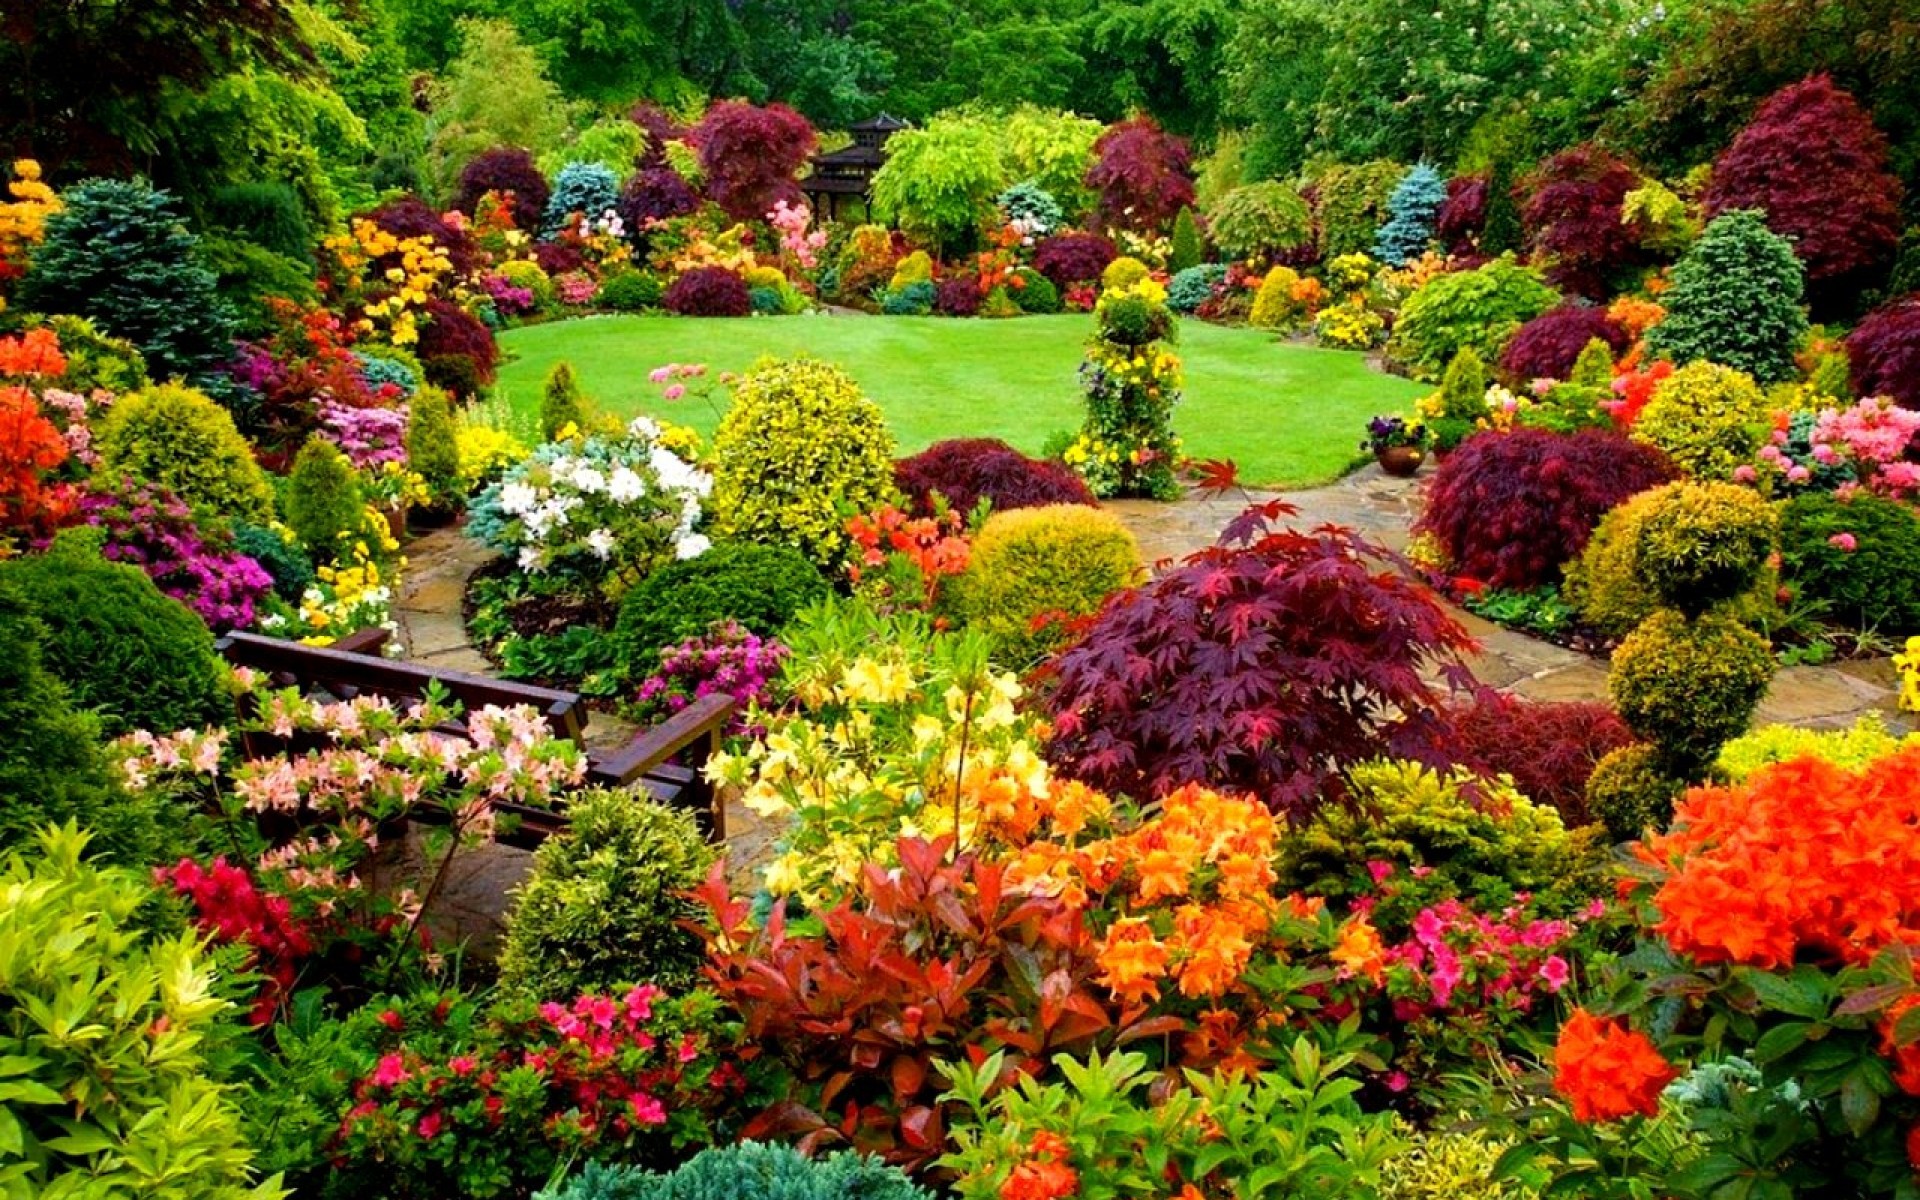
By Paul James
Imagine being able to add something to your garden that makes plants far less susceptible to insects and diseases, provides essential nutrients and micronutrients, improves soil structure and water retention, activates beneficial soil microbes, and basically provides the perfect growing conditions for anything and everything you grow. Now imagine that “something” is free.
I’m talking about compost, the secret to successful gardening if ever there was one. And I can say with absolute certainty that if you’ll routinely add compost to your trees, shrubs, annuals, perennials, vegetables – even plants in containers – you’ll discover a real difference in the health of your plants. You’ll discover that you can grow plants with less fertilizer — because compost is the perfect food for plants — and fewer pesticides — because genuinely healthy plants have the ability to resist pests and diseases. You’ll discover that even heavy, compacted soils become lighter and looser. You’ll discover that you’ll water less often. And you’ll discover that your once sterile soil is teaming with all sorts of critters, especially earthworms.
Still not convinced? Then take a walk in the woods. Notice how healthy everything is, from the trees above to the shrubs and thickets below to the grasses and flowers on the forest floor. Then notice the accumulation of leaf litter and other organic matter on the ground. That’s compost, plain and simple. And that’s nature’s way of keeping everything in perfect harmony.
You can mimic nature’s way by purchasing composted products or by starting a compost pile at home. And to learn how to do just that, join me this Saturday morning at 10:00 for a free seminar titled “Compost is King.” Please register in the Events tab.
Bulbs- Get ‘Em in the Ground!
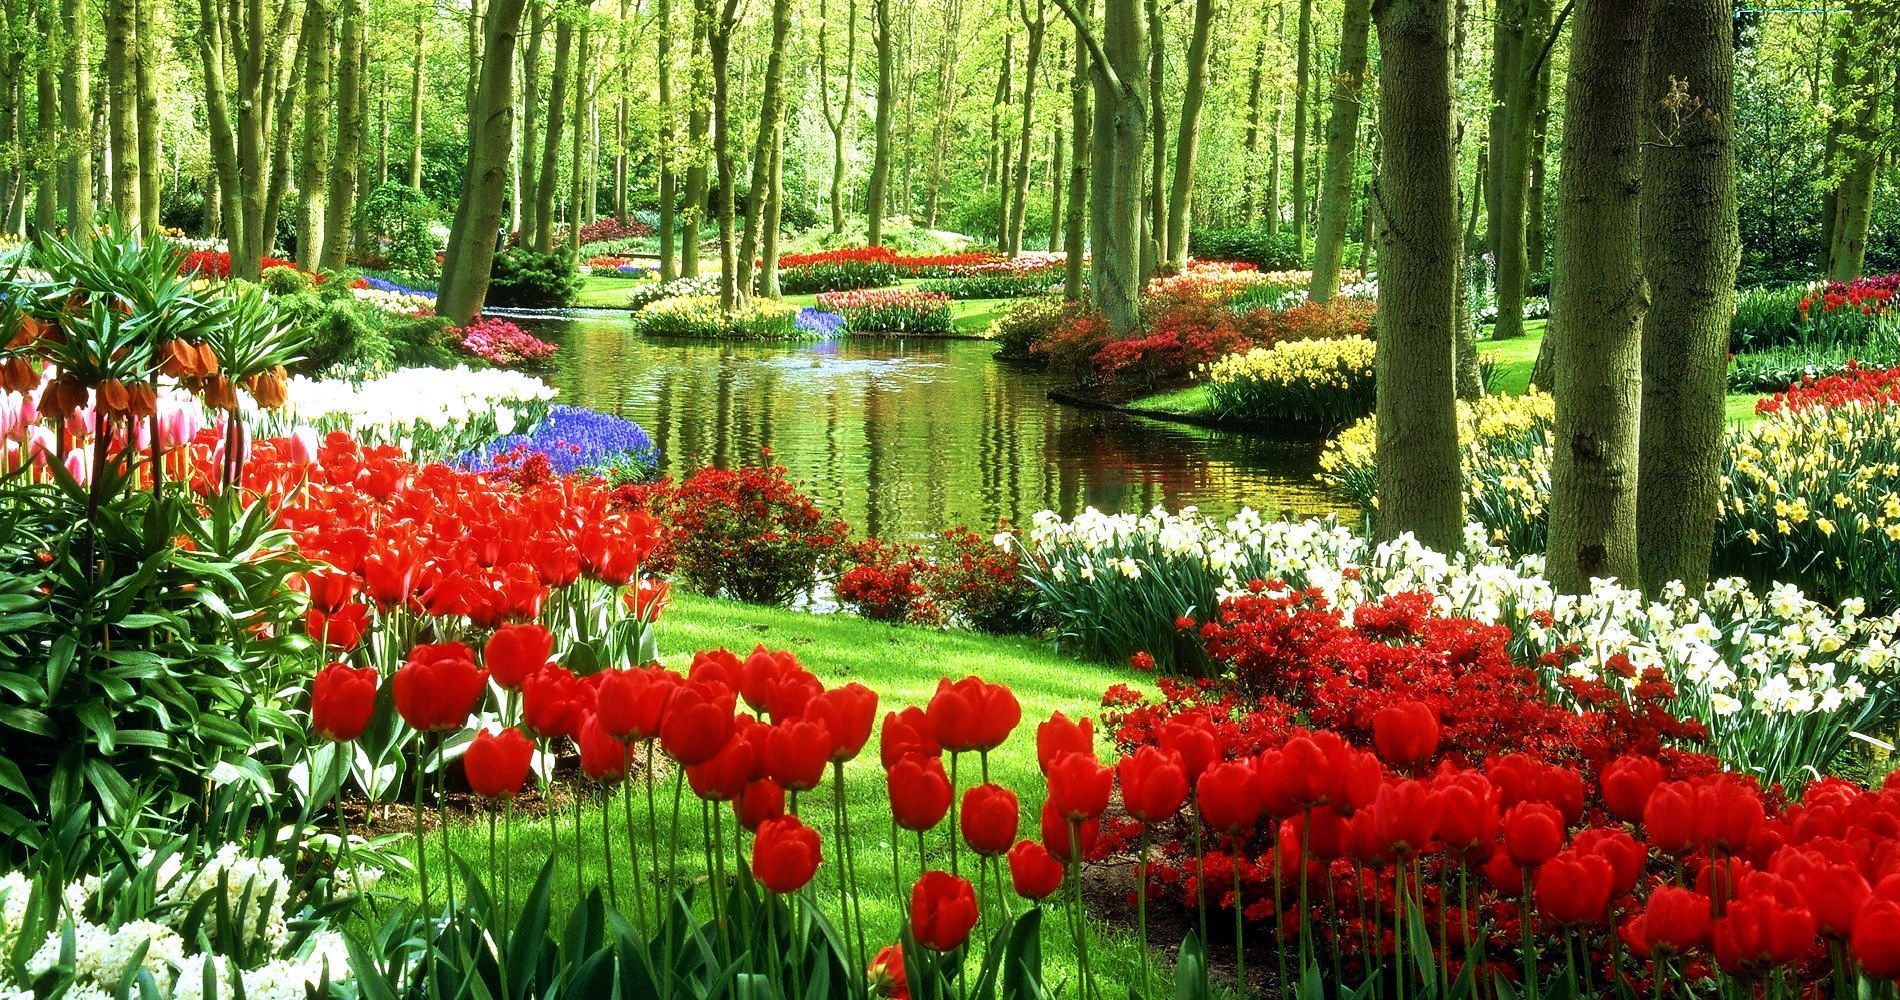
By Paul James
Yeah, you read that right. It’s time to plant spring-flowering bulbs. There’s really no point in waiting any longer. And there’s really no point in planting some now and some later. Why not just get the job done in one fell swoop?
And besides, if you’re going to mix bulbs in the same planting area – which is a great way to grow them – then why would you want to plant daffodils now and tulips or hyacinths or whatever two weeks from now? It doesn’t make sense. And the truth of the matter is the bulbs will be better off in the ground than sitting in your garage or on a store shelf.
According to every source I’ve contacted – from Piet Stuifbergen of Stuifbergen Bloembollen Export (Southwood’s exclusive supplier of bulbs) to the people at The Netherlands Flower Bulb Centre to our friends at OSU, the time to plant is now. And you can continue planting until the ground freezes, which may be November and might even be December.
So, sound the alarm. Tell your friends and neighbors. The time to plant bulbs is now. Or this weekend, anyway.
It’s Planting Time!

By Paul James
Every year for the past 25 years or more, I’ve tried to convince my friends and fellow gardeners that now is the perfect time to plant all kinds of things. So here I go again. But to be clear, I’m not talking about things that most folks know to plant in fall – mums, pansies, asters, ornamental kale and cabbage, cool-season veggies, fescue and rye grasses, spring-flowering bulbs – the stuff that practically defines fall planting. I’m talking about practically everything else, in particular trees, shrubs, and perennials.
The reason I’ve harped on the subject for so long is that I’ve witnessed firsthand for decades the enormous difference fall planting makes. Allow me to explain by getting to the root (or rather, roots) of the matter.
Planting in the fall gives roots a chance to grow quickly, because the plant isn’t forced to devote near as much energy toward producing foliage or flowers or fruit as it is in spring. Instead, it devotes nearly all of its energy into producing roots, a process that continues for weeks, even months. The reverse is generally true in the spring – a plant’s energy is devoted to new top growth at the expense of root growth.
Consequently, what you plant in fall will be far more prepared for the surge of new growth in spring, and be far better equipped to handle the heat of summer, thanks to its larger root mass. And fall planting greatly reduces the chance of transplant shock, largely because air temperatures are cooler and rainfall is more dependable.
Don’t get me wrong: I’m not saying you shouldn’t plant trees, shrubs, and perennials in spring. But I am saying that given a choice, I’d opt to plant the vast majority of plants from those categories in fall. And so should you.
Yes, I’m Conifer Crazy!

By Paul James
This isn’t the first time I’ve written about conifers, and it won’t be the last. My love affair with this amazing plant group began many years ago with a visit to Rich’s Foxwillow Pines Nursery in Woodstock, Illinois. Owner Rich Eyres took me on a tour of his place, and as he described the plants in his considerable (as in $12-million) inventory, his passion oozed like sap from a fresh-cut spruce. That passion has stuck with me ever since, and to this day that tour ranks as the most memorable of all my gardening experiences.
When I got back to Tulsa, I immediately set out to find as many conifers as I could, but was dismayed to discover that the choices at the time were limited. Sure, there were a few species of pine available, as well as some junipers and a spruce or two, but the more interesting and unusual selections I’d seen at Rich’s place were nowhere to be found.
Thankfully, however, all that has changed in recent years. Now you can find outstanding selections in a broad range of sizes, shapes, and colors. Common to this area are a number of excellent cedars, junipers, pines and spruces, all of which do well in Green Country. But here are some of my less familiar favorites that you really should consider.
Cedrus: There are only three species in the true cedar family – the Atlantic cedar, the Deodar cedar, and the cedar of Lebanon. Truth is, you can’t go wrong with any of them. Perhaps my favorite of the lot is the Deodar known as ‘Feelin’ Blue.’ It reaches a height of only three feet, but spreads to around five or six feet. There’s also a yellow equivalent called ‘Feelin Sunny.’ All cedars can handle full sun.
Cryptomeria: Sometimes called Japanese cedar (even though it isn’t), this is the most revered tree in Japan, where you’ll find it planted near shrines and temples, as well as in huge swaths of forest. ‘Black Dragon’ is an outstanding upright form, and ‘Globosa Nana’ is an excellent mounded shrub form. Both grow well here so long as they’re planted in a spot that gets afternoon shade.
Chamaecyparis: Also known as false cypress, this genus includes dozens of great choices, although my favorites are the Hinoki cypresses. They too are available in upright and shrub forms, as well as true dwarfs, such as the magnificent, golden-tinged ‘Verdoni.’ I’m also keen on the large and graceful weeping ‘Alaskan Cedar’ (which isn’t a cedar either). And then there’s ‘Fernspray’ (in green and gold), which is truly gorgeous. Again, afternoon shade is preferred.
Picea: The spruce family is vast, and while many are familiar with the blue forms, I’m actually partial to the green ones. I love the weepers, although I must admit a new upright form called ‘Hillside Upright’ has grabbed my attention, and is destined for a spot in my yard. Its lateral branches grow somewhat sparsely up the main trunk, so it’s easy to see through, unlike most spruces. A cool round form that produces oodles of cones is the relatively new ‘Pusch.’ Spruces love the sun.
Pinus: Oh, the pines. If I had to pick only one conifer, it would likely be a pine. The odd-shaped ‘Uncle Fogy’ is one of my favorites, although I’m guessing it’s not for everybody. The weeping white pines are spectacular as well. A new, round form of white pine called ‘Billow’ is gorgeous, and a new mugo named ‘Jakobsen’ is beyond beautiful. It looks like a ready-made bonsai. But if you’ve got room for a 20-foot tree form, check out the yellow-needled ‘Louie.’ It’s drop-dead gorgeous, and it holds its yellow color year round. Generally speaking, pines prefer full sun, but a bit of afternoon shade won’t hurt.
Last but not least, there are dozens of incredible miniature conifers available that look dynamite in the ground or in containers. And many of them make excellent starter bonsais.
I could easily rattle off more choices, but I’m hoping these will spark your curiosity. Fair warning, however: You may become as addicted to conifers as I have, but then that’s hardly a bad thing.
Bulb Planting Tips and Tricks
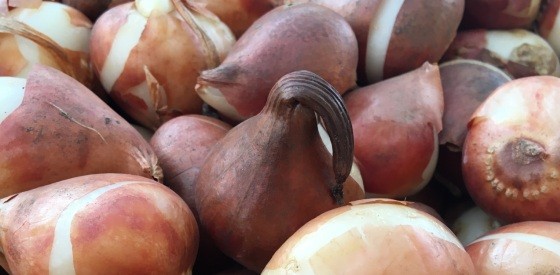
by Paul James
Bulb Planting Tips & Tricks
This Saturday morning at 10:00, none other than Piet Stuifbergen of Holland-based exporter Stuifbergen Bloembollen will be at Southwood to share his vast knowledge of bulbs with us. I don’t pretend to know what Piet knows, but I have successfully planted thousands of bulbs over the years, so I thought I’d give you a brief primer on bulb planting in advance, including a few of my favorite tips and tricks. First, the basics.
Spring-flowering bulbs arrive in stores (Southwood included) several weeks before the ideal planting time. That’s just the nature of the business, and has been for as long as I can remember. Consequently, it pays to shop early to ensure the best selection. The bulbs will be fine for several weeks if stored in the garage or other cool, dark spot.
Planting time varies from year to year, although typically it begins in October or, as a general rule of thumb, six weeks before the first hard freeze. Another suggestion is to simply wait until overnight temps are consistently in the 50s. I’ve planted as early as late September and as late as Thanksgiving in years past and achieved excellent results.
First and foremost, realize that bulbs don’t like wet feet, so make sure the planting area you have in mind drains well. Adding soil amendments won’t hurt, but it’s not always necessary. Plant large bulbs approximately eight-inches deep and small bulbs roughly five-inches deep. Always plant the pointed end up. If there’s no clearly defined pointed end, plant the bulb on its side and it’ll figure out which way to grow.
You can fertilize at planting time, but all the nutrients needed for growth are contained in the bulb itself. Fertilization is more important when early spring growth begins to emerge. After planting, water well, and give yourself a pat on the back.
In terms of where and how to plant, the possibilities are endless. However, here are some of my favorite approaches, beginning with companion plantings.
One of my favorite companion-planting techniques is to combine daffodils with daylilies. The daffodils come up first, then as the daylilies begin to grow, their foliage hides the fading daffodil foliage. And you get continuous blooms from both for weeks on end.
I also like the look of daffodils or tulips mixed with pansies, which results in a dazzling spring display.
What I don’t care for are bulbs planting in straight rows like soldiers on parade. Instead, I prefer swaths of several dozen bulbs. If you layer the planting area with tall bulbs in the back and short ones in front, you get a beautiful, cascading effect. And if you plant early-, mid-, and late-blooming varieties, you get weeks and weeks of eye-popping color.
Without question, my favorite look is the naturalized planting, and the best way to achieve that look is to place a few dozen mixed bulbs in a bag or bucket, toss them in the yard or garden bed, and plant them where they fall. It works great, and it’s pretty much foolproof. Give it a try.
I’ll see you Saturday morning.
Wascally Wabbits!

by Paul James
I moved into my current home just over four years ago, and from day one I’ve dealt with rabbits ravaging my vegetable gardens. I actually made the situation worse by building fences to keep my three dogs out of the gardens, which basically created safe havens for the rabbits (and squirrels, but that’s another story).
I’ve contributed to the problem in other ways – a pallet of stones that I bought a while back but haven’t figured out what to do with, and several hay bales that I buy every year and allow to rot for months before applying to the gardens as mulch. Both are ideal habitats for rabbits. And I have a deck and storage building that rabbits burrow beneath to nest. I routinely seal the openings, but invariably they create new ones elsewhere, or my beagle creates new ones for them as he relentlessly but futilely tries to get at them.
I’ve used various repellent products, which offer limited control and must be reapplied often. I’ve tried fake owls, which must be moved every day, and even then don’t seem to work more than a few weeks. I’ve tried blood meal with some success, but you can only apply so much pure nitrogen to plants. I’ve tried coyote urine, manure from zoo animals, dog hair from the groomer, shavings of Irish Spring soap, dustings of cayenne pepper and homemade garlic sprays, all with mixed results. I have had some success by planting white clover in my lawns as a trap crop. Rabbits love clover, but they also like a diverse diet, one that includes lettuce and spinach and just about everything else I grow (although they don’t like mustard greens – yippee!).
And that’s the way it is with nearly all rabbit controls, whether store bought or homemade: They definitely work, but they don’t work indefinitely.
(My wife says we need a cat to roam free in the backyard, but I’m allergic to cats, and my numerous raised beds would serve as nothing more than gigantic litter boxes.)
If you scour The Google for ideas, you’ll ultimately discover that the only tried and true way to keep rabbits out of the garden is to fence them out. But not just any fence will do. Ideally, it should be made of ¼-inch galvanized mesh screening, should be at least two-feet tall, and should be buried below ground at least six inches. Great. So how am I supposed to work in my garden beds when they’re wrapped in fencing?
I’ve spent decades giving advice to fellow gardeners. Now I need advice from you. If you’ve discovered a way to keep rabbits out of the garden (other than using products made by Winchester or Remington), please tell me about it. And hurry. My fall veggies are germinating, and the young seedlings are an enticing smorgasbord to all the wascally wabbits that call my home their home.
Plant More Bulbs!
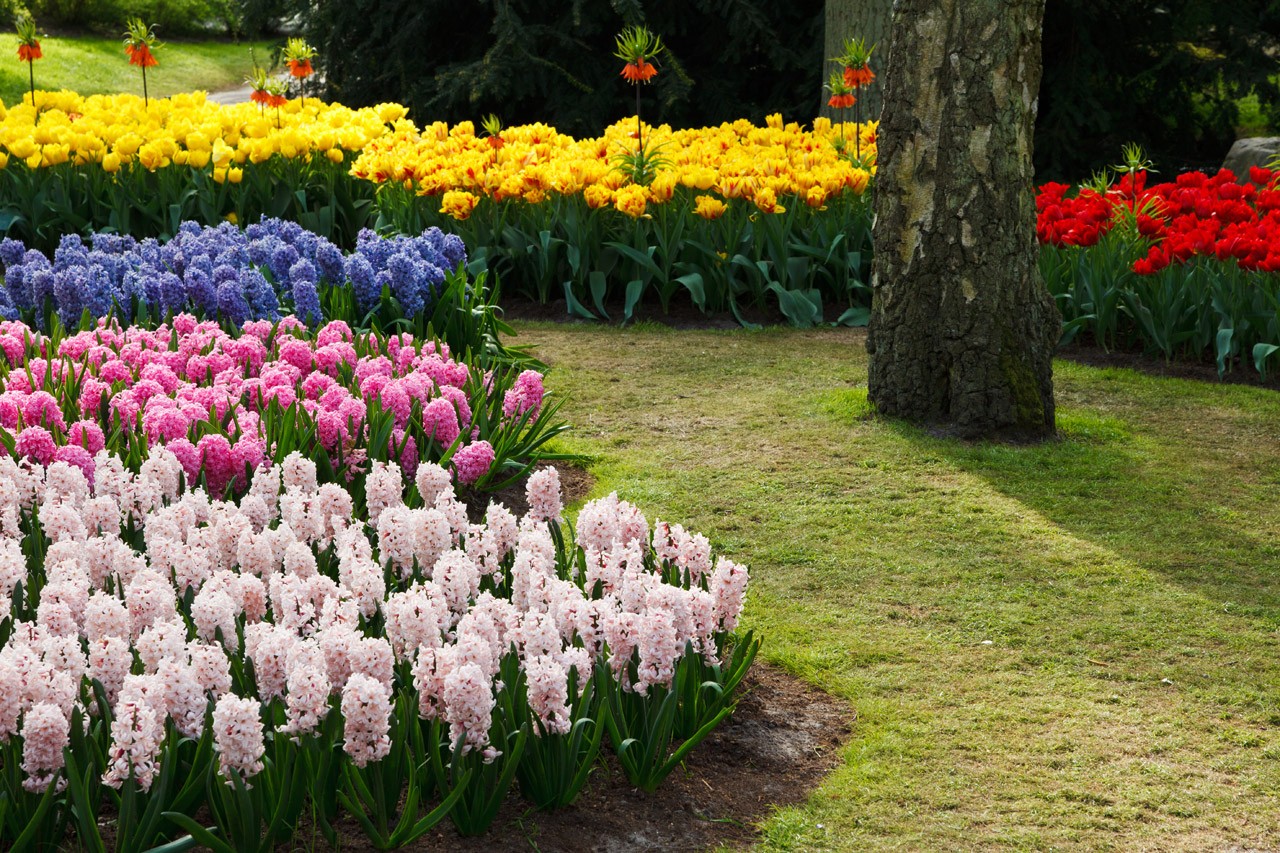
by Paul James
Sales of spring-flowering bulbs – tulips, daffodils, hyacinths, and more – have been declining nationwide in recent years, and I can’t for the life of me understand why. After all, we’re talking about gorgeous flowers that are easy to plant, even easier to care for, in most cases come back year after year, and cost precious little coin. Why then, aren’t more and more people taking advantage of the many attributes of bulbs?
Is it because aging gardeners (a group I’m now a member of) think that planting bulbs is too difficult? Perhaps. But c’mon, preparing a planting hole with a bulb planter or trowel is pretty simple, and even simpler with a bulb-planting auger attached to a drill.
Is it because homeowners think bulbs require too much maintenance? Maybe. But bulbs are about as maintenance free as any plant could possibly be. Fertilize them just as green growth begins to emerge, and water them during dry spells. That’s about all there is to it.
Is it because the price of bulbs seems high? That’s hard to imagine. Bulbs are a bargain, the best bargain in the entire world of plants. Think about it. A dozen daffodils retails for less than ten bucks. That’s less than the price of many one-gallon perennials. And instead of one plant you get 12. In two years, those 12 become might become 24, in three years 36, and so on.
Is it because bulbs have lost their appeal? Not a chance. Bulb festivals in New York, Michigan, Utah, Iowa, Kansas, the Pacific Northwest, and elsewhere continue to draw huge crowds.
So why have bulbs sales been declining? Well, I’m convinced the reason is rather simple: people just forget when to plant them. Bulbs require a chilling period in the ground, which means they must be planted in October through November, a time when most folks – even many diehard gardeners – have put their gardens to bed and called it quits until spring.
Those are the same people I hear complaining every spring – as they walk through their neighborhood or stroll through a park — about how they missed the opportunity to plant bulbs in their own gardens the previous year. Don’t be one of those people. Mark your calendar now for October 15, and make it a point this fall to plant more bulbs. Lots and lots of bulbs.
Talkin’ Turf
by Paul James
Fall in Green Country means cooler temperatures, more dependable rainfall, fewer pest and disease problems… and lots of stuff to do in the garden! In the next few weeks I’ll be looking at the most important fall gardening topics and presenting timelines for what to do and when. This week my focus is on lawn care.
Seeding time for cool-season grasses such as fescue and rye is just around the corner, ideally when overnight temperatures are in the 60s or cooler and the mid-80s or cooler during the day. You can certainly plant earlier, but chances are you’ll have to water more if rainfall is scare. Regardless, you should plan on sowing five pounds of seed per thousand square feet in an existing lawn, and twice that rate on bare surfaces. Scratching the soil surface with a metal rake to create shallow furrows helps to ensure good seed-to-soil contact, but in an existing lawn you can just let the seeds fall where they may.
The only real trick to getting seed to germinate is even and consistent moisture. You don’t need to water a lot, but you do need to water often so that the seed and the top quarter inch of soil stay moist. Typically, that means watering briefly twice a day. Both fescue and rye ordinarily germinate within seven days if they receive adequate moisture.
Fall — as in now through the first or second week in October — is also a good time to deal with weed control in the lawn, but realize that you can’t use certain weed-control products – namely those known as pre-emergent herbicides —and sow grass seed at the same time. Pre-emergent herbicides, by definition, prevent seeds from germinating, and they don’t distinguish between grass seed and chickweed seed.
And finally, fall – as in now through mid to late September — is the ideal time to fertilize turf grasses of all types. In fact, if you can only afford to fertilize once a year, fall is your best bet. Turf grasses have the ability to take up the nutrients in fertilizers, convert them to carbohydrates, and store the carbs over the winter. The following spring, they use those carbs to kick growth into high gear.
Next week I’ll focus on a group of plants that give you the biggest bang for your buck – spring-flowering bulbs.
“The Most Important Time Spent in the Garden is the Time Spent Not Gardening”
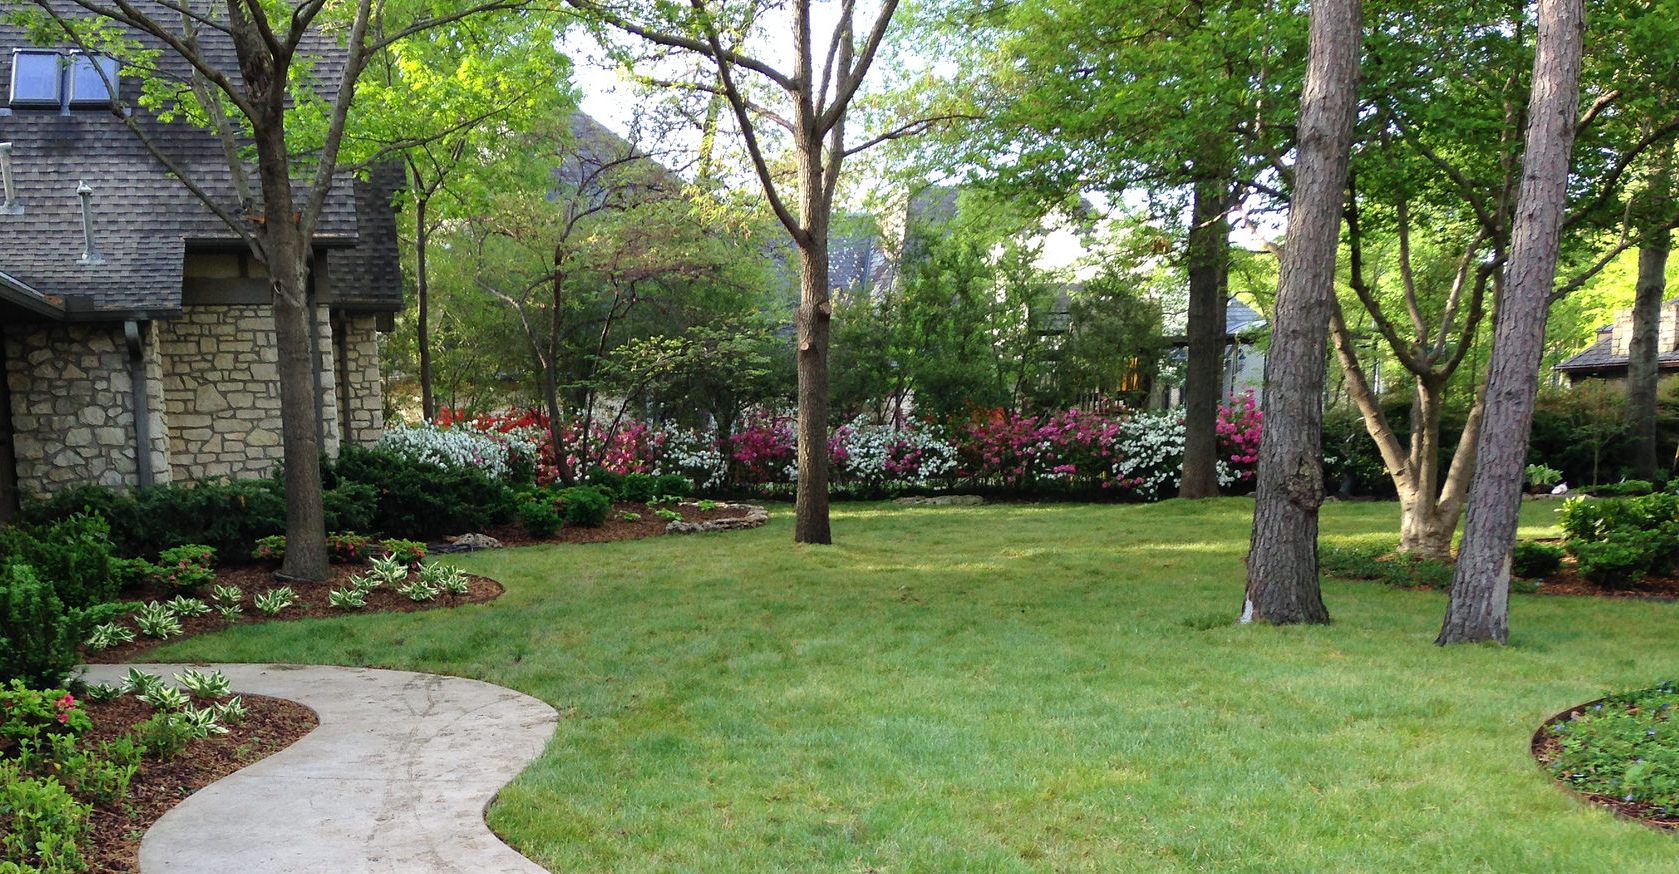
by Paul James
The quote above is my own. And while it may not pass for profundity, it captures the essence of what I think is the most important lesson I’ve learned in 40 years of success and failure as a gardener.
Naturally, I’m not suggesting for a moment that you don’t garden. What I am suggesting is that you spend time in the garden now and then doing nothing more than observing. No pruners. No trowel. No watering wand. Just you (and perhaps a beverage) strolling through the garden and paying close attention to the wonders that surround you.
Try it for the first time early in the morning. As you stroll, deliberately change your perspective. Look at plants from the top down, from the side, and from the bottom up. Examine the undersides of their leaves, and be prepared to be startled by critters that like to hide there.
Feel the textures of leaves and stems. Crush them and smell them. Do likewise with flowers. And yes, even weeds.
Flip over rocks to see who and what’s hiding under them. Scratch the soil surface and see what lies an inch below. Pull up a plant that’s seen better days and pay close attention to its root system.
Then try it again at night, ideally when the moon is full, and get ready to witness a whole new world, one that can be as different as, well, day and night.
Do those things and chances are you’ll never see your garden in the same way again, and you’ll begin to understand the interconnectedness of all the living things that call your garden home. But most importantly, you’ll begin to develop a genuine kinship with the world around you. And that’s time well spent.
Plant a Fall Veggie Garden!
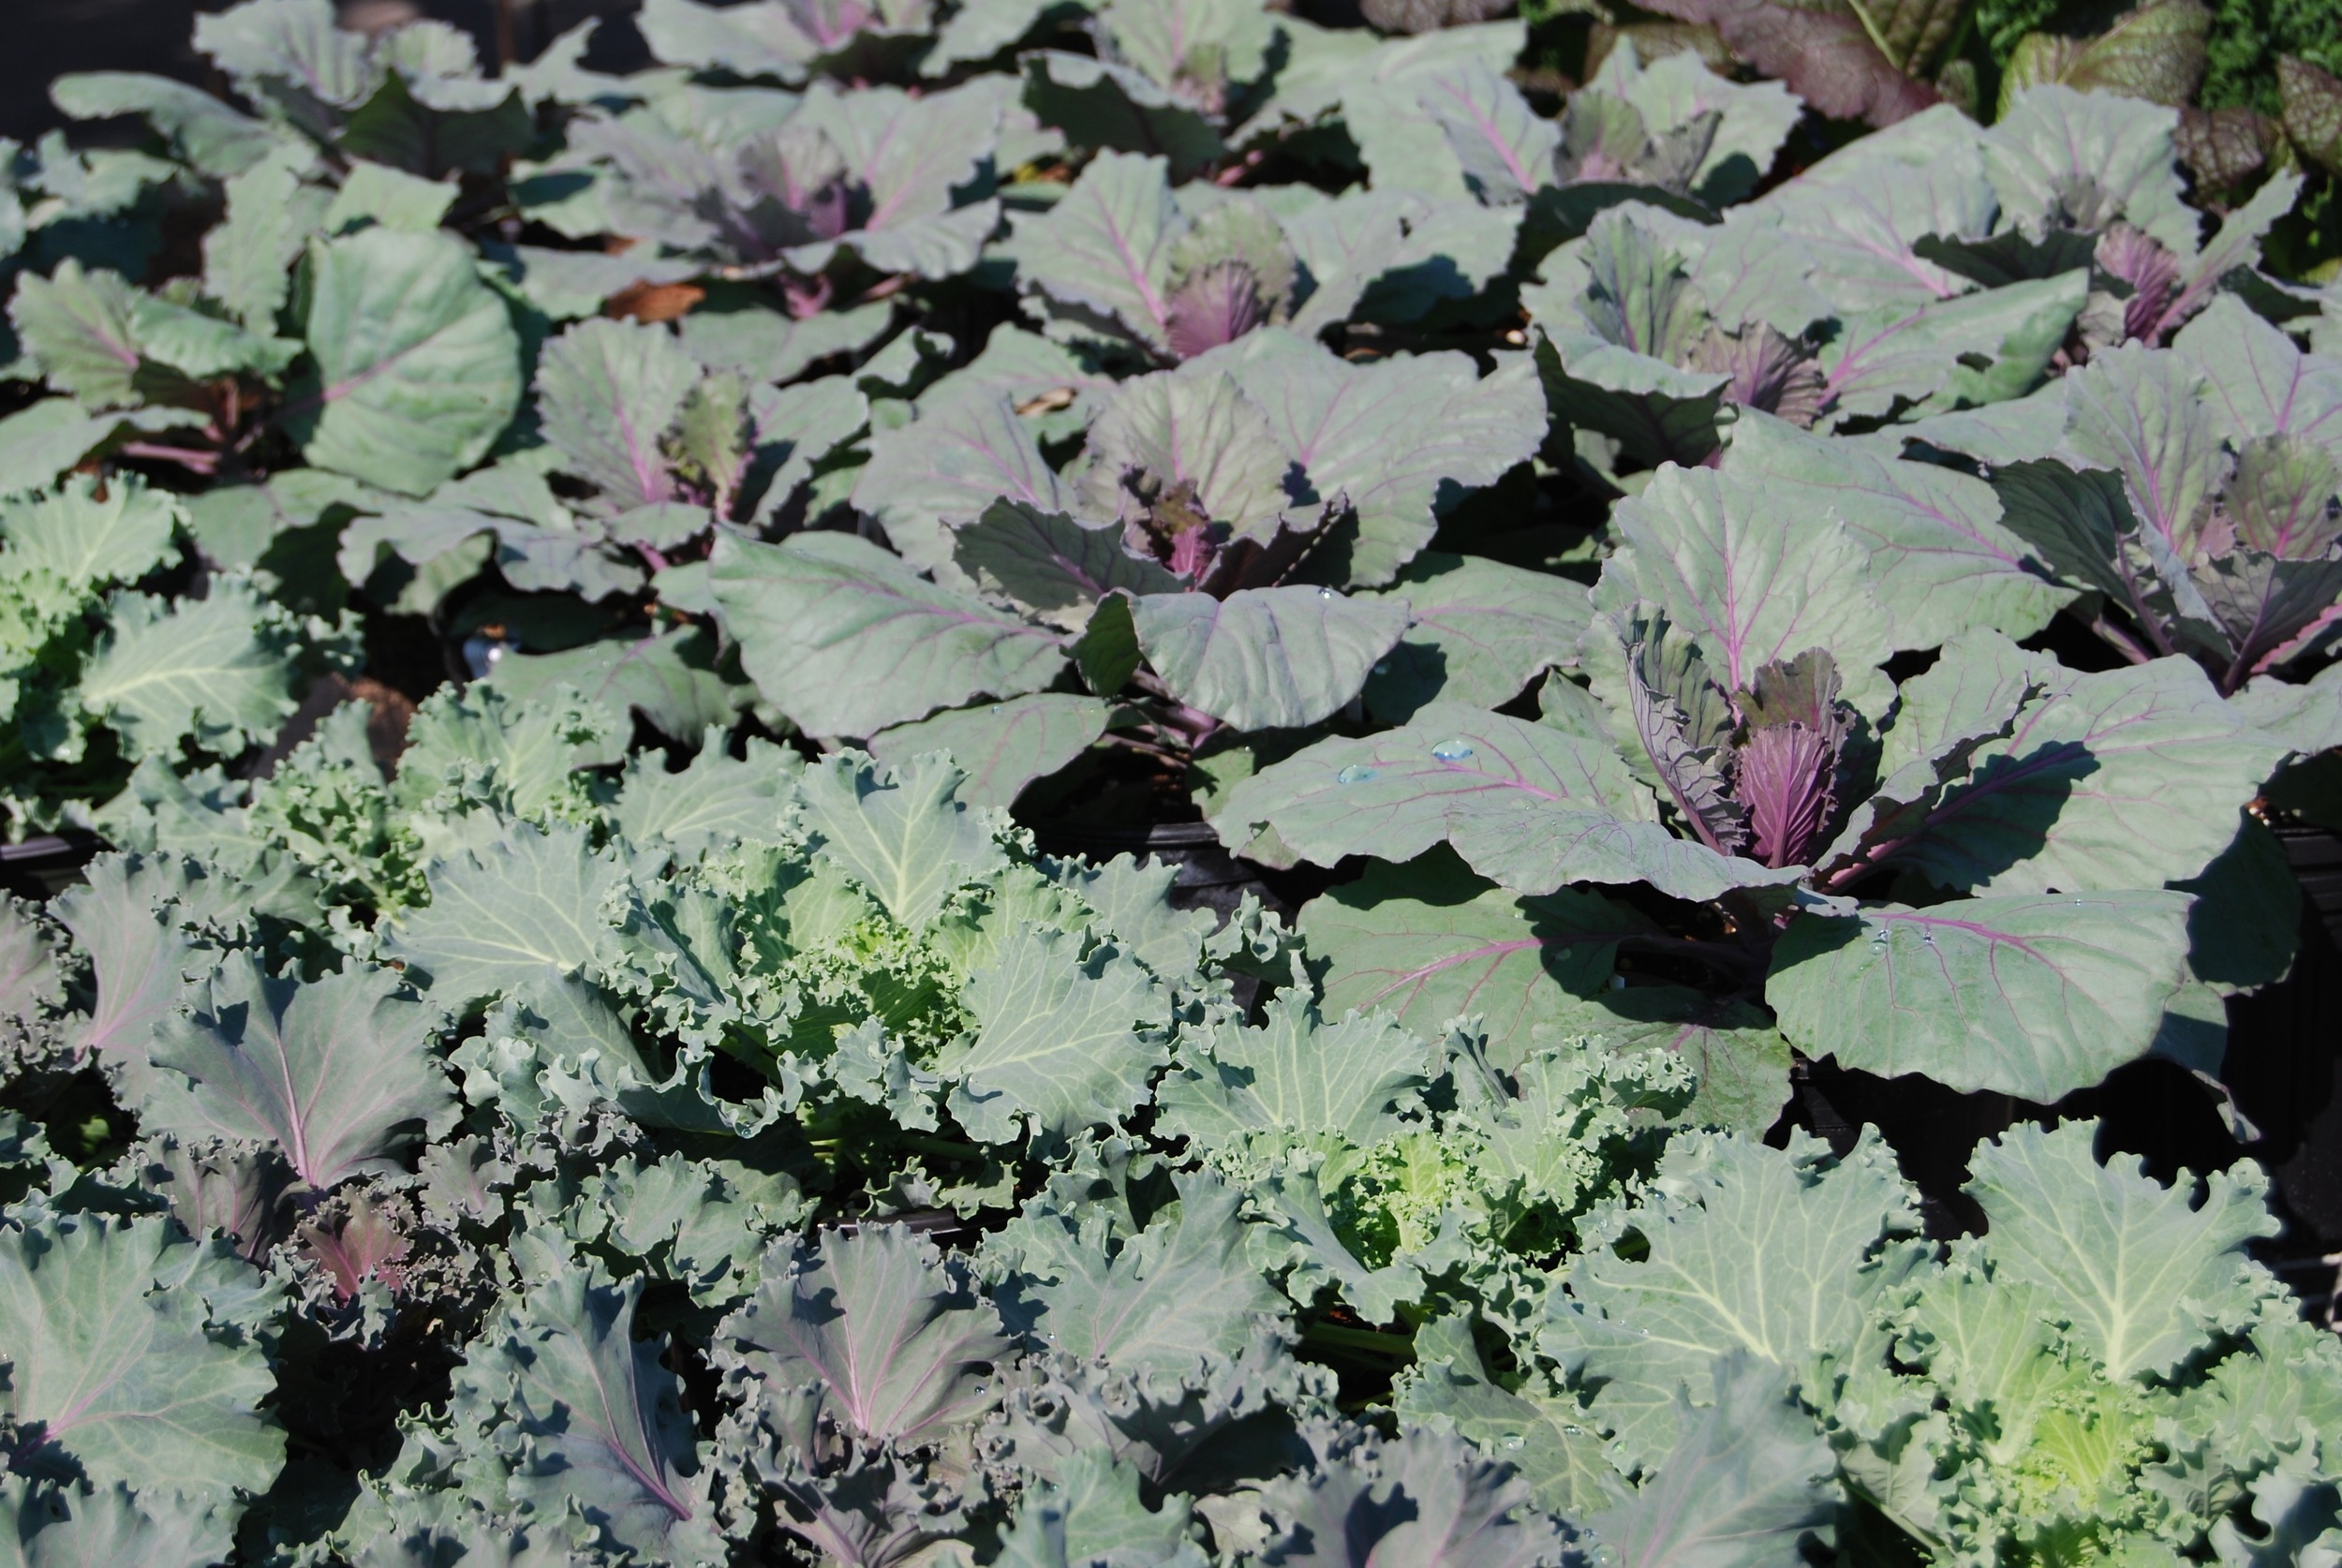
by Paul James
If I had only one season in which to plant a vegetable garden, it would be fall. No doubt about it. And the reason is simple: vegetables harvested in the fall taste better. No doubt about that either.
And just what will I be planting? Well pretty much everything I plant every spring, with the exception of asparagus, and that’s a long list, one that I now present in alphabetical order, with an asterisk indicating those that I plant as transplants. All others I direct sow in the garden from seed.
Arugula
Beets
*Broccoli
*Brussel Sprouts
* Cabbage
Carrots
*Cauliflower
Collards
Kale
Kohlrabi
Lettuce
Mustard Greens
Onions
Potatoes
Spinach
Swiss Chard
Radishes
Turnips
Planting veggies in the fall is a tad tricky, because everything on my list is a cool-season crop, yet it’s anything but cool this time of year. And it’s not just the air temperature that presents a problem – it’s the soil temp as well. So here’s what you need to do to ensure a successful fall planting.
1. Wait until at least the middle of August to plant, and make successive sowings into mid-September.
2. Plant seeds and transplants late in the day, so they aren’t subjected to the hot sun immediately after planting, or wait for an overcast day to plant.
3. Plant seeds roughly twice as deep as you would in spring (check the seed packet for planting depth). It may take them longer to germinate, but they’ll be fine.
4. Water every morning and again every night to keep the seeds as cool as possible. (And if you can, run home at lunch and water some more.)Water just enough to keep the top inch or so of soil moist and cool. If you’ve got a drip irrigation system, good for you. Follow the same schedule.
5. Spread a light layer of mulch over the planting area to conserve moisture. Grass clippings work great, as do hay or compost.
6. As seeds begin to germinate, increase the amount of water, but continue to water both day and night until plants are established and temperatures begin to cool off a bit, then water only as needed.
Do all that, and you should have plenty of tasty veggies to enjoy for weeks on end. And don’t worry too much about frosts. Everything on my list is not only frost tolerant (down to about 27 degrees or so), but their flavor actually improves when they get nipped by frost (the plants produce more sugars in response to colder temperatures). In fact, I’ve harvested carrots and spinach and beets and kale on Christmas morning many a year, and that’s about as good a present as I could hope for.
Deadheading – Yay or Nay?
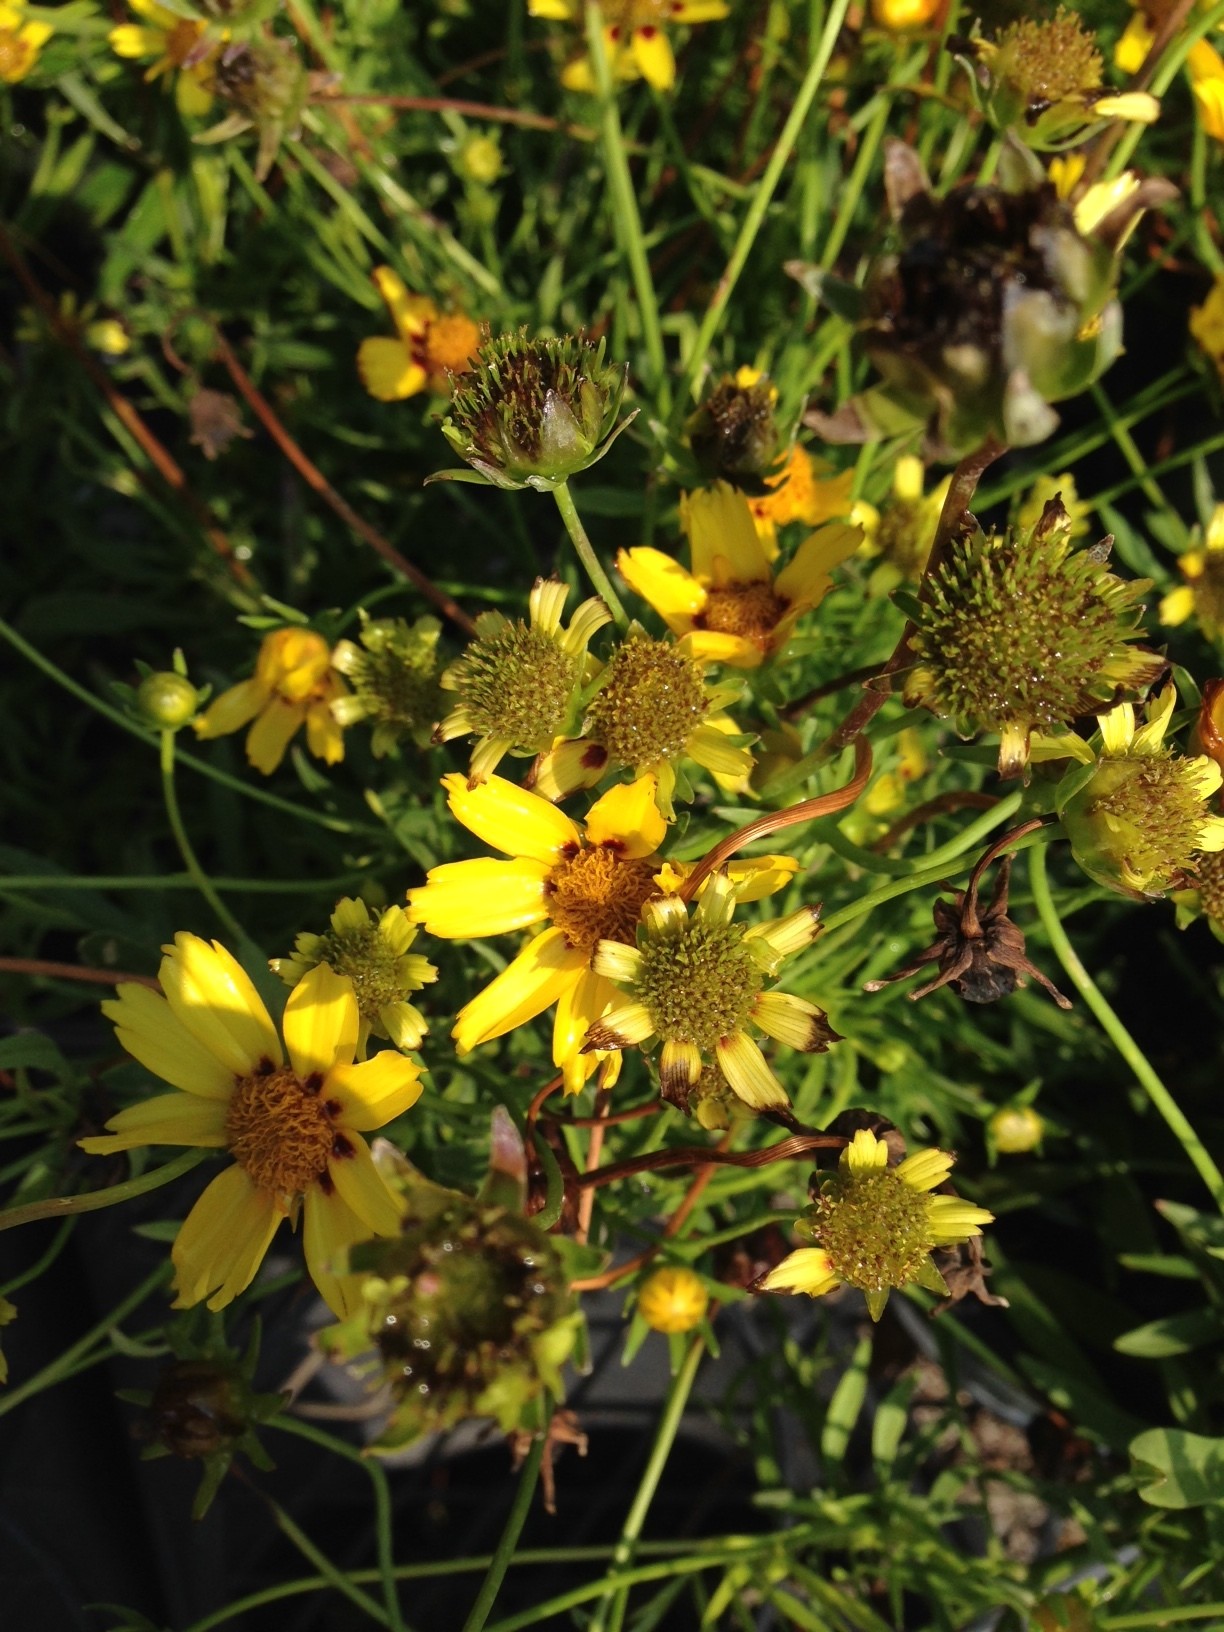
by Paul James
I’ll never forget the first time I heard the term deadheading. It was in the late 70s, and it curiously coincided with the moment I decided that the Grateful Dead was the most overrated band of the era.
Deadheading is the process of removing spent flowers. It’s not something you have to do, but in some cases it’s worth doing.
Many flowering plants will rebloom after deadheading. After all, the evolutionary goal of flowering plants is to set seed, so by deadheading you encourage those plants to produce even more flowers. Another reason to deadhead is to prevent plants that reproduce readily from seed from taking over your garden.
Now if you’ve got three or four Coreopsis, then deadheading two or three times during the growing season with pruners or scissors or a flick of the thumb is no big deal. But if you’ve got a few dozen plants, then you’ve got your work cut out for you.
So make no mistake – deadheading can be a tedious, if not downright daunting task, which is why plant breeders are developing so-called “self-cleaning” hybrids that don’t require deadheading, either because the foliage and new flowers hide the old ones, or because wind actually removes the flowers from the plant.
At the end of the day, the decision to deadhead comes down to whether you’re a neat freak or not. If you like things orderly, manicured, and maintained, then by all means deadhead all you want. But if you think neatness is overrated, feel free to skip the process altogether. And by not deadheading, you can take heart in knowing that your garden will become a haven for songbirds that’ll quickly devour the seeds left on your plants.
What Not to Do in the Garden

by Paul James
Given the dome of heat and humidity that seems to have perched directly on top of us – and with little if any relief in sight — I thought now would be a good time to remind you what not to do in the garden. Here it goes.
Don’t spray with oil-based products in the middle of the day. This includes horticultural oil and Neem oil. Although they’re great, all-natural pesticides/fungicides, they can be phytotoxic, meaning they can burn leaves, especially when temps are in the 90s. Instead, apply oil-based products after sundown.
Don’t cut your grass too short. The height of your turf is roughly equivalent to the depth of its roots, and this time of year you want the deepest roots possible. So raise the height of your mower at least one notch, regardless of the type of turf you grow.
Don’t allow water to stand in pot saucers, or anywhere else for that matter. It’s mosquito season, after all, and those little buzzers need only a thimble full of water to lay their eggs.
Don’t apply fertilizer too aggressively. Feeding plants when it’s this hot forces them to grow at a time when they’d rather take a break. If you feel you must fertilize, use half the amount recommended on the package. Otherwise, wait another month or so.
Don’t plant large trees or shrubs this time of year. The odds of them surviving aren’t good at all, so better to wait until things cool off a bit.
Don’t overdo it. Take frequent breaks, drink lots of water, and try to get your gardening chores done early in the morning.
Paul James Chats with Southwood Farm Customer Jared Chamberlain

I first met Jared Chamberlain in 2010, the year he joined Bodean’s Seafood Restaurant as Chef de Cuisine. I took an immediate liking to him, thanks to his big, friendly smile and contagious laugh. But I was particularly impressed by his take on food preparation: less is more, freshness is key, and pretentiousness has no place on the plate.
Jared’s roots in the restaurant biz go way back. His mother, Debbie Higgs, operated Route 66 Diner, and it was there that Jared became acquainted with one of the most important tasks in any kitchen. “I washed dishes in third grade after bringing home bad grades,” he told me.
Jared was promoted (deservedly) to Executive Chef at Bodean’s in 2015. I sat down with him last week to chat about a number of things, especially his love of local ingredients.
PJ: You actually seek out local farmers for the freshest ingredients. Why is that?
JC: Taste!
PJ: So there’s a noticeable difference in the flavor of local produce?
JC: Absolutely. The flavors of locally grown fruits and vegetables are more unique and always better.
PJ: And why do you think that is?
JC: It’s because everything is picked when it’s perfectly ripe, and because local farmers seem to genuinely care about the quality of what they grow. They’re passionate about what they do, and so am I. The farmers and I have the same goal, which is the freshest, tastiest product.
PJ: You buy a lot of veggies from Southwood Farm. Have you been pleased with the produce?
JC: Oh yeah. The tomatoes in particular are delicious. Farmer Kyle (Dismukes) does a great job at growing them and picking them at just the right moment – not too early, not too late. I also love the Austrian Crescent potatoes. And the eggplant. And the cucumbers. And the squash.
PJ: What’s your favorite way of preparing most veggies?
JC: Roasted! I thinking roasting brings out the flavors of veggies in a way no other cooking method can.
PJ: And how are you using the cucumbers?
JC: Well of course we use them in salads. But what’s really cool – as cool as a cucumber, you might say – is the cucumber “water” we make and use as the base sauce for halibut. Customers love it.
Cucumber “Water”
Peel six cucumbers. Cut in half lengthwise and chop into one-inch chunks. Using the metal blade in a food processor or a blender, process on high for about two minutes. Strain the mixture through a fine-mesh strainer or colander lined with cheesecloth. Press solids to extract as much liquid (and flavor) as you can.
Use cucumber water as a refreshing drink straight up or mixed with a splash of soda, add it to gin- or vodka-based cocktails, or use it as a simple sauce, seasoned with a little salt and pepper. It’ll keep for several days in the fridge.
Paul’s Plant Pick Week 10: Three Big Bloomers for Summer
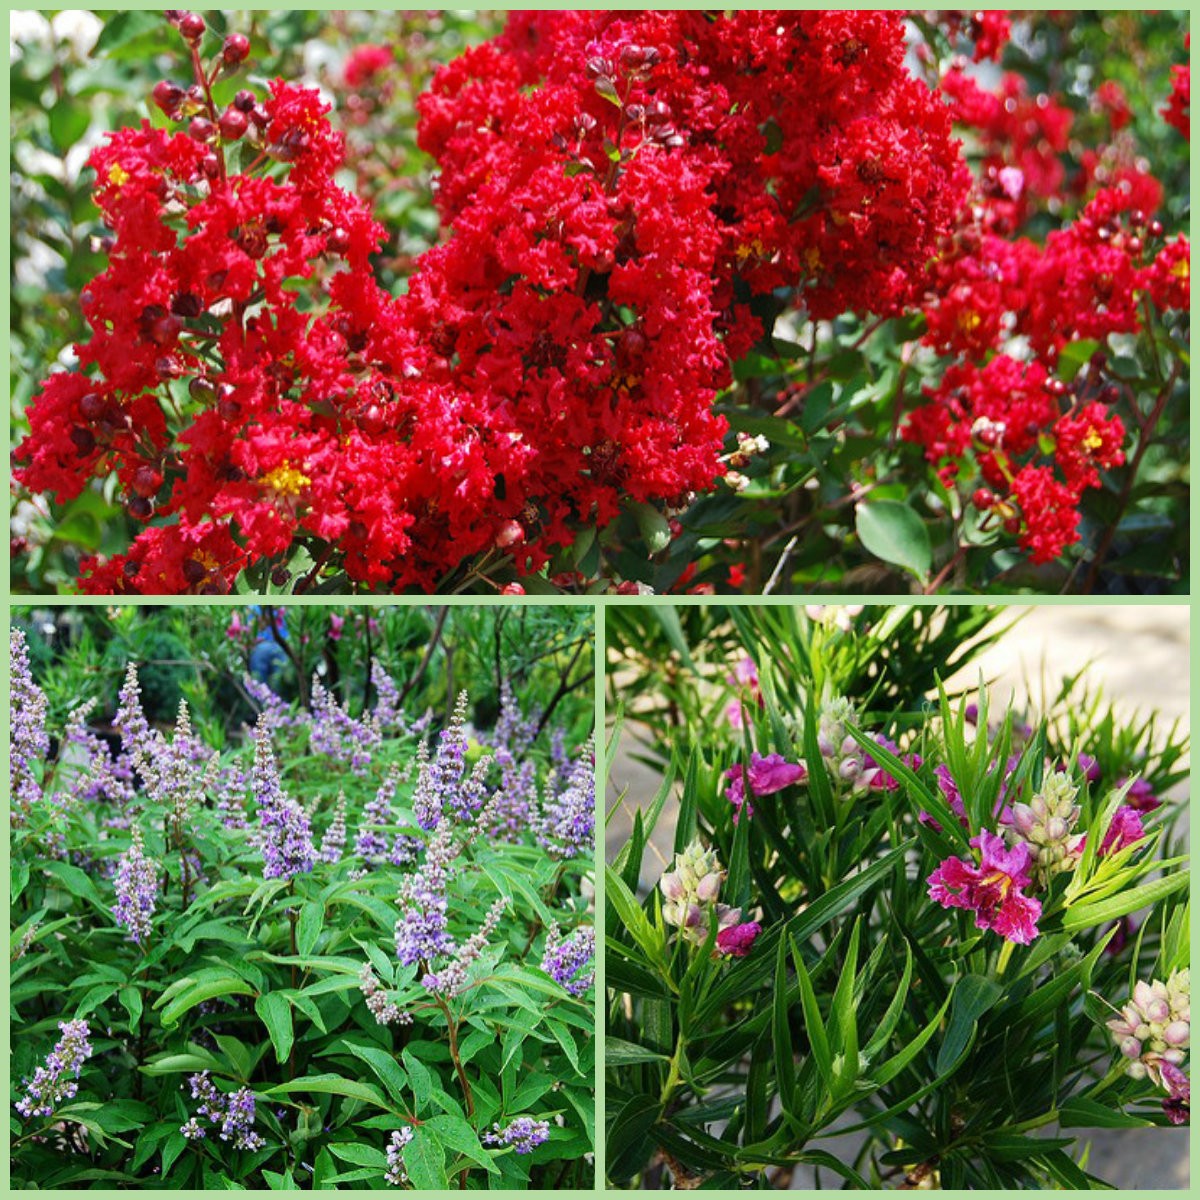
Three Big Bloomers for Summer
Funny thing about trees and shrubs: Most of them do best when planted in either spring or fall. In fact, I can’t in good faith recommend that you even consider planting most trees – and to a lesser extent, most shrubs — this time of year. Better to just wait until fall.
But there are three notable exceptions – all deciduous — and they are among my favorite plants because not only do they bloom like crazy in the intense heat of summer, they actually do best when planted in the heat of summer. And the three I speak of are Crape Myrtle, Vitex – also known as the Chaste Tree – and Desert Willow.
These three big bloomers can take all the insufferable heat and blazing sun nature throws their way, and they respond by flowering more and more, as if to say, “Is that all you’ve got?” They also root rapidly in the warm soils of summer, which is why the best time to plant them is now.
Crape Myrtle
Crape Myrtles are familiar to just about everyone, but not everyone is aware that they are available in a broad range of sizes. Not so long ago nearly all Crape Myrtles were sold as multi-trunk trees with a height of roughly 20 feet. Those trees are still available and hugely popular, but so are the shrub forms which range in height from less than two feet to around eight feet, which means you can plant a Crape Myrtle just about anywhere so long as it receives full sun.
Vitex (Chaste Tree)
Vitex is another sun lover, and it’s a pollinator magnet throughout the summer and into the fall. Most varieties grow as multi-stemmed shrubs to around ten-feet tall and wide, but they can be pruned annually for a more compact look. And you can choose plants with white, pink, or blue flowers. This is definitely an underused plant.
Desert Willow
Desert willow is a small deciduous tree native to west Texas. As the name suggests, it loves the heat. (However, it’s not a willow; it’s so named because the leaves resemble those of willows.)Large, fragrant, orchid-like flowers occur in showy clusters at the tips of the branches and on new wood from late spring to fall. It’s easy to grow but must have a well-drained site and must not be overwatered. It can be pruned to a tree or shrub, and because it blooms on new wood, the more it’s pruned, the more it flowers.
Paul’s Plant Pick Week 9: Yews
The genera Taxus and the related Cephalotaxus include the beautiful and familiar yews and the equally beautiful but less familiar plum yews, respectively. Feel free to think of them interchangeably, for the differences between them are relatively minor, and feel free to plant them in a spot that gets a few hours of morning sun followed by shade the rest of the day or receives dappled light throughout the day and has well-drained soil. Basically, plant them anywhere you might otherwise plant azaleas, because both thrive in similar conditions.
So why do I love yews? Well, let me count the ways. For starters, they’re evergreen, and I think landscapes are often woefully lacking in evergreens. They’re available in different sizes and shapes, from columnar forms (‘Capitata,’ Hicksii,’ and ‘Viridis’) to broad shrub forms (‘Densiformis’) to low, wide forms (‘Emerald Spreader’). They’re great as specimens, as shrub borders, even in mass plantings. They can be sheared again and again to keep them at whatever size and shape you want. Their new growth in spring is a gorgeous lime green, and female plants produce bright red berries in late summer to early fall. Their needles are soft. They’re bothered by few insect and disease problems (but you should inspect plants periodically for scale and mealybugs). And they’re remarkably drought tolerant once established.
And that’s why I love yews. What do yew think?
Paul’s Plant Pick Week 8: Coleus
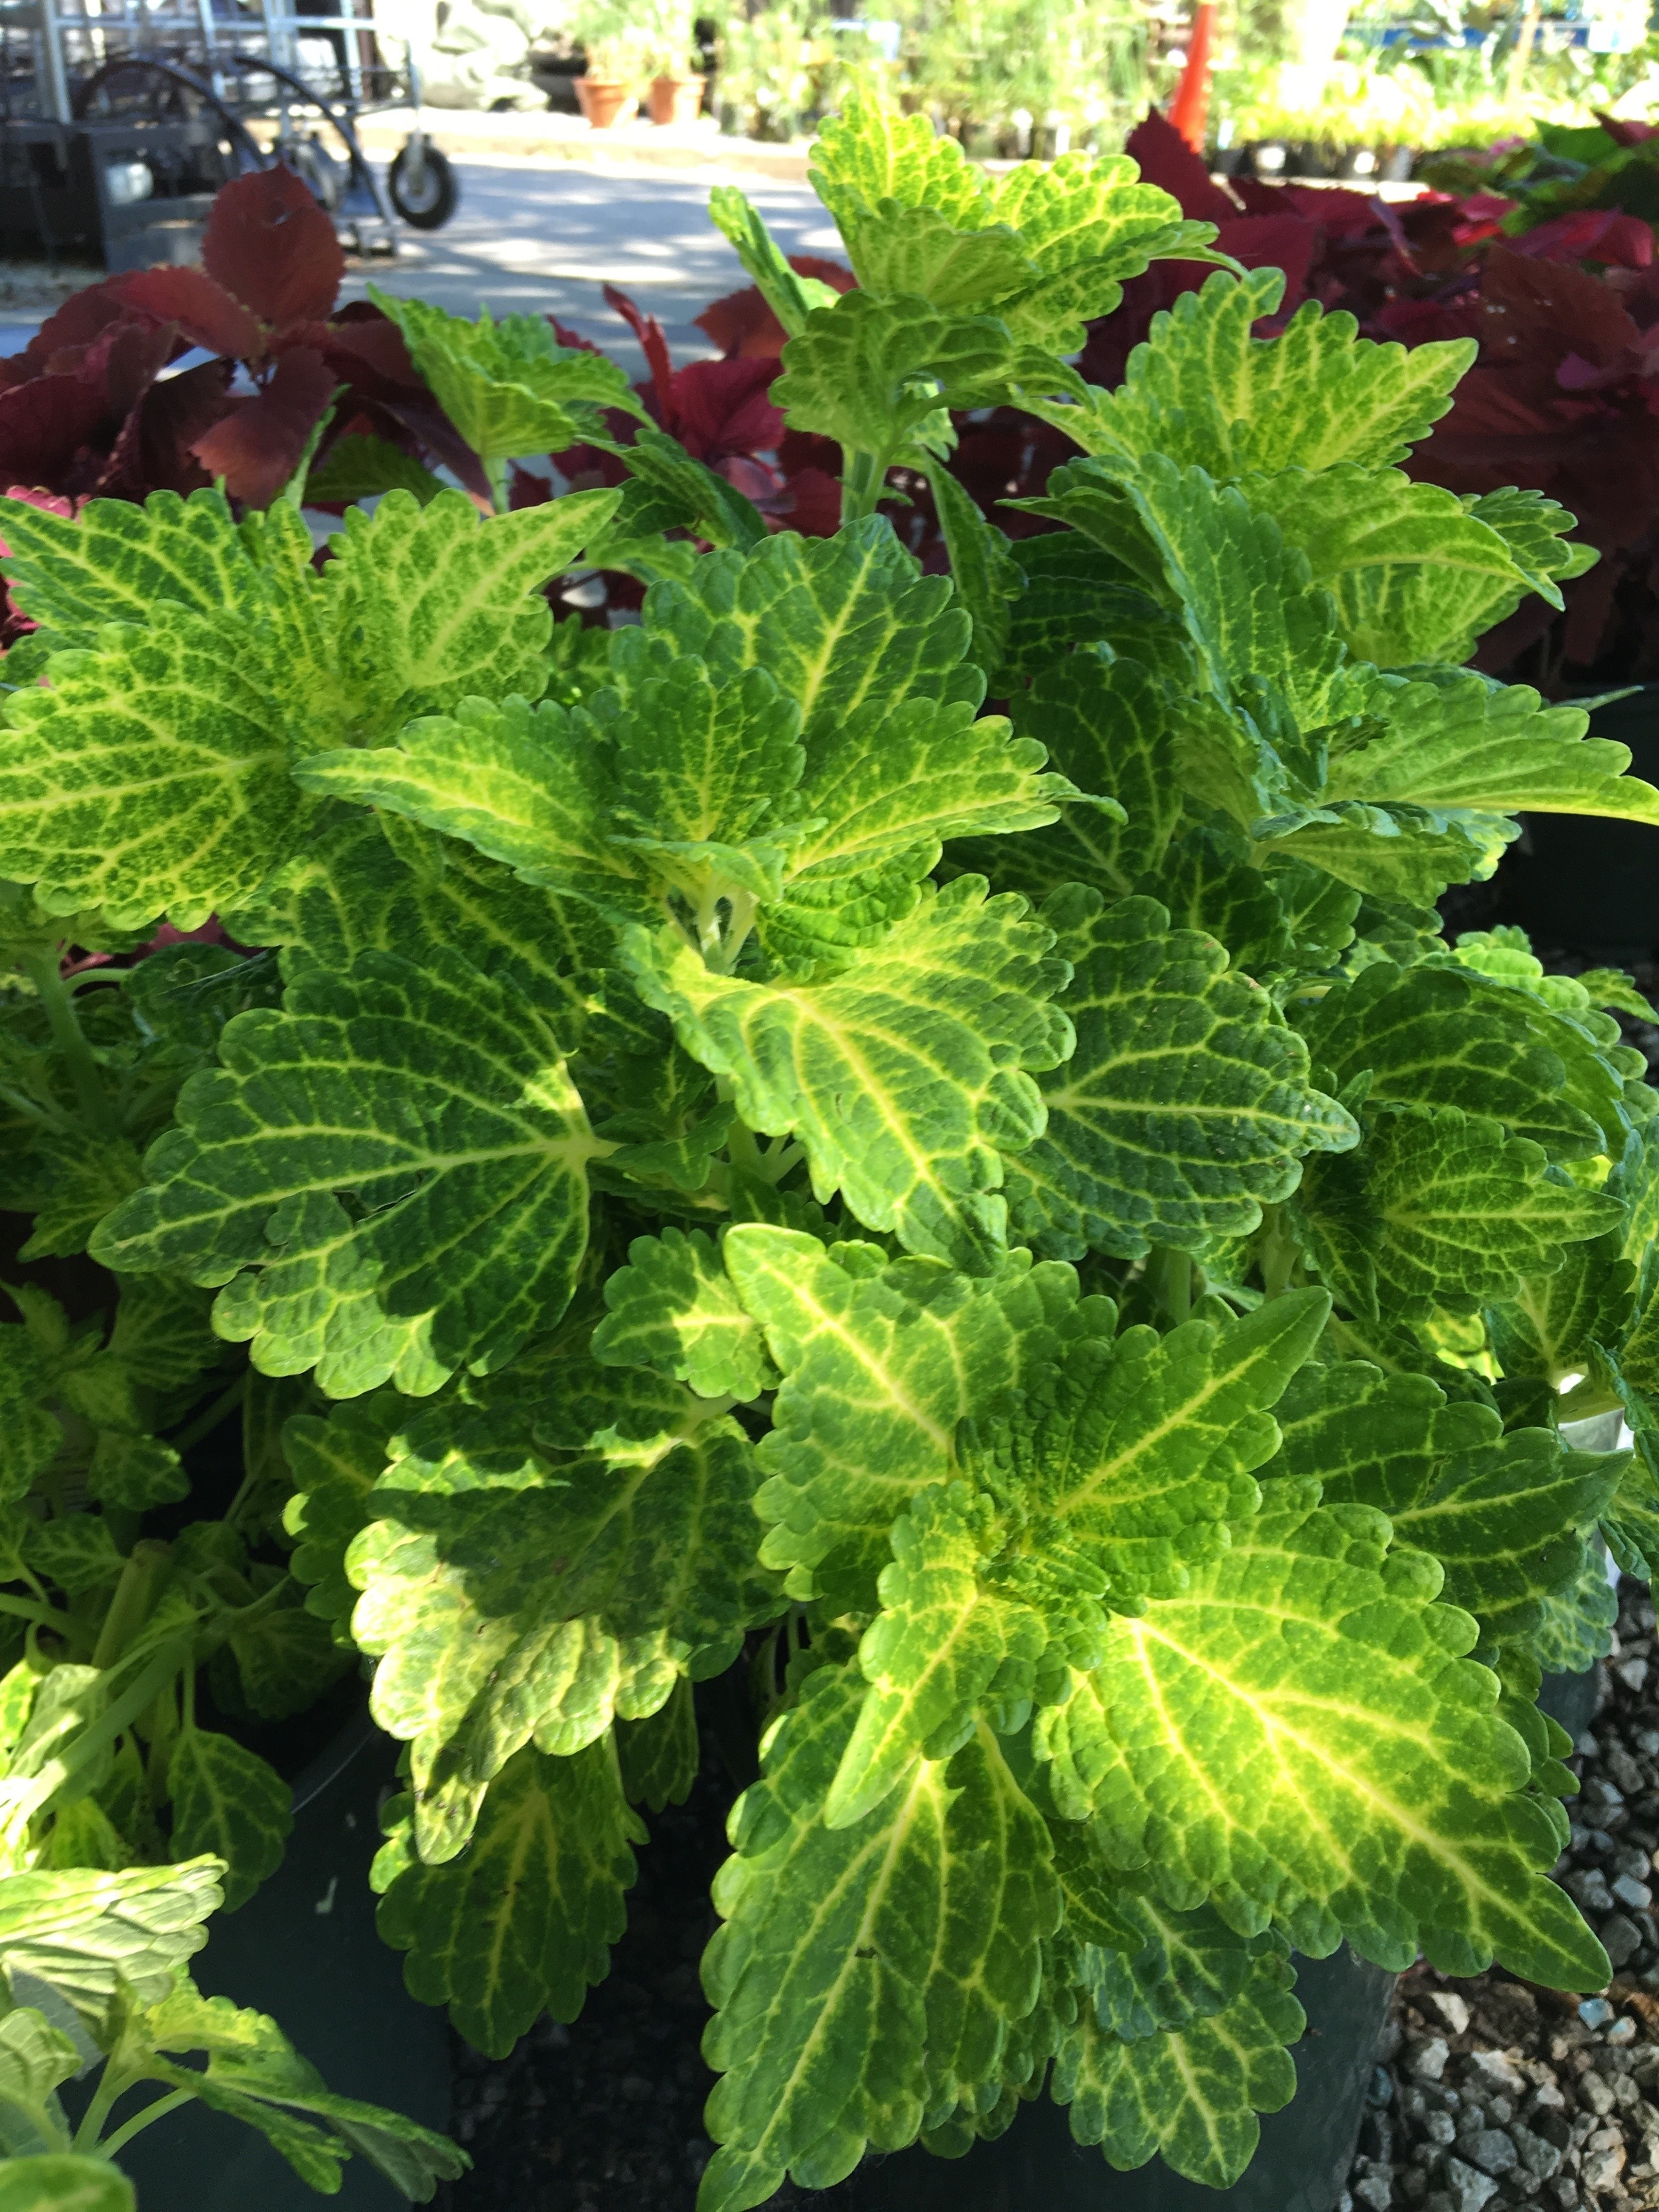
Cool, Colorful Coleus
Back in Victorian days, a sort of Coleus Fever swept through much of Europe after plant collectors returned from the tropics – especially Indonesia and Sri Lanka — with dozens of the new “it” plants. As the popularity of Coleus grew, so did the price aristocratic gardeners were willing to pay for unusual specimens. In just a few years, “The Great Coleus Race” had begun, as hybridizers and hobbyists alike rushed to create new varieties and cash in on the craze.
But the fad soon faded, and by the middle of the 20th century nearly all Coleus were grown from seed and sold as bedding plants for shady gardens. Unfortunately, most of the varieties were short in stature and quick to bolt.
A resurgence began in the 1990s, and today Coleus are among the most diverse plant group around, with amazing colors, vibrant hues, and tantalizing textures. Most grow to a height of between 18 and 30 inches, are slower to bolt, and can tolerate a good deal of sun. And they grow equally well in the ground or in containers.
I like to pinch the terminal growth of Coleus during the first few weeks after planting to encourage a bushier form, and I remove the flower stalks as they form to encourage more root and foliage development. In my experience, Coleus will tolerate a wide range of soil conditions, but they do need to be watered regularly. They’ll do fine in two to six hours of sun a day, but in a hot, west-facing spot they may wilt in the afternoon regardless how much you water them.
My favorite choice among Coleuses (yes, that’s the plural of Coleus – I looked it up) changes from year to year, but at the moment I’m partial to ‘Electric Lime.’ Aptly named, it looks as though bolts of yellow lightning are shooting through its lime-green leaves. I love it. My guess is you will too.
Paul’s Plant Picks Week 7: Ornamental Grasses
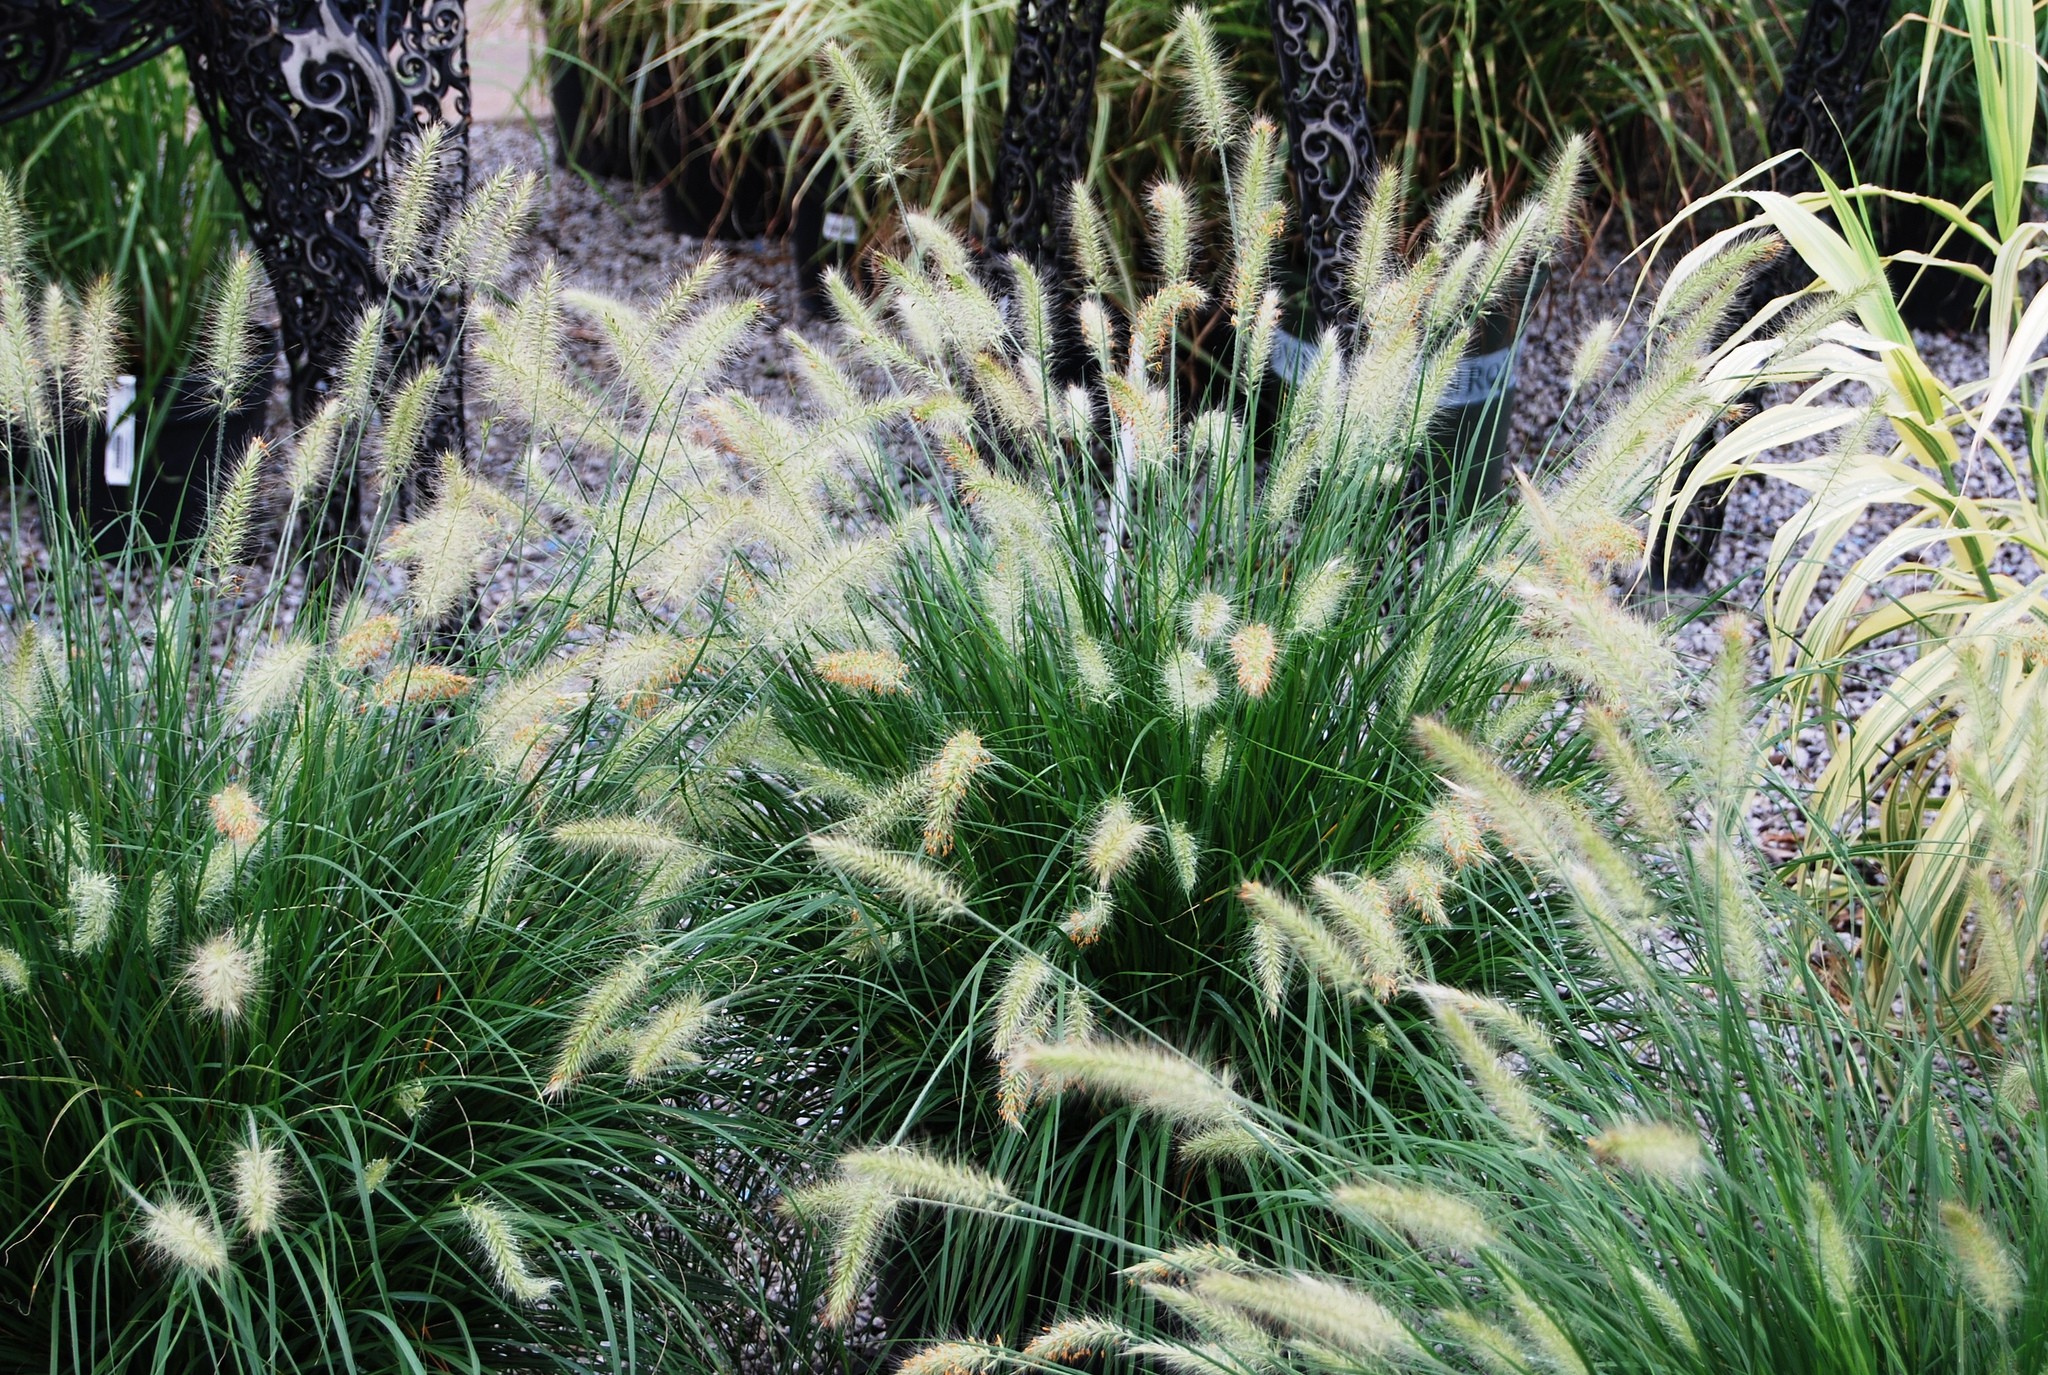
I first fell in love with ornamental grasses in the mid-80s, and my affection for them continues to this day. Not just because they’re beautiful, but also because they’re tough as nails and about as low maintenance as any plant on the planet, so much so that they practically thrive on neglect.
My first planting consisted of five, solid-green Maiden grasses (Miscanthus sinensis ‘Gracillimus’), which was about all you could find back in those days. I stuck them in the ground in May, watered them well throughout the summer and occasionally in the fall, then cut them back to about six inches the following February. That’s basically how you care for ornamental grasses – water now and then, and give them an annual haircut. Most, but not all, do best in full sun in a spot with decent soil, and I’ll let you decide whether they need fertilizer or not (I’m in the “not” camp).
Thankfully, the list of choices among ornamental grasses available these days has grown considerably. Here are a few worth considering.
Among the Maiden grasses, there are variegated forms such as ‘Adagio ‘and ‘Morning Light’, both of which tend to grow about four-feet tall and wide, and ‘Zebrinus’, which will get a foot bigger both ways.
Members of the Pennisetum or Fountain grass family are especially showy in mass plantings. ‘Hameln’ (two-feet tall and wide) and ‘Karley Rose’ (three-feet tall and wide) are two popular choices, and you can’t go wrong with either.
Panicums – the Switch grasses – are another great group. The variety ‘Northwind’ is a spectacular choice. It grows to about five-feet tall but only two-feet wide, making it what I consider a vertical masterpiece in the garden as a specimen or en masse. It also grows well in wet or boggy sites. ‘Ruby Ribbons’ is another solid choice given its namesake foliage color which appears late in the season.
Pampas grass – Cortaderia selloana – is perhaps the most popular of all the ornamental grasses in this area. And lucky for us, it’s not invasive (although in several states, notably California and Oregon, it’s considered a noxious weed). With eight-foot plumes towering above the five-foot foliage, this is a real attention getter.
Calamagrostis acutiflora, better known as ‘Karl Foerster’ Feather Reed Grass, has become hugely popular in the last decade or so, and with good reason. It grows upright, and while its foliage grows to only two-feet tall and wide, its plumes rise up to nearly six feet.
Chasmanthium latifolium – Northern Sea Oats – tolerates a good deal of shade, and while it’s beautiful with or without its distinctive seed heads, I should warn you that unlike other ornamental grasses, it’s not sterile, and has a tendency to reseed.
There are also a number of smaller grasses worth considering. Mexican Feather Grass is about as wispy as grasses get. Japanese Forest Grass is a must for shady spots. And Japanese Blood Grass offers a two-tone (red and green) color combination that’s hard to beat.
If you haven’t already discovered the world of ornamental grasses, you owe it to yourself to ponder a place in your landscape where one – or a dozen – might be just right. And if you can’t find such a spot, remember that most of them grow quite nicely in containers.
Click HERE to see images of some of Paul’s favorites!
Paul’s Plant Pick Week 6: Hostas
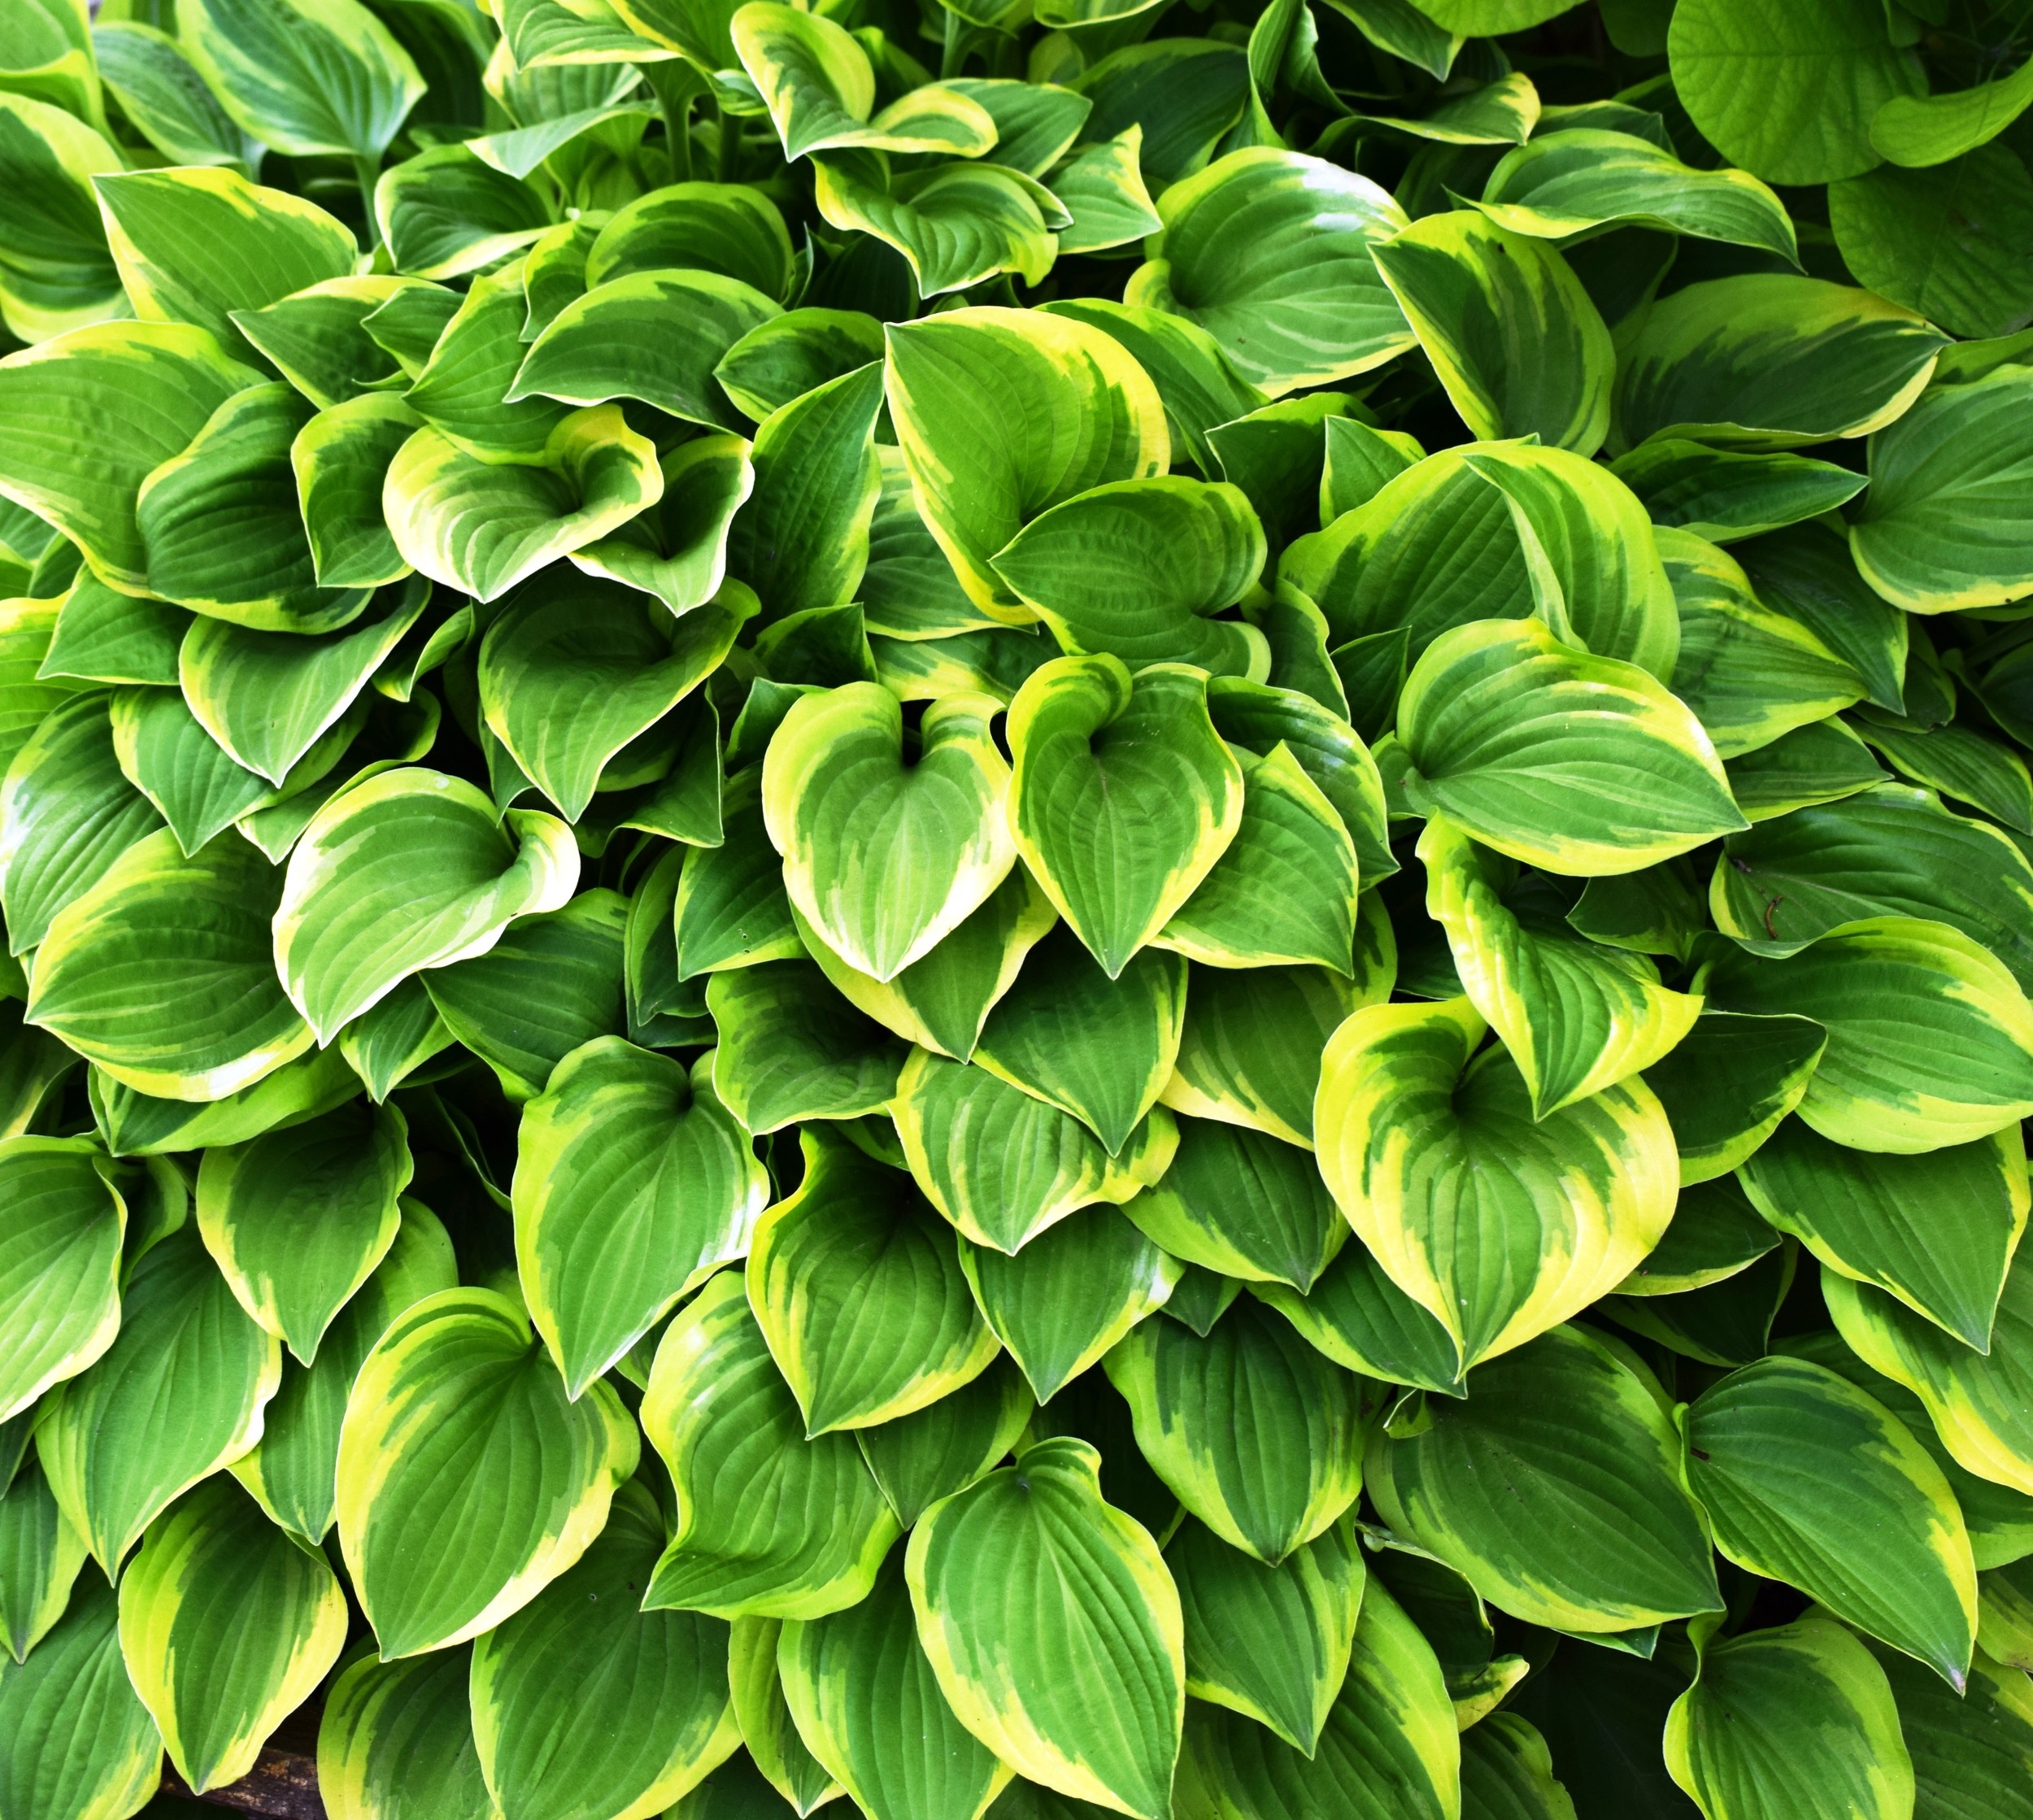
Hostas practically define shade gardening. And unlike most other plant groups, they can do it boldly or subtly, with a shout or a whisper. Want a monstrous, in-your-face hosta? Try ‘T-Rex.’ It’ll get nearly three-feet tall and six-feet wide! With 18-inch leaves, no less. At the other end of the scale there’s ‘Blue Mouse Ears,’ which grows only six-inches tall and maybe a foot wide. Having such a vast range of options is one of the things that make the genus Hosta so versatile.
Beyond size, however, is the astonishing array of color, variegation, leaf shape, and texture. I’ve always been partial to the blue hostas, but the green ones come in so many different shades of green that you’d be hard pressed to find one you didn’t like. And the variegation on the leaf margins only adds to their beauty and interest. Leaf shape varies considerably, from heart-shaped to lance-like to cupped. But leaf texture, whether smooth, veined, corrugated, or puckered, is what I find most interesting.
And let’s not forget fragrance, because the flowers of some – though not all – varieties have a heady scent that I find intoxicating. I’d describe it as a sweet, floral perfume, sort of like honeysuckle.
Hostas are native to Japan, China, and Korea, but they like it here just fine. They grow best in a rich soil that’s high in organic matter and drains well, but they can adapt to heavy soils as well. They also need fairly even moisture. But most of all, they need shade. A couple of hours of morning sun is fine, as is dappled light throughout the day, but afternoon shade is essential. Even under those conditions, hostas can become stressed in the heat of summer. Generally speaking, the blue varieties need even more shade than the green ones.
If you routinely enrich your soil with compost, you can skip the use of fertilizer. If you don’t, consider feeding your hostas twice a year – once in early spring and again when flowers begin to form. Go light on the phosphorous and potassium, and a little heavier on the nitrogen.
The bane of hosta lovers are slugs, for they can decimate a plant in no time. I’ve tried every home remedy imaginable, from beer traps to salt, but Sluggo, a product made of iron phosphate, works great for me.
Finally, lest you think plant geeks lack a sense of humor, consider the names of hosta varieties. There’s Guacamole (and its progeny, Avocado), Captain Kirk, Humpback Whale, Popcorn, and Abiqua Drinking Gourd. Strangely, however, no one has come with the obvious – Hosta La Vista, Baby!
Fun Factoid: The genus Hosta was named in 1812 in honor of the Austrian botanist Nicholas Thomas Host. Apparently no one bothered to tell that to German botanist Kurt Sprengel, who in 1817 named the plant Funkia in honor of his friend Heinrich Funk. If we could turn back the hands of time, I’d vote for Funkia any day of the week.
Paul’s Plant Pick: Week 5 Succulents
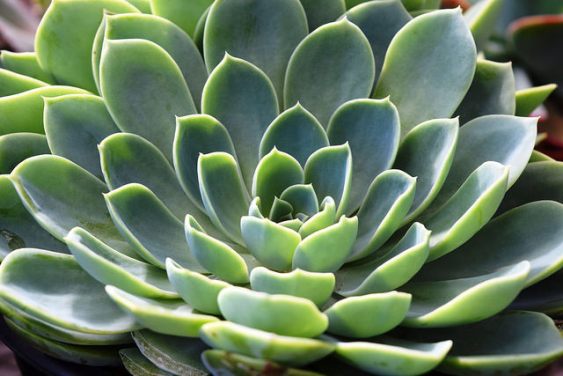
I could easily rattle off a dozen or more reasons why I like succulents so much – their rich diversity, mind-blowing colors and textures, ease of care, and so on – but what I like best about them is they’re just plain cool. And funky. And in some cases downright bizarre.
Succulents are native to arid regions all around the world, including the United States. Botanically speaking, all cacti are succulents, but not all succulents are cacti. Nevertheless, they all share the ability to store water in their fleshy leaves and stems, a trait that makes them extremely drought tolerant.
They’re also among the easiest plants to grow, which is to say they’re difficult to kill unless you overwater them. They grow in poor soils. They don’t need fertilizer. They don’t need to be pruned. And they’re rarely bothered by pests or diseases. About the only thing easier to grow are plastic plants (and we have plenty of plastic succulents available that look remarkably like the real thing!).
Most succulents are grown as houseplants, but there are several that are perfectly hardy and dependable perennials in our area such as Hens and Chicks, Sedums, and Yucca. Most succulents are also easy to propagate: just stick a leaf on top of the potting mix and it’ll root in no time. And most succulents will grow well in average household light. I overwinter mine on the shelf of a bay window that never gets direct light and they do just fine.
The real trick to keeping succulents healthy and happy, especially during the winter months, is to let them dry thoroughly between waterings. I generally water mine once a month in winter.
You can grow succulents in just about any container, from the traditional to the unusual. At one of our recent Planting Bar classes, a woman showed up with an old, rusty toolbox and proceeded to fill it with succulents. It looked great!
Fun Factoid: Asparagus is a succulent. And when roasted with olive oil, salt and pepper, and a squeeze of lemon, the taste is truly, well, succulent!
Paul’s Plant Pick Week 4: Japanese Snowbell
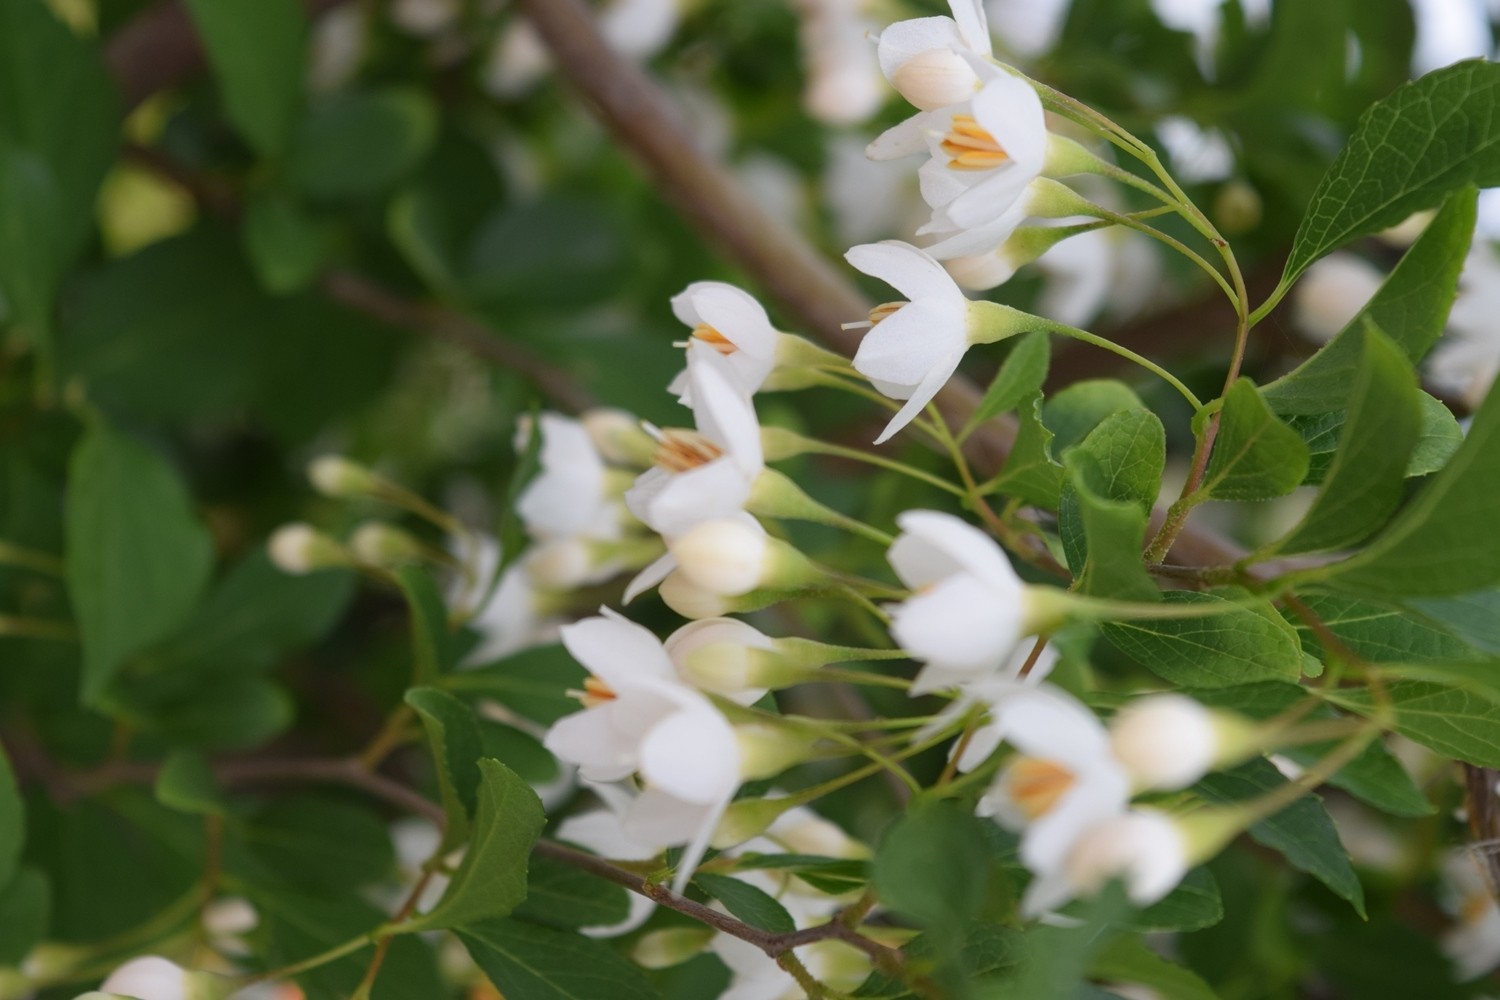
Twenty-five or so years ago, I planted a tree that at the time I’d never heard of, let alone seen growing anywhere around Tulsa. It was a Japanese Snowbell, known botanically as Styrax japonicus. I treated it as an understory tree, sticking it in a spot that received dappled light all day thanks to a twisted, strangely contorted old hackberry that looked like it belonged in a scene of The Hobbit.
That was in November, as I recall. The following spring, the tree’s small, glossy, medium green leaves emerged, and I was impressed by its overall look and form – open, airy, with branches more horizontal than vertical and a rounded crown. But I wasn’t prepared for what happened next. In early May, seemingly overnight, my Snowbell was covered with pendulous clusters of bell-shaped, mildly fragrant, waxy white flowers. Hundreds of them! I immediately fell in love with my Snowbell, and my affection hasn’t waned in the years since.
The gorgeous flowers (which bees love) give way to greenish-brown drupes (fancy, but technically correctword for fruits) that look like little olives. Fall color is nothing to write home about (leaves turn a pale yellow), but in time the gray bark develops fissures that reveal a beautiful orange inner bark.
Japanese Snowbell can take a fair amount of sun, but a spot that gets afternoon shade is best. It also does well in dappled light throughout the day. It’ll ultimately reach 25-feet tall and wide, but that’ll take at least a decade, maybe even two. And for what it’s worth, after 15 years, mine was only 10-feet tall and wide. Here’s one more thing to keep in mind: Japanese Snowbell has no known pest or disease problems, and isn’t all that finicky about soil type.Small trees with a long list of attributes are hard to come by. The Japanese Snowbell is perhaps the best of the lot.
Paul’s Plant Picks: Week 2 Japanese Maples
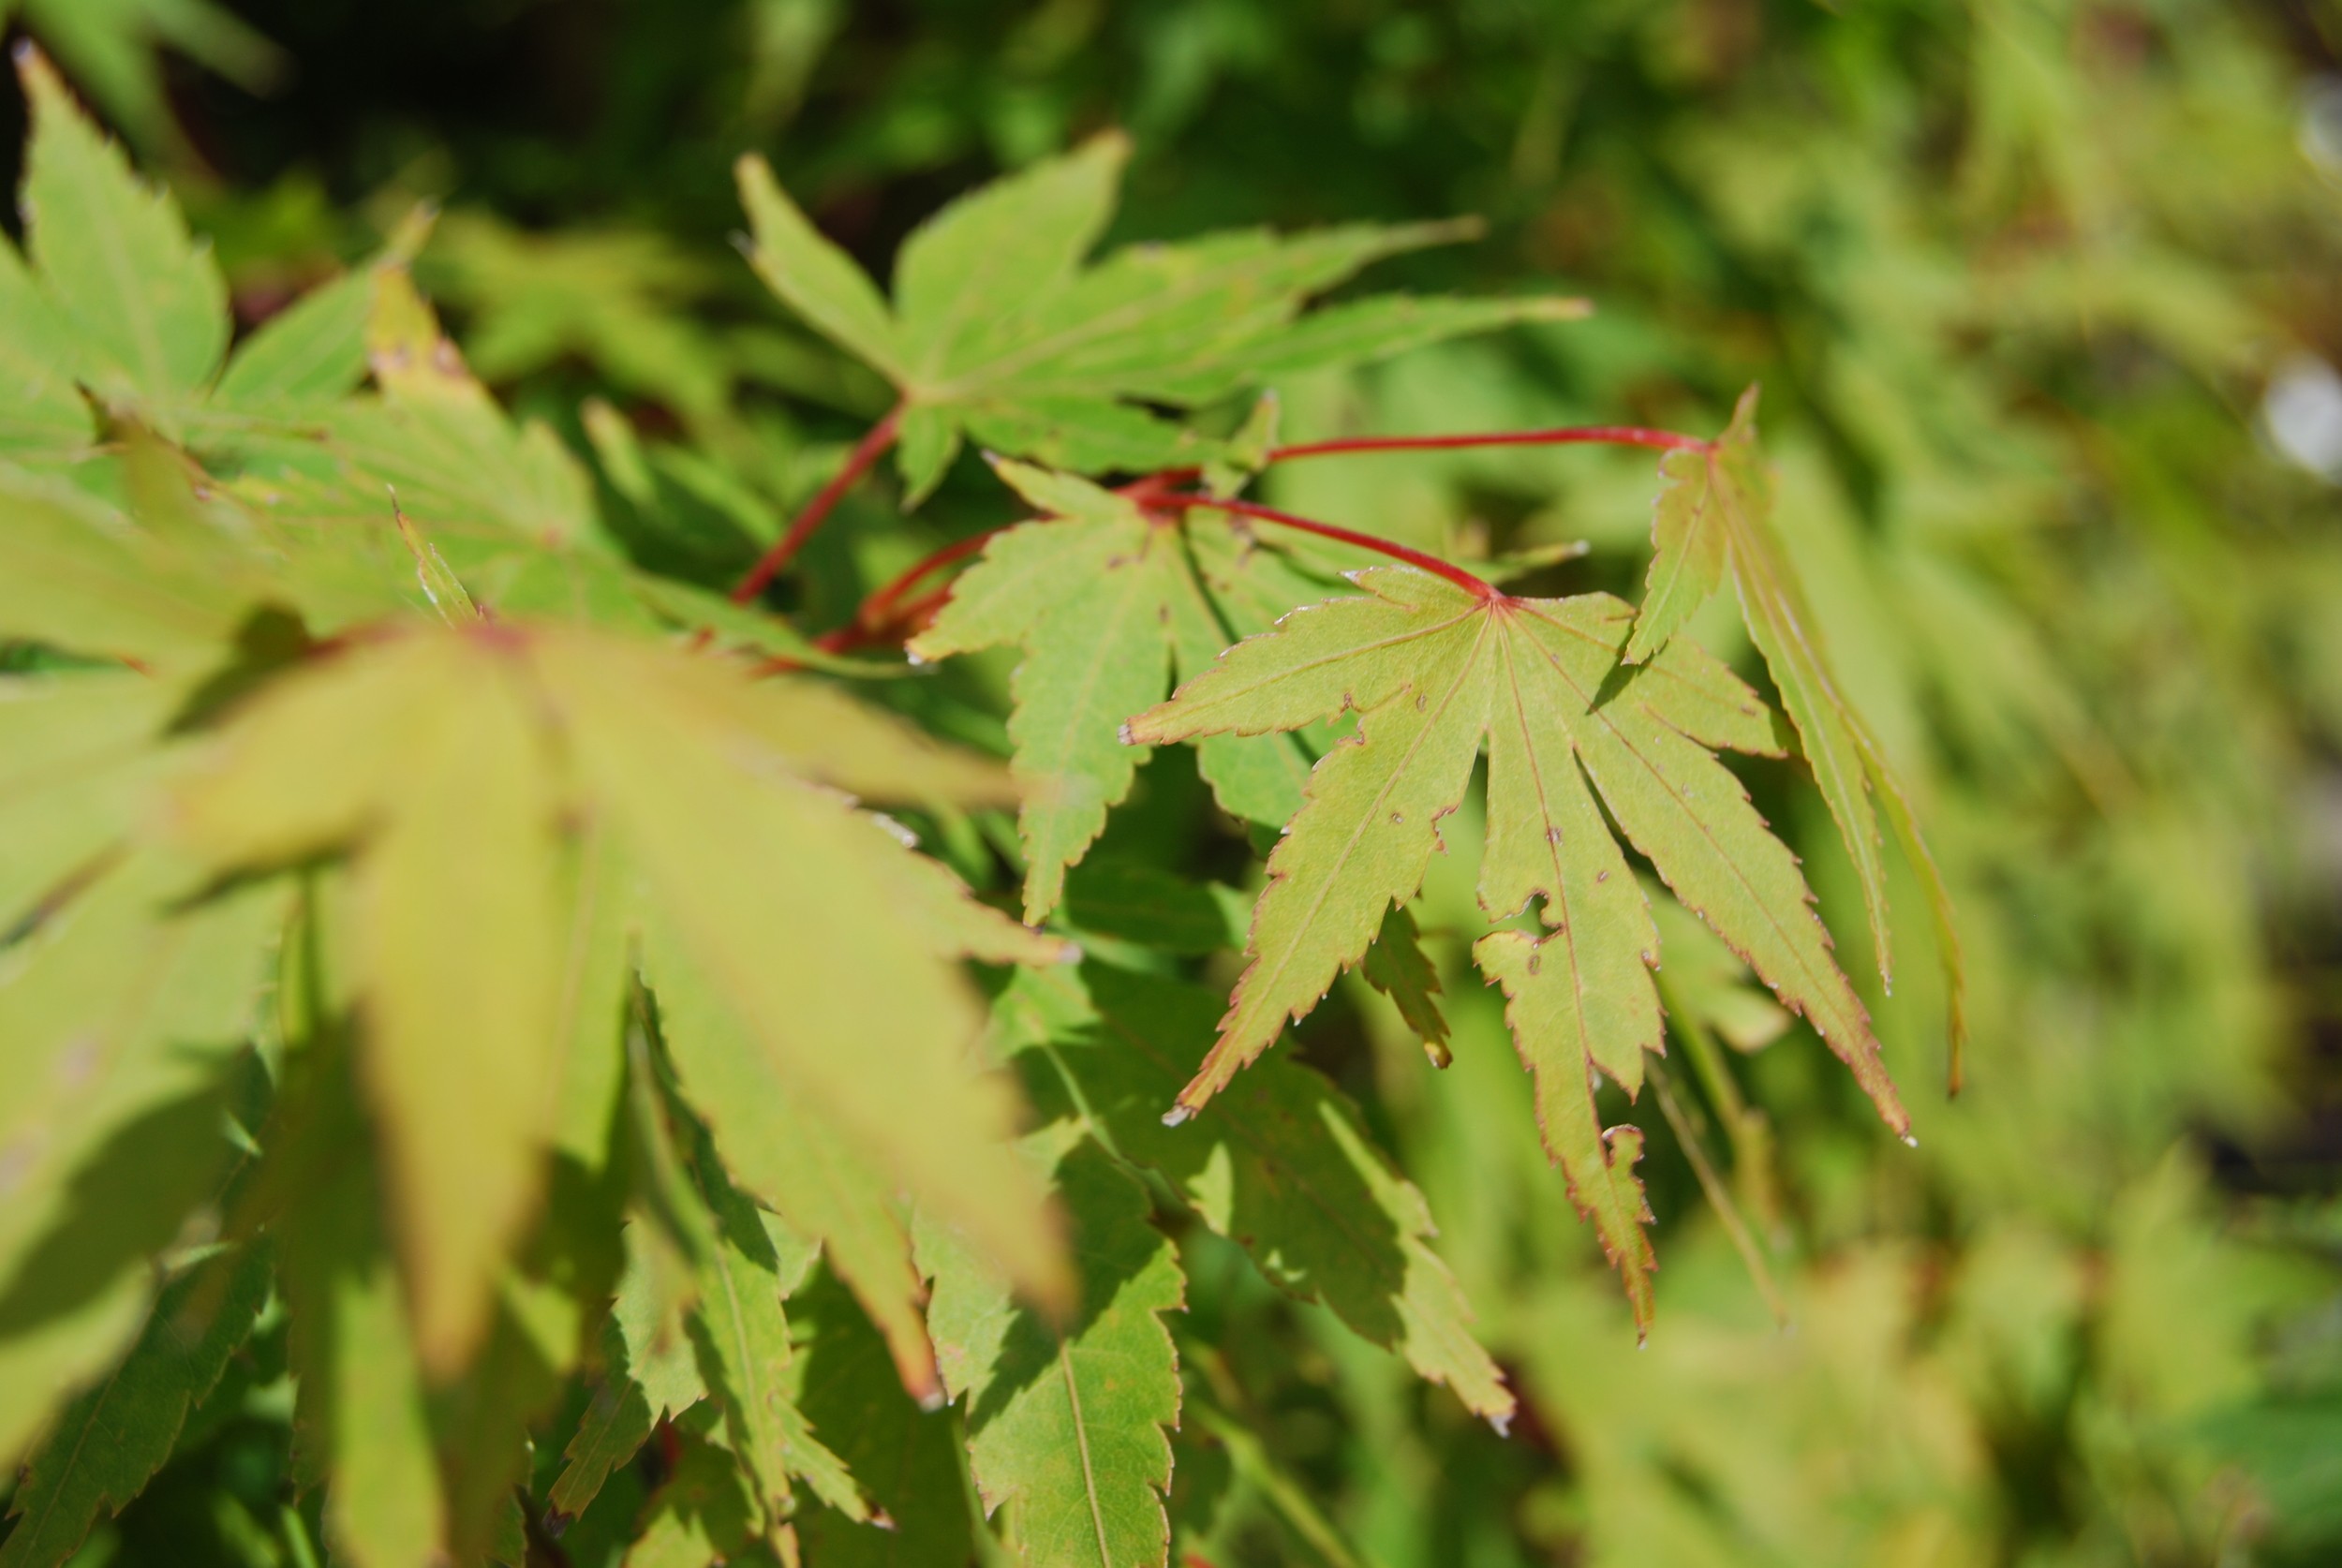
To paraphrase Will Rogers, I never met a Japanese maple I didn’t like. After all, few trees evoke a sense of tranquility the way Japanese maples do. And few trees light up a landscape the way they do, regardless of leaf shape or color. What’s more, they’re small trees – rarely growing to more than 25’ – and they’re slow growers, making them ideal for small gardens.
Generally speaking, Japanese maples are divided into two distinct leaf shapes: palmatums (from the Latin, shaped like a hand) and dissectums (finely dissected). The latter are also known as lace-leaf maples. Both groups have red and green selections and are available in a range of sizes. They’re further divided into two distinct forms: uprights and weepers.
Despite their fragile appearance, Japanese maples are tough and easy to grow, assuming they’re planted in the right spot. First and foremost, that means a shady spot, ideally on the north or east side of your landscape, or in an area that gets filtered light throughout the day. The red-leaf varieties will color up best if they receive a few hours of morning sun, while the green-leaf varieties can handle pure shade. Dissectum varieties, regardless of color, need more shade than palmatum varieties. And among the palmatum varieties, there are some reds that can handle more sun than others.
(Still with me? Good. The hard part is over.)
In a perfect world, all Japanese maples would be planted in a slightly acidic, well-drained soil enriched with a good deal of organic matter. If that describes your soil, then do yourself a favor and never, ever move. Unfortunately, most of us are forced to deal with soil that falls short of perfect. But fear not. Japanese maples are actually quite adaptable, so long as the soil drains well. That’s the most important consideration.
All Japanese maples make outstanding specimen trees in the landscape, whether upright forms or weepers. They also look great in groups, with a mix of red and green varieties or uprights and weepers. The upright reds combine well with a number of plants, but I especially like the look of Japanese Forest Grass (Hakonechloa) planted at the base of the trees. The green varieties contrast beautifully with Mondo Grass (Ophiopogon), especially the slow-growing but gorgeous black variety. Japanese maples also do quite well in containers for dressing up a porch, patio, or courtyard, and they’re hugely popular among bonsai enthusiasts.
If you forced me to pick a favorite Japanese maple, I’d have to say it’s the Full Moon, known botanically as Acer japonicum ‘Aconitifolium.’ It has an awesome, open growth form, which is to say you can see through it. That’s a great trait, because it allows you to plant in front of a window but still see the view beyond. Its deeply lobed leaves emerge light green in spring, and turn an amazing crimson in fall. Its ultimate height is maybe 18’ in as many years, although around here I’ve never seen one grow to more than about 12’.
Other favorites, at least among those that are readily available, include the following:
Coral Bark – As the name implies, the bark of this beauty is a beautiful coral color that really stands out in winter. Its deeply cut green leaves turn golden in fall. Gets 15’ tall and wide.
Red Dragon – A great weeper with spectacular blood-red foliage, and it holds its color well even in our summer heat. Grows slowly to 12’ tall and wide.
Viridis – An equally great green weeper with terrific fall color (orange and yellow, with shades of scarlet). Ultimately grows to roughly 8’ tall and wide.
Fireglow – Hugely popular upright red form that tops out at around 12’ (okay, maybe 15’ in time).
Emperor – Another nice red upright form that’ll grow to 15’.
Osakakuzi – Maybe 20’ by 20’ in time. Leaves appear green, then turn crimson in fall.
Katsura – In a word, amazing. Leaves are yellow-orange in spring, green in summer, then yellow-orange again in fall. Grows to about 10’.
Shaina – Only 6’ to 8’ at maturity, this maple is great for containers and courtyards. Leaves emerge bright red, then turn dark crimson.
Got a favorite Japanese maple that’s not on my admittedly short list? Click on comments and tell me all about it.
Photo Gallery: Click on each photo for a description or visit on flickr for additional details: https://flic.kr/s/aHskxv8ZpN
Related to Gladiolus, but different enough to deserve their own name, even if it is a mouthful. White, hauntingly fragrant flowers appear above graceful, sword-like foliage. Plant in full sun.